
Loading...
Loading...
Loading...
Loading...
Loading...
Loading...
Loading...
Loading...
Loading...
Loading...
Loading...
Loading...
Loading...
Loading...
Loading...
Loading...
Loading...
Loading...
Loading...
Loading...
Loading...
Loading...
Loading...
Loading...
Loading...
Loading...
Loading...
Loading...
Loading...
Loading...
Loading...
Loading...
Loading...
Loading...
Loading...
Loading...
Loading...
Loading...
Loading...
Loading...
Loading...
Loading...
Loading...
Loading...
Loading...
Loading...
Loading...
Loading...
Loading...
Running the Trust1Connector in a shared environment, such as Citrix, XenApp and Remote Desktop, requires additional installation steps. In this section we explain the concept and approach used.


<!DOCTYPE html>
<html lang="en">
<head>
<meta charset="UTF-8">
<meta http-equiv="X-UA-Compatible" content="IE=edge">
<meta name="viewport" content="width=device-width, initial-scale=1.0">
<title>Document</title>
<script defer src="./T1CSdk.js"></script>
</head>
<body>
...
</body>
</html><script defer src="./T1CSdk.js"></script>
T1CSdk.T1CClient.initialize(config).then(res => {
var coreService = res.core();
core.readers(callback);
}, err => {
console.error(err);
});){
"success": true,
"data": [
{
"id": "57a3e2e71c48cee9",
"name": "Bit4id miniLector",
"pinpad": false,
"card": {
"atr": "3B9813400AA503010101AD1311",
"description": [
"Belgium Electronic ID card (eID)"
],
"module": "beid"
}
}
]
}{
"data": [
{
"id": "ec3109c84ee9eeb5",
"name": "Identiv uTrust 4701 F Dual Interface Reader(2)",
"pinpad": false
},
{
"card": {
"atr": "3B9813400AA503010101AD1311",
"description": [
"Belgium Electronic ID card"
]
},
"id": "57a3e2e71c48cee9",
"name": "Bit4id miniLector",
"pinpad": false
},
{
"id": "c8d31f8fed44d952",
"name": "Identiv uTrust 4701 F Dual Interface Reader(1)",
"pinpad": false
}
],
"success": true
}{
"data": [
{
"card": {
"atr": "3B9813400AA503010101AD1311",
"description": [
"Belgium Electronic ID card"
]
},
"id": "57a3e2e71c48cee9",
"name": "Bit4id miniLector",
"pinpad": false
}
],
"success": true
}{
"data": [
{
"card": {
"atr": "3B9813400AA503010101AD1311",
"description": [
"Belgium Electronic ID card"
]
},
"id": "57a3e2e71c48cee9",
"name": "Bit4id miniLector",
"pinpad": false
}
],
"success": true
}{
"data": [
{
"id": "ec3109c84ee9eeb5",
"name": "Identiv uTrust 4701 F Dual Interface Reader(2)",
"pinpad": false
},
{
"card": {
"atr": "3B67000000000000009000",
"description": [
"MisterCash & Proton card",
"VISA Card (emitted by Bank Card Company - Belgium)"
]
},
"id": "e5863fcc71478871",
"name": "Gemalto Ezio Shield Secure Channel",
"pinpad": true
},
{
"card": {
"atr": "3B9813400AA503010101AD1311",
"description": [
"Belgium Electronic ID card"
]
},
"id": "57a3e2e71c48cee9",
"name": "Bit4id miniLector",
"pinpad": false
},
{
"id": "c8d31f8fed44d952",
"name": "Identiv uTrust 4701 F Dual Interface Reader(1)",
"pinpad": false
}
],
"success": true
}T1CClient.initialize(config).then(client => {
var coreService = client.core();
core.readersCardAvailable(callback);
}, err => {
console.error(err);
});{
"data": [
{
"card": {
"atr": "3B9813400AA503010101AD1311",
"description": []
},
"id": "57a3e2e71c48cee9",
"name": "Bit4id miniLector",
"pinpad": false
}
],
"success": true
}T1CSdk.T1CClient.initialize(config).then(client => {
var coreService = client.core();
core.version().then(version => {
console.log(version)
});
}, err => {
console.error(err);
});3.5.3export interface AbstractCore {
getImplicitConsent(codeWord: string, durationInDays?: number, callback?: (error?: T1CLibException, data?: T1CClient) => void): Promise<T1CClient>;
validateConsent(consent: string, callback?: (error?: T1CLibException, data?: T1CClient) => void): Promise<T1CClient>;
updateJWT(jwt: string, callback?: (error: T1CLibException, data?: T1CClient) => void): Promise<T1CClient>
info(callback?: (error: T1CLibException, data: InfoResponse) => void): void | Promise<InfoResponse>;
reader(reader_id: string, callback?: (error: T1CLibException, data: SingleReaderResponse) => void): Promise<SingleReaderResponse>;
readers(callback?: (error: T1CLibException, data: CardReadersResponse) => void): Promise<CardReadersResponse>;
readersCardAvailable(callback?: (error: T1CLibException, data: CardReadersResponse) => void): Promise<CardReadersResponse>;
readersCardsUnavailable(callback?: (error: T1CLibException, data: CardReadersResponse) => void): Promise<CardReadersResponse>;
getUrl(): string;
getDevicePublicKey(): void;
dsCorsSync(): Promise<boolean>;
pushLogs(): Promise<boolean>;
version(): Promise<string>;
}Authorization header. This JWT token can be retrieved by asking the Distribution Service to generate a token for a specific API-key.
It is important that this API-key is not exposed in the front-end application as this is a security violation.T1CSdk.T1CClient.initialize(config).then(res => {
var coreService = res.core();
core.readers(callback);
}){
"success": true,
"data": [
{
"id": "57a3e2e71c48cee9",
"name": "Bit4id miniLector",
"pinpad": false,
"card": {
"atr": "3B9813400AA503010101AD1311",
"description": [
"Belgium Electronic ID card (eID)"
],
"module": ["beid"]
}
}
]
}{
"data": [
{
"id": "ec3109c84ee9eeb5",
"name": "Identiv uTrust 4701 F Dual Interface Reader(2)",
"pinpad": false
},
{
"card": {
"atr": "3B9813400AA503010101AD1311",
"description": [
"Belgium Electronic ID card"
],
"module": ["beid"]
},
"id": "57a3e2e71c48cee9",
"name": "Bit4id miniLector",
"pinpad": false
},
{
"id": "c8d31f8fed44d952",
"name": "Identiv uTrust 4701 F Dual Interface Reader(1)",
"pinpad": false
}
],
"success": true
}{
"data": [
{
"card": {
"atr": "3B9813400AA503010101AD1311",
"description": [
"Belgium Electronic ID card"
],
"module": ["beid"]
},
"id": "57a3e2e71c48cee9",
"name": "Bit4id miniLector",
"pinpad": false
}
],
"success": true
}{
"data": [
{
"card": {
"atr": "3B9813400AA503010101AD1311",
"description": [
"Belgium Electronic ID card"
]
},
"id": "57a3e2e71c48cee9",
"name": "Bit4id miniLector",
"pinpad": false
}
],
"success": true
}{
"data": [
{
"id": "ec3109c84ee9eeb5",
"name": "Identiv uTrust 4701 F Dual Interface Reader(2)",
"pinpad": false
},
{
"card": {
"atr": "3B67000000000000009000",
"description": [
"MisterCash & Proton card",
"VISA Card (emitted by Bank Card Company - Belgium)"
],
"module": ["emv"]
},
"id": "e5863fcc71478871",
"name": "Gemalto Ezio Shield Secure Channel",
"pinpad": true
},
{
"card": {
"atr": "3B9813400AA503010101AD1311",
"description": [
"Belgium Electronic ID card"
]
"module": ["beid"]
},
"id": "57a3e2e71c48cee9",
"name": "Bit4id miniLector",
"pinpad": false
},
{
"id": "c8d31f8fed44d952",
"name": "Identiv uTrust 4701 F Dual Interface Reader(1)",
"pinpad": false
}
],
"success": true
}T1CSdk.T1CClient.initialize(config).then(client => {
var coreService = client.core();
core.readersCardAvailable(callback);
}, err => {
console.error(err);
});{
"data": [
{
"card": {
"atr": "3B9813400AA503010101AD1311",
"description": []
},
"id": "57a3e2e71c48cee9",
"name": "Bit4id miniLector",
"pinpad": false
}
],
"success": true
}// Config object definition
export class T1CConfigOptions {
constructor(
public t1cApiUrl?: string,
public t1cApiPort?: string,
public t1cProxyUrl?: string,
public t1cProxyPort?: string,
public jwt?: string
) {}
}
// example
const configoptions = new T1CSdk.T1CConfigOptions(
environment.t1cApiUrl,
environment.t1cApiPort,
environment.t1cProxyUrl,
environment.t1cProxyPort,
environment.jwt
);
config = new T1CSdk.T1CConfig(configoptions);curl --location --request GET 'https://acc-ds.t1t.io/v3_5/tokens/application' \
--header 'apikey: your-api-key'{
"success": true,
"data": "eyJraWQiOiJ0MWNkcyIsImFsZyI6IlJTMjU2In0.eyJpc3MiOiJ0MWNkcy1hcHAiLCJzdWIiOiJkZXZlbG9wbWVudCIsImV4cCI6MTU5OTA1MTExMywiaWF0IjoxNTk5MDQ5OTEzLCJuYmYiOjE1OTkwNDk5MDh9.LE_AdYv9PWxqSRm6-lkV_3TxInCqbf_hTwHFKCFfYwkuzex6AMkeW6FaVCOxu-EBU158S2g70i4VBpeT2TAr0IoOyjK-nalvVG5aB9MwidZMtiPlidcUfsDhsyhbhwqlhI2dzB5J5KsBmvZwpoG-Pg2koUSidruixg3SxRrCMotBRlRNKItnYgfs6_wvd_OOLXs2OlufYOD876MWcJymBK48wf9ESQ50clR3zwPAQsNnXFq2Augk0gOlCgWO1--WgaFeMnBF28b7genZXIkwZCfT82nRYtiOs0zLK2WtyireTHDgjIZif4nX8pggE7t_63Hbv8wCvv8_Mg2PfdhCMQ"
}const configoptions = new T1CSdk.T1CConfigOptions(
environment.t1cApiUrl,
environment.t1cApiPort,
environment.t1cProxyUrl,
environment.t1cProxyPort,
environment.jwt
);
config = new T1CSdk.T1CConfig(configoptions);
T1CSdk.T1CClient.initialize(config).then(res => {
client = res;
console.log("Client config: ", client.localConfig)
core = client.core();
}, err => {});updateJWT(jwt: string, callback?: (error: T1CLibException, data?: T1CClient) => void): Promise<T1CClient>core.updateJWT("jwt").then(client => {}, error => {});/v3_5/downloads/installers/{{OS}}/versions/{{version}}: This endpoint allows you to download a specific version of a T1C installer for a specific OS.

# Intel x86_64
https://ds.t1t.io/v3_5/downloads/installers/macos
# ARM64
https://ds.t1t.io/v3_5/downloads/installers/macosarmcurl --location --request GET 'https://acc-ds.t1t.io/v3_5/versions/latest' \
--header 'Authorization: Bearer eyJh...BCr8Q'{
"success": true,
"data": {
"id": "3.6.0",
"createdOn": "2022-03-21T07:47:48.590425Z",
"updatedOn": "2022-05-30T10:46:36.532283Z",
"recommended": false,
"mandatory": false,
"allowed": true,
"visible": true,
"uris": [
{
"os": "MACOSARM",
"uri": "https://storage.googleapis.com/t1c-dependen....e/trust1team/Trust1Connector-arm.dmg"
},
{
"os": "UNIX",
"uri": "https://storage.googleapis.com/t1c-depend....trust1team/trust1connector.deb"
},
{
"os": "MACOS",
"uri": "https://storage.googleapis.com/t1c-dep....Trust1Connector Acceptance-x86.dmg"
},
{
"os": "WIN64",
"uri": "https://storage.googleapis.com/t1c-depe....t1Connector-Acceptance-x64.msi"
},
{
"os": "WIN32",
"uri": "https://storage.googleapis.com/t1c-dependenci...ust1Connector-Acceptance-x86.msi"
}
],
"installationApiKey": "6257cbe3-e25a-.....-9fb9-02ad17d1f193"
}
}curl --location --request GET 'https://acc-ds.t1t.io/v3_5/versions/3.6.0' \
--header 'Authorization: Bearer eyJh...BCr8Q'{
"success": true,
"data": "eyJraWQiOiJ0MWNkcyIsImFsZyI6IlJTMjU2In0...v8_Mg2PfdhCMQ"
}{
"message": "No API key found in request"
}{
"success": false,
"description": "Invalid API key",
"code": 1005,
}class T1CConfigOptions {
constructor(
public t1cApiUrl?: string,
public t1cApiPort?: string,
public t1cProxyUrl?: string, // deprecated
public t1cProxyPort?: string, // deprecated
public jwt?: string,
public applicationDomain?: string, // "rmc.t1t.be"
) {}
}// ...
let environment = {
t1cApiUrl: 'https://t1c.t1t.io',
t1cApiPort: '51983',
t1cProxyUrl: 'https://t1c.t1t.io',
t1cProxyPort: '51983',
jwt: 'eyJraWQiOiJ0MWNkcyIsImFsZyI6IlJTMjU2In0..._Mg2PfdhCMQ',
applicationDomain: 'test-app'
};
const configoptions = new T1CSdk.T1CConfigOptions(
environment.t1cApiUrl,
environment.t1cApiPort,
environment.t1cProxyUrl,
environment.t1cProxyPort,
environment.jwt,
environment.applicationDomain
);
config = new T1CSdk.T1CConfig(configoptions);
// ...// When remote DS is used set the following parameter
config.dsUrl = "https://acc-ds.t1t.io";// ...
T1CSdk.T1CClient.initialize(config).then(res => {
client = res;
console.log("Client config: ", client.localConfig);
core = client.core();
core.version().then(versionResult => console.log("T1C running on core "+ versionResult));
}, err => {
if (err.code == 814500 || err.code == 814501) {
client = err.client;
// (new) Consent is required
}
else if(err.code == 112999) {
// Could not connect with the Trust1Connector
} else {
// an uncatched error occured
console.error("T1C error:", err)
}
});
// ...public getImplicitConsent(codeWord: string, durationInDays?: number,
callback?: (error?: T1CLibException, data?: T1CClient) => void
): Promise<T1CClient>client.core().getImplicitConsent(document.querySelector(".clipboard-data").innerHTML).then(res => {
console.log("Consent Executed")
client = res;
// Use the client for your use-cases
}, err => {
// Failed, use the error client to retry the consent
this.client = err.client;
console.error(err.description ? err.description : err)
})// Global client to be used over the entire application
const client = null
// Prepare the configuration
let environment = {
t1cApiUrl: 'https://t1c.t1t.io',
t1cApiPort: '51983',
t1cProxyUrl: 'https://t1c.t1t.io',
t1cProxyPort: '51983',
jwt: 'eyJraWQiOiJ0MWNkcyIsImFsZyI6IlJTMjU2In0..._Mg2PfdhCMQ',
applicationDomain: 'test-app'
};
const configoptions = new T1CSdk.T1CConfigOptions(
environment.t1cApiUrl,
environment.t1cApiPort,
environment.t1cProxyUrl,
environment.t1cProxyPort,
environment.jwt,
environment.applicationDomain
);
config = new T1CSdk.T1CConfig(configoptions);
// Initialize the Trust1Connector with the previously created configuration object
T1CSdk.T1CClient.initialize(config).then(res => {
client = res;
console.log("Client config: ", client.localConfig);
core = client.core();
core.version().then(versionResult => console.log("T1C running on core "+ versionResult));
}, err => {
if (err.code == 814500 || err.code == 814501) {
// (new) Consent is required
}
else if(err.code == 112999) {
// Could not connect with the Trust1Connector
} else {
// an uncatched error occured
console.error("T1C error:", err)
}
});
// when the user has clicked on the clipboard/consent button we execute the getImplicitConsent function
document.querySelector(".clipboard").addEventListener("click", (ev) => {
if (client != null) {
client.core().getImplicitConsent(document.querySelector(".clipboard-data").innerHTML).then(res => {
console.log("Consent Executed")
client = res;
// Use the client for your use-cases
}, err => {
this.client = err.client;
console.error(err.description ? err.description : err)
})
}
})// ...
T1CSdk.T1CClient.initializeExplicitConsent(config).then(res => {
client = res;
console.log("Client config: ", client.localConfig);
core = client.core();
core.version().then(versionResult => console.log("T1C running on core "+ versionResult));
}, err => {
if (err.code == 814500 || err.code == 814501) {
client = err.client;
// (new) Consent is required
}
else if(err.code == 112999) {
// Could not connect with the Trust1Connector
} else {
// an uncatched error occured
console.error("T1C error:", err)
}
});
// ...const tokenNode = document.querySelector('.consent-token');
var range = document.createRange();
range.selectNode(tokenNode);
window.getSelection().addRange(range);
try {
// Now that we've selected the anchor text, execute the copy command
document.execCommand('copy');
} catch(err) {
console.log('Oops, unable to copy');
}
// Remove the selections - NOTE: Should use
// removeRange(range) when it is supported
window.getSelection().removeRange(range);
const clipboardData = tokenNode.textContent;
export interface AbstractIdemia {
allCerts(parseCerts?: boolean, filters?: string[] | Options, callback?: (error: T1CLibException, data: TokenAllCertsResponse) => void): Promise<TokenAllCertsResponse>;
tokenData(callback?: (error: T1CLibException, data: TokenInfoResponse) => void): Promise<TokenInfoResponse>;
rootCertificate(parseCerts?: boolean, callback?: (error: T1CLibException, data: TokenCertificateResponse) => void): Promise<TokenCertificateResponse>;
authenticationCertificate(parseCerts?: boolean, callback?: (error: T1CLibException, data: TokenCertificateResponse) => void): Promise<TokenCertificateResponse>;
nonRepudiationCertificate(parseCerts?: boolean, callback?: (error: T1CLibException, data: TokenCertificateResponse) => void): Promise<TokenCertificateResponse>;
encryptionCertificate(parseCerts?: boolean, callback?: (error: T1CLibException, data: TokenCertificateResponse) => void): Promise<TokenCertificateResponse>;
issuerCertificate(parseCerts?: boolean, callback?: (error: T1CLibException, data: TokenCertificateResponse) => void): Promise<TokenCertificateResponse>
allCertsExtended(parseCerts?: boolean, filters?: string[] | Options, callback?: (error: T1CLibException, data: TokenAllCertsExtendedResponse) => void): Promise<TokenAllCertsExtendedResponse>;
rootCertificateExtended(parseCerts?: boolean, callback?: (error: T1CLibException, data: TokenCertificateExtendedResponse) => void): Promise<TokenCertificateExtendedResponse>;
authenticationCertificateExtended(parseCerts?: boolean, callback?: (error: T1CLibException, data: TokenCertificateExtendedResponse) => void): Promise<TokenCertificateExtendedResponse>;
nonRepudiationCertificateExtended(parseCerts?: boolean, callback?: (error: T1CLibException, data: TokenCertificateExtendedResponse) => void): Promise<TokenCertificateExtendedResponse>;
encryptionCertificateExtended(parseCerts?: boolean, callback?: (error: T1CLibException, data: TokenCertificateExtendedResponse) => void): Promise<TokenCertificateExtendedResponse>;
issuerCertificateExtended(parseCerts?: boolean, callback?: (error: T1CLibException, data: TokenCertificateExtendedResponse) => void): Promise<TokenCertificateExtendedResponse>;
validateSignature(body: TokenValidateSignatureRequest, callback?: (error: T1CLibException, data: TokenValidateSignatureResponse) => void): Promise<TokenValidateSignatureResponse>;
verifyPin(body: TokenVerifyPinData, callback?: (error: T1CLibException, data: TokenVerifyPinResponse) => void): Promise<TokenVerifyPinResponse>;
authenticate(body: TokenAuthenticateOrSignData, callback?: (error: T1CLibException, data: TokenAuthenticateResponse) => void): Promise<TokenAuthenticateResponse>;
sign(body: TokenAuthenticateOrSignData, bulk?: boolean, callback?: (error: T1CLibException, data: TokenSignResponse) => void): Promise<TokenSignResponse>;
signRaw(body: TokenAuthenticateOrSignData, bulk?: boolean, callback?: (error: T1CLibException, data: TokenSignResponse) => void): Promise<TokenSignResponse>;
allAlgoRefs(callback?: (error: T1CLibException, data: TokenAlgorithmReferencesResponse) => void): Promise<TokenAlgorithmReferencesResponse>
resetBulkPin(callback?: (error: T1CLibException, data: BoolDataResponse) => void): Promise<BoolDataResponse>;
}
T1cSdk.initialize(config).then(res => {
const idemia = res.client.idemia(readerId);
}, err => {
console.error(error)
});module.tokenData().then(res => {
// see response below
}){
"success": true,
"data": {
"info": {
"slot": "string",
"label": "string",
"manufacturerId": "string",
"model": "string",
"serialNumber": "string",
"flags": {
"isRandomNumberGenerator": "boolean",
"isWriteProtected": "boolean",
"isLoginRequired": "boolean",
"isUserPinInitialized": "boolean",
"isRestoreKeyNotNeeded": "boolean",
"isClockOnToken": "boolean",
"isProtectedAuthenticationPath": "boolean",
"isDualCryptoOperations": "boolean",
"isTokenInitialized": "boolean",
"isSecondaryAuthentication": "boolean",
"isUserPinCountLow": "boolean",
"isUserPinFinalTry": "boolean",
"isUserPinLocked": "boolean",
"isUserPinToBeChanged": "boolean",
"isSoPinCountLow": "boolean",
"isSoPinFinalTry": "boolean",
"isSoPinLocked": "boolean",
"isSoPinToBeChanged": "boolean"
},
"mechanisms": [
{
"mechanism": "string",
"flags": {
"isHardware": "boolean",
"isEncrypt": "boolean",
"isDecrypt": "boolean",
"isDigest": "boolean",
"isSign": "boolean",
"isSignRecover": "boolean",
"isVerify": "boolean",
"isVerifyRecover": "boolean",
"isGenerate": "boolean",
"isGenerateKeyPair": "boolean",
"isWrap": "boolean",
"isUnwrap": "boolean",
"isExtension": "boolean",
"isEcFP": "boolean",
"isEcNamedcurve": "boolean",
"isEcUncompress": "boolean",
"isEcCompress": "boolean"
},
"ulMinKeySize": "number",
"ulMaxKeySize": "number"
}
],
"ulMaxSessionCount": "number",
"ulSessionCount": "number",
"ulMaxRwSessionCount": "number",
"ulMaxPinLen": "number",
"ulMinPinLen": "number",
"ulTotalPubLicMemory": "number",
"ulFreePubMemory": "number",
"ulTotalPrivateMemory": "number",
"ulFreePrivateMemory": "number",
"hardwareVersion": "string",
"firmwareVersion": "string"
},
"infoType": "TokenInfoType"
}
}
//ENUM
TokenInfoType {
Token,
PKCS11,
File,
Payment,
HSM,
Vault,
Wallet,
}allCertsExtended(parseCerts?: boolean, filters?: string[] | Options, callback?: (error: T1CLibException, data: TokenAllCertsExtendedResponse) => void): Promise<TokenAllCertsExtendedResponse>;
rootCertificateExtended(parseCerts?: boolean, callback?: (error: T1CLibException, data: TokenCertificateExtendedResponse) => void): Promise<TokenCertificateExtendedResponse>;
authenticationCertificateExtended(parseCerts?: boolean, callback?: (error: T1CLibException, data: TokenCertificateExtendedResponse) => void): Promise<TokenCertificateExtendedResponse>;
nonRepudiationCertificateExtended(parseCerts?: boolean, callback?: (error: T1CLibException, data: TokenCertificateExtendedResponse) => void): Promise<TokenCertificateExtendedResponse>;
encryptionCertificateExtended(parseCerts?: boolean, callback?: (error: T1CLibException, data: TokenCertificateExtendedResponse) => void): Promise<TokenCertificateExtendedResponse>;
issuerCertificateExtended(parseCerts?: boolean, callback?: (error: T1CLibException, data: TokenCertificateExtendedResponse) => void): Promise<TokenCertificateExtendedResponse>;{
"success" : true
"data" : {
"certificates": [{
"certificate"?: string,
"certificateType"?: string,
"id"?: string,
"subject"?: string,
"issuer"?: string,
"serialNumber"?: string,
"url"?: string,
"hashSubPubKey"?: string,
"hashIssPubKey"?: string,
"exponent"?: string,
"remainder"?: string,
"parsedCertificate"?: Certificate
}]
}
}{
"success" : true
"data" : {
"rootCertificate": {
"certificates": [...]
},
"authenticationCertificate": {
"certificates": [...]
},
"nonRepudiationCertificate": {
"certificates": [...]
},
"encryptionCertificates": {
"certificates": [...]
},
"issuerCertificates": {
"certificates": [...]
}
}
}idemia.allCertFilters().then(res => {
}, err => {
console.error(err)
}){
success: true,
data: ['rootCertificate', 'authenticationCertificate', 'encryptionCertificate', 'nonRepudiationCertificate', 'issuerCertificate']
}idemia.allKeyRefs().then(res => {
}, err => {
console.error(err)
}){
success: true,
data: ['authenticate', 'sign', 'encrypt']
}const filter = ['rootCertificate', 'authenticationCertificate', 'encryptionCertificate'];
idemia.allCerts(filter).then(res => {
res.data
}, err => {
console.error(err)
}){
"rootCertificate": {
...
},
"authenticationCertificate": {
...
},
"nonRepudiationCertificate": {
...
},
"intermediateCertificates": {
...
},
"encryptionCertificate": {
...
}
}idemia.tokenData().then(res => {
}, err => {
console.error(err)
}){
success: true,
data: {
version?: string,
serialNumber?: string,
label?: string,
changeCounter?: number,
}
}idemia.rootCertificate(parseCertsBoolean).then(res => {
}, err => {
console.error(err)
})idemia.authenticationCertificate(parseCertsBoolean).then(res => {
}, err => {
console.error(err)
})idemia.nonRepudiationCertificate(parseCertsBoolean).then(res => {
}, err => {
console.error(err)
})idemia.issuerCertificate(parseCertsBoolean).then(res => {
}, err => {
console.error(err)
})aventra.encryptionCertificate(parseCertsBoolean).then(res => {
}, err => {
console.error(err)
}){
success: true,
data: {
certificate?: string,
certificates?: Array<string>,
certificateType?: string,
id?: string,
parsedCertificate?: Certificate,
parsedCertificates?: Array<Certificate>
}
}const data = {
pin: "1234", // optional
osDialog: true // optional
}
idemia.verifyPin(data).then(res => {
}, err => {
console.error(err)
}){
success: true,
data: {
"verfied": true
}
}const data = {
algorithm: "sha256",
data: "E1uHACbPvhLew0gGmBH83lvtKIAKxU2/RezfBOsT6Vs=",
id: "123"
}
const bulk = false;
idemia.sign(data, bulk).then(res => {
}, err => {
console.error(err)
}){
success: true,
data: {
data: string
}
}var data = {
"algorithm":"sha256",
"data":"vl5He0ulthjX+VWNM46QX7vJ8VvXMq2k/Tq8Xq1bwEw=",
"osDialog": false,
"id" : "fewf5+65"
}
idemia.signRaw(data, callback);idemia.resetBulkPin().then(res => {
}, err => {
console.error(err)
}){
"success": true,
"data": true
}const data = {
algorithm: "sha256",
data: "E1uHACbPvhLew0gGmBH83lvtKIAKxU2/RezfBOsT6Vs=",
id: "123"
}
idemia.authenticate(data).then(res => {
}, err => {
console.error(err)
}){
success: true,
data: {
data: string
}
}idemia.allAlgoRefs(data).then(res => {
}, err => {
console.error(err)
}){
success: true,
data: {
ref: ['sha256', 'md5']
}
}const body = {
"algorithm": 'sha256',
"hash": '...',
"signedHash": '...',
"osDialog": false,
"id": 'cert_id',
"pin": 'pin_code',
"timeout": 120 //timeout in seconds
}
safenet.validateSignature(body).then(response => {
response.valid
).catch(error => {
errorHandler(error)}
){
"success": true,
"data": {
"valid": true
}
}{
description: "some error description",
code: "some error code"
}
T1CSdk.T1CClient.initialize(config).then(res => {
client = res;
}, err => {
console.error(error)
});const beid = client.beid(reader_id);beid.allData(filters).then(...).catch(...)// pin and pin_type are needed for luxid
const generic = client.generic(reader_id, pin, pin_type)generic.allData('beid', filters).then(...).catch(...)const generic = client.paymentGeneric(reader_id)generic.readData('emv').then(...).catch(...)export interface AbstractEidGeneric {
allData(module: string, filters?: string[] | Options, callback?: (error: T1CLibException, data: TokenAllDataResponse) => void): Promise<TokenAllDataResponse>;
allCerts(module: string, parseCerts?: boolean, filters?: string[] | Options, callback?: (error: T1CLibException, data: TokenAllCertsResponse) => void): Promise<TokenAllCertsResponse>;
biometric(module: string, callback?: (error: T1CLibException, data: TokenBiometricDataResponse) => void): Promise<TokenBiometricDataResponse>;
tokenData(module: string, callback?: (error: T1CLibException, data: TokenInfoResponse) => void): Promise<TokenInfoResponse>;
address(module: string, callback?: (error: T1CLibException, data: TokenAddressResponse) => void): Promise<TokenAddressResponse>;
picture(module: string, callback?: (error: T1CLibException, data: TokenPictureResponse) => void): Promise<TokenPictureResponse>;
rootCertificate(module: string, parseCerts?: boolean, callback?: (error: T1CLibException, data: TokenCertificateResponse) => void): Promise<TokenCertificateResponse>;
intermediateCertificates(module: string, parseCerts?: boolean, callback?: (error: T1CLibException, data: TokenCertificateResponse) => void): Promise<TokenCertificateResponse>;
authenticationCertificate(module: string, parseCerts?: boolean, callback?: (error: T1CLibException, data: TokenCertificateResponse) => void): Promise<TokenCertificateResponse>;
nonRepudiationCertificate(module: string, parseCerts?: boolean, callback?: (error: T1CLibException, data: TokenCertificateResponse) => void): Promise<TokenCertificateResponse>;
encryptionCertificate(module: string, parseCerts?: boolean, callback?: (error: T1CLibException, data: TokenCertificateResponse) => void): Promise<TokenCertificateResponse>;
issuerCertificate(module: string, parseCerts?: boolean, callback?: (error: T1CLibException, data: TokenCertificateResponse) => void): Promise<TokenCertificateResponse>;
allCertsExtended(module: string, parseCerts?: boolean, filters?: string[] | Options, callback?: (error: T1CLibException, data: TokenAllCertsExtendedResponse) => void): Promise<TokenAllCertsExtendedResponse>;
rootCertificateExtended(module: string, parseCerts?: boolean, callback?: (error: T1CLibException, data: TokenCertificateExtendedResponse) => void): Promise<TokenCertificateExtendedResponse>;
intermediateCertificatesExtended(module: string, parseCerts?: boolean, callback?: (error: T1CLibException, data: TokenCertificateExtendedResponse) => void): Promise<TokenCertificateExtendedResponse>;
authenticationCertificateExtended(module: string, parseCerts?: boolean, callback?: (error: T1CLibException, data: TokenCertificateExtendedResponse) => void): Promise<TokenCertificateExtendedResponse>;
nonRepudiationCertificateExtended(module: string, parseCerts?: boolean, callback?: (error: T1CLibException, data: TokenCertificateExtendedResponse) => void): Promise<TokenCertificateExtendedResponse>;
encryptionCertificateExtended(module: string, parseCerts?: boolean, callback?: (error: T1CLibException, data: TokenCertificateExtendedResponse) => void): Promise<TokenCertificateExtendedResponse>;
issuerCertificateExtended(module: string, parseCerts?: boolean, callback?: (error: T1CLibException, data: TokenCertificateExtendedResponse) => void): Promise<TokenCertificateExtendedResponse>;
verifyPin(module: string, body: TokenVerifyPinData, callback?: (error: T1CLibException, data: TokenVerifyPinResponse) => void): Promise<TokenVerifyPinResponse>;
authenticate(module: string, body: TokenAuthenticateOrSignData, callback?: (error: T1CLibException, data: TokenAuthenticateResponse) => void): Promise<TokenAuthenticateResponse>;
sign(module: string, body: TokenAuthenticateOrSignData, bulk?: boolean, callback?: (error: T1CLibException, data: TokenSignResponse) => void): Promise<TokenSignResponse>;
allAlgoRefs(module: string, callback?: (error: T1CLibException, data: TokenAlgorithmReferencesResponse) => void): Promise<TokenAlgorithmReferencesResponse>
resetBulkPin(module: string, callback?: (error: T1CLibException, data: BoolDataResponse) => void): Promise<BoolDataResponse>;
}export interface AbstractPaymentGeneric {
readApplicationData(module: string, callback?: (error: T1CLibException, data: PaymentReadApplicationDataResponse) => void): Promise<PaymentReadApplicationDataResponse>;
readData(module: string, callback?: (error: T1CLibException, data: PaymentReadDataResponse) => void): Promise<PaymentReadDataResponse>;
allCerts(module: string, aid: string, filters: string[] | Options, callback?: (error: T1CLibException, data: PaymentAllCertsResponse | TokenAllCertsExtendedResponse) => void): Promise<PaymentAllCertsResponse | TokenAllCertsExtendedResponse>;
issuerPublicCertificate(module: string, aid: string, callback?: (error: T1CLibException, data: PaymentCertificateResponse) => void): Promise<PaymentCertificateResponse>;
iccPublicCertificate(module: string, aid: string, callback?: (error: T1CLibException, data: PaymentCertificateResponse) => void): Promise<PaymentCertificateResponse>;
allCertsExtended(module: string, aid: string, filters: string[] | Options, callback?: (error: T1CLibException, data: TokenAllCertsExtendedResponse) => void): Promise<TokenAllCertsExtendedResponse>;
issuerPublicCertificateExtended(module: string, aid: string, callback?: (error: T1CLibException, data: TokenCertificateExtendedResponse) => void): Promise<TokenCertificateExtendedResponse>;
iccPublicCertificateExtended(module: string, aid: string, callback?: (error: T1CLibException, data: TokenCertificateExtendedResponse) => void): Promise<TokenCertificateExtendedResponse>;
verifyPin(module: string, body: PaymentVerifyPinData, callback?: (error: T1CLibException, data: PaymentVerifyPinResponse) => void): Promise<PaymentVerifyPinResponse>;
resetBulkPin(module: string, callback?: (error: T1CLibException, data: BoolDataResponse) => void): Promise<BoolDataResponse>;
sign(module: string, body: PaymentSignData, bulk?: boolean, callback?: (error: T1CLibException, data: PaymentSignResponse) => void): Promise<PaymentSignResponse>;
}public generic = (reader_id: string, pin?: string, pinType?: PinType): AbstractEidGeneric => {
return this.moduleFactory.createEidGeneric(reader_id, pin, pinType)
};
public paymentGeneric = (reader_id: string): AbstractPaymentGeneric => {
return this.moduleFactory.createPaymentGeneric(reader_id)
};
public fileex = (): AbstractFileExchange => {
return this.moduleFactory.createFileExchange()
};
public rawprint = (): AbstractRawPrint => {
return this.moduleFactory.createRawPrint()
};
public beid = (reader_id: string): AbstractEidBE => {
return this.moduleFactory.createEidBE(reader_id)
};
public remoteloading = (reader_id: string): AbstractRemoteLoading => {
return this.moduleFactory.createRemoteLoading(reader_id)
};
public emv = (reader_id: string): AbstractEmv => {
return this.moduleFactory.createEmv(reader_id)
};
public crelan = (reader_id: string): AbstractCrelan => {
return this.moduleFactory.createCrelan(reader_id)
};
// get instance for Aventra
public aventra = (reader_id: string): AbstractAventra => {
return this.moduleFactory.createAventra(reader_id);
}
// get instance for Oberthur
public oberthur = (reader_id: string): AbstractOberthur73 => {
return this.moduleFactory.createOberthur(reader_id);
}
// get instance for Oberthur
public idemia = (reader_id: string): AbstractIdemia => {
return this.moduleFactory.createIdemia(reader_id);
}
public luxeid = (reader_id: string, pin: string, pin_type: PinType): AbstractEidLux => {
return this.moduleFactory.createEidLUX(reader_id, pin, pin_type);
}
public wacom = (): AbstractWacom => {
return this.moduleFactory.createWacom();
}
public diplad = (reader_id: string): AbstractEidDiplad => {
return this.moduleFactory.createEidDiplad(reader_id);
}
public certigna = (reader_id: string): AbstractCertigna => {
return this.moduleFactory.createCertigna(reader_id);
}
public certinomis = (reader_id: string): AbstractCertinomis => {
return this.moduleFactory.createCertinomis(reader_id);
}
public dnie = (reader_id: string): AbstractDNIe => {
return this.moduleFactory.createDNIe(reader_id);
}
public safenet = (reader_id: string): AbstractSafenet => {
return this.moduleFactory.createSafenet(reader_id);
}
public eherkenning = (reader_id: string): AbstractEherkenning => {
return this.moduleFactory.createEherkenning(reader_id);
}
public jcop = (reader_id: string): AbstractJcop => {
return this.moduleFactory.createJcop(reader_id);
}
public airbus = (reader_id: string): AbstractAirbus => {
return this.moduleFactory.createAirbus(reader_id);
}
public luxtrust = (reader_id: string): AbstractLuxTrust => {
return this.moduleFactory.createLuxTrust(reader_id);
}
public camerfirma = (reader_id: string): AbstractCamerfirma => {
return this.moduleFactory.createCamerfirma(reader_id);
}
public chambersign = (reader_id: string): AbstractChambersign => {
return this.moduleFactory.createChambersign(reader_id);
}export class ModuleDescriptionResponse extends DataObjectResponse {
constructor(public data: TokenModuleDescription, public success: boolean) {
super(data, success);
}
}
export class TokenCertificateResponse extends T1CResponse {
constructor(public data: TokenCertificate, public success: boolean) {
super(success, data);
}
}
export class TokenCertificate {
constructor(
public certificate?: string,
public certificates?: Array<string>,
public certificateType?: string,
public id?: string,
public parsedCertificate?: Certificate,
public parsedCertificates?: Array<Certificate>
) {}
}
export class TokenAddressResponse extends DataObjectResponse {
constructor(public data: TokenAddressData, public success: boolean) {
super(data, success);
}
}
export class TokenPictureResponse extends DataObjectResponse {
constructor(public data: TokenPictureData, public success: boolean) {
super(data, success);
}
}
export class TokenVerifyPinResponse extends DataObjectResponse {
constructor(public data: TokenVerifyPinResponseData, public success: boolean) {
super(data, success);
}
}
export class TokenVerifyPinResponseData {
constructor(
public verified: boolean
) {}
}
export class TokenSignResponse extends DataObjectResponse {
constructor(public data: TokenSignResponseData, public success: boolean) {
super(data, success);
}
}
export class TokenSignResponseData {
constructor(
public data?: string
) {}
}
export class TokenAuthenticateResponse extends DataObjectResponse {
constructor(public data: TokenAuthenticateResponseData, public success: boolean) {
super(data, success);
}
}
export class TokenAuthenticateResponseData {
constructor(
public data?: string
) {}
}
export class TokenModuleDescription {
constructor(
public desc: string
) {}
}
export class TokenAddressData {
constructor(
public municipality?: string,
public rawData?: string,
public signature?: string,
public streetAndNumber?: string,
public version?: number,
public zipcode?: string
) {}
}
export class TokenAllDataResponse extends DataObjectResponse {
constructor(public data: TokenAllData, public success: boolean) {
super(data, success);
}
}
export class TokenAllData {
constructor(
public picture?: TokenPictureData,
public biometric?: TokenBiometricData,
public address?: TokenAddressData,
) {}
}
export class TokenPictureData {
constructor(
public picture?: string,
public signature?: string,
public width?: number,
public height?: number,
) {}
}
export class TokenData {
constructor(
public rawData?: string,
public version?: string,
public serialNumber?: string,
public label?: string,
public prnGeneration?: string,
public eidCompliant?: string,
public graphicalPersoVersion?: string,
public versionRfu?: string,
public electricalPersoVersion?: string,
public electricalPersoInterfaceVersion?: string,
public changeCounter?: number,
public activated?: string,
) {}
}
export class TokenDataResponse extends DataObjectResponse {
constructor(public data: TokenData, public success: boolean) {
super(data, success);
}
}
export class TokenBiometricData {
constructor(
public birthDate?: string,
public birthLocation?: string,
public cardDeliveryMunicipality?: string,
public cardNumber?: string,
public cardValidityDateBegin?: string,
public cardValidityDateEnd?: string,
public chipNumber?: string,
public documentType?: string,
public firstNames?: string,
public name?: string,
public nationalNumber?: string,
public nationality?: string,
public nobleCondition?: string,
public pictureHash?: string,
public rawData?: string,
public sex?: string,
public signature?: string,
public specialStatus?: string,
public thirdName?: string,
public version?: number,
public issuer?: string
) {}
}
export class TokenBiometricDataResponse extends DataObjectResponse {
constructor(public data: TokenBiometricData, public success: boolean) {
super(data, success);
}
}
export class TokenAlgorithmReferencesResponse {
constructor(public data: TokenAlgorithmReferences, public success: boolean) {
}
}
export class TokenAlgorithmReferences {
constructor(public ref: Array<string>) {
}
}
export class TokenResetPinResponse {
constructor(public data: TokenResetPin, public success: boolean) {
}
}
export class TokenResetPin {
constructor(public verified: boolean) {
}
}
export class PinType {
static PIN = 'Pin';
static CAN = 'Can';
}
// Requests
export class TokenAuthenticateOrSignData {
constructor(public algorithm: string, public data: string, public pin?: string, public pace?: string, public id?: string, public osDialog?: boolean, public txId?: string, public language?: string, public base64Encoded?: boolean, public timeout?: number) {
}
}
export class TokenVerifyPinData {
constructor(public pin?: string, public pace?: string, public osDialog?: boolean, public base64Encoded?: boolean, public timeout?: number) {
}
}
export enum TokenResetPinReferenceType {
issign = "issign",
isauthenticate = "isauthenticate",
isencrypt = "isencrypt"
}
export class TokenResetPinData {
constructor(
public puk: string,
public pin?: string,
public resetOnly?: boolean,
public osDialog?: boolean,
public reference?: TokenResetPinReferenceType,
public base64Encoded?: boolean) {
}
}
export class PaymentVerifyPinData {
constructor(public pin?: string, public osDialog? :boolean, public base64Encoded?: boolean, public timeout?: number) {
}
}
export class PaymentSignData {
constructor(public txId: string, public language: string, public data: string, public timeout?: number) {
}
}
export class TokenCertificateExtendedResponse extends T1CResponse {
constructor(public data: TokenCertificateExtended, public success: boolean) {
super(success, data);
}
}
export class TokenCertificateExtended {
constructor(
public certificates?: Array<T1CCertificate>
) {
}
}
export class T1CCertificate {
constructor(
public certificate?: string,
public certificateType?: string,
public id?: string,
public subject?: string,
public issuer?: string,
public serialNumber?: string,
public url?: string,
public hashSubPubKey?: string,
public hashIssPubKey?: string,
public exponent?: string,
public remainder?: string,
public parsedCertificate?: Certificate
) {
}
}public static generateConsentToken(): string# regular imported javascript via script tag
T1CSdk.T1CClient.generateConsentToken()# Import loaded via NPM
import {T1CClient} from "t1c-sdk-js";
T1CClient.generateConsentToken()T1CSdk.T1CClient.initialize(config).then(res => {
client = res;
console.log("Client config: ", client.localConfig)
core = client.core();
}, err => {
if(err.code == 814501 || err.code == 814500) {
console.log(err)
client = err.client
$('#consentModal').modal('show', {
keyboard: false
});
$('.consent-token').text(client.core().generateConsentToken());
} else if (err.code == 112999) {
// Unavailable
} else {
console.error("T1C error:", err)
}
}); $('#consentModal .btn-primary').on('click', (ev) => {
const tokenNode = document.querySelector('.consent-token');
var range = document.createRange();
range.selectNode(tokenNode);
window.getSelection().addRange(range);
try {
document.execCommand('copy');
} catch (err) {
console.log('Oops, unable to copy');
}
window.getSelection().removeRange(range);
const clipboardData = tokenNode.textContent;
const validityInDays = 365
client.core().getImplicitConsent(clipboardData, validityInDays).then(consentRes => {
client = consentRes // replace the client and other set variables of the T1C
core = client.core();
core.version().then(versionResult => console.log("T1C running on core " + versionResult));
$('#consentModal').modal('hide');
}, err => {
console.error(err)
})
});export interface AbstractOberthur73 {
allCerts(parseCerts?: boolean, filters?: string[] | Options, callback?: (error: T1CLibException, data: TokenAllCertsResponse) => void): Promise<TokenAllCertsResponse>;
tokenData(callback?: (error: T1CLibException, data: TokenInfoResponse) => void): Promise<TokenInfoResponse>;
rootCertificate(parseCerts?: boolean, callback?: (error: T1CLibException, data: TokenCertificateResponse) => void): Promise<TokenCertificateResponse>;
authenticationCertificate(parseCerts?: boolean, callback?: (error: T1CLibException, data: TokenCertificateResponse) => void): Promise<TokenCertificateResponse>;
nonRepudiationCertificate(parseCerts?: boolean, callback?: (error: T1CLibException, data: TokenCertificateResponse) => void): Promise<TokenCertificateResponse>;
encryptionCertificate(parseCerts?: boolean, callback?: (error: T1CLibException, data: TokenCertificateResponse) => void): Promise<TokenCertificateResponse>;
issuerCertificate(parseCerts?: boolean, callback?: (error: T1CLibException, data: TokenCertificateResponse) => void): Promise<TokenCertificateResponse>
allCertsExtended(parseCerts?: boolean, filters?: string[] | Options, callback?: (error: T1CLibException, data: TokenAllCertsExtendedResponse) => void): Promise<TokenAllCertsExtendedResponse>;
rootCertificateExtended(parseCerts?: boolean, callback?: (error: T1CLibException, data: TokenCertificateExtendedResponse) => void): Promise<TokenCertificateExtendedResponse>;
authenticationCertificateExtended(parseCerts?: boolean, callback?: (error: T1CLibException, data: TokenCertificateExtendedResponse) => void): Promise<TokenCertificateExtendedResponse>;
nonRepudiationCertificateExtended(parseCerts?: boolean, callback?: (error: T1CLibException, data: TokenCertificateExtendedResponse) => void): Promise<TokenCertificateExtendedResponse>;
encryptionCertificateExtended(parseCerts?: boolean, callback?: (error: T1CLibException, data: TokenCertificateExtendedResponse) => void): Promise<TokenCertificateExtendedResponse>;
issuerCertificateExtended(parseCerts?: boolean, callback?: (error: T1CLibException, data: TokenCertificateExtendedResponse) => void): Promise<TokenCertificateExtendedResponse>;
validateSignature(body: TokenValidateSignatureRequest, callback?: (error: T1CLibException, data: TokenValidateSignatureResponse) => void): Promise<TokenValidateSignatureResponse>;
verifyPin(body: TokenVerifyPinData, callback?: (error: T1CLibException, data: TokenVerifyPinResponse) => void): Promise<TokenVerifyPinResponse>;
authenticate(body: TokenAuthenticateOrSignData, callback?: (error: T1CLibException, data: TokenAuthenticateResponse) => void): Promise<TokenAuthenticateResponse>;
sign(body: TokenAuthenticateOrSignData, bulk?: boolean, callback?: (error: T1CLibException, data: TokenSignResponse) => void): Promise<TokenSignResponse>;
signRaw(body: TokenAuthenticateOrSignData, bulk?: boolean, callback?: (error: T1CLibException, data: TokenSignResponse) => void): Promise<TokenSignResponse>;
allAlgoRefs(callback?: (error: T1CLibException, data: TokenAlgorithmReferencesResponse) => void): Promise<TokenAlgorithmReferencesResponse>
resetBulkPin(callback?: (error: T1CLibException, data: BoolDataResponse) => void): Promise<BoolDataResponse>;
}T1cSdk.initialize(config).then(res => {
const oberthur = res.client.oberthur(readerId);
}, err => {
console.error(error)
});module.tokenData().then(res => {
// see response below
}){
"success": true,
"data": {
"info": {
"slot": "string",
"label": "string",
"manufacturerId": "string",
"model": "string",
"serialNumber": "string",
"flags": {
"isRandomNumberGenerator": "boolean",
"isWriteProtected": "boolean",
"isLoginRequired": "boolean",
"isUserPinInitialized": "boolean",
"isRestoreKeyNotNeeded": "boolean",
"isClockOnToken": "boolean",
"isProtectedAuthenticationPath": "boolean",
"isDualCryptoOperations": "boolean",
"isTokenInitialized": "boolean",
"isSecondaryAuthentication": "boolean",
"isUserPinCountLow": "boolean",
"isUserPinFinalTry": "boolean",
"isUserPinLocked": "boolean",
"isUserPinToBeChanged": "boolean",
"isSoPinCountLow": "boolean",
"isSoPinFinalTry": "boolean",
"isSoPinLocked": "boolean",
"isSoPinToBeChanged": "boolean"
},
"mechanisms": [
{
"mechanism": "string",
"flags": {
"isHardware": "boolean",
"isEncrypt": "boolean",
"isDecrypt": "boolean",
"isDigest": "boolean",
"isSign": "boolean",
"isSignRecover": "boolean",
"isVerify": "boolean",
"isVerifyRecover": "boolean",
"isGenerate": "boolean",
"isGenerateKeyPair": "boolean",
"isWrap": "boolean",
"isUnwrap": "boolean",
"isExtension": "boolean",
"isEcFP": "boolean",
"isEcNamedcurve": "boolean",
"isEcUncompress": "boolean",
"isEcCompress": "boolean"
},
"ulMinKeySize": "number",
"ulMaxKeySize": "number"
}
],
"ulMaxSessionCount": "number",
"ulSessionCount": "number",
"ulMaxRwSessionCount": "number",
"ulMaxPinLen": "number",
"ulMinPinLen": "number",
"ulTotalPubLicMemory": "number",
"ulFreePubMemory": "number",
"ulTotalPrivateMemory": "number",
"ulFreePrivateMemory": "number",
"hardwareVersion": "string",
"firmwareVersion": "string"
},
"infoType": "TokenInfoType"
}
}
//ENUM
TokenInfoType {
Token,
PKCS11,
File,
Payment,
HSM,
Vault,
Wallet,
}allCertsExtended(parseCerts?: boolean, filters?: string[] | Options, callback?: (error: T1CLibException, data: TokenAllCertsExtendedResponse) => void): Promise<TokenAllCertsExtendedResponse>;
rootCertificateExtended(parseCerts?: boolean, callback?: (error: T1CLibException, data: TokenCertificateExtendedResponse) => void): Promise<TokenCertificateExtendedResponse>;
authenticationCertificateExtended(parseCerts?: boolean, callback?: (error: T1CLibException, data: TokenCertificateExtendedResponse) => void): Promise<TokenCertificateExtendedResponse>;
nonRepudiationCertificateExtended(parseCerts?: boolean, callback?: (error: T1CLibException, data: TokenCertificateExtendedResponse) => void): Promise<TokenCertificateExtendedResponse>;
encryptionCertificateExtended(parseCerts?: boolean, callback?: (error: T1CLibException, data: TokenCertificateExtendedResponse) => void): Promise<TokenCertificateExtendedResponse>;
issuerCertificateExtended(parseCerts?: boolean, callback?: (error: T1CLibException, data: TokenCertificateExtendedResponse) => void): Promise<TokenCertificateExtendedResponse>;{
"success" : true
"data" : {
"certificates": [{
"certificate"?: string,
"certificateType"?: string,
"id"?: string,
"subject"?: string,
"issuer"?: string,
"serialNumber"?: string,
"url"?: string,
"hashSubPubKey"?: string,
"hashIssPubKey"?: string,
"exponent"?: string,
"remainder"?: string,
"parsedCertificate"?: Certificate
}]
}
}{
"success" : true
"data" : {
"rootCertificate": {
"certificates": [...]
},
"authenticationCertificate": {
"certificates": [...]
},
"nonRepudiationCertificate": {
"certificates": [...]
},
"encryptionCertificates": {
"certificates": [...]
},
"issuerCertificates": {
"certificates": [...]
}
}
}oberthur.allCertFilters().then(res => {
}, err => {
console.error(err)
}){
success: true,
data: ['rootCertificate', 'authenticationCertificate', 'encryptionCertificate', 'nonRepudiationCertificate', 'issuerCertificate']
}oberthur.allKeyRefs().then(res => {
}, err => {
console.error(err)
}){
success: true,
data: ['authenticate', 'sign', 'encrypt']
}const filter = ['rootCertificate', 'authenticationCertificate', 'encryptionCertificate'];
oberthur.allCerts(filter).then(res => {
res.data
}, err => {
console.error(err)
}){
"rootCertificate": {
...
},
"authenticationCertificate": {
...
},
"nonRepudiationCertificate": {
...
},
"intermediateCertificates": {
...
},
"encryptionCertificate": {
...
}
}oberthur.tokenData().then(res => {
}, err => {
console.error(err)
}){
success: true,
data: {
version?: string,
serialNumber?: string,
label?: string,
changeCounter?: number,
}
}oberthur.rootCertificate(parseCertsBoolean).then(res => {
}, err => {
console.error(err)
})oberthur.authenticationCertificate(parseCertsBoolean).then(res => {
}, err => {
console.error(err)
})oberthur.nonRepudiationCertificate(parseCertsBoolean).then(res => {
}, err => {
console.error(err)
})oberthur.issuerCertificate(parseCertsBoolean).then(res => {
}, err => {
console.error(err)
})aventra.encryptionCertificate(parseCertsBoolean).then(res => {
}, err => {
console.error(err)
}){
success: true,
data: {
certificate?: string,
certificates?: Array<string>,
certificateType?: string,
id?: string,
parsedCertificate?: Certificate,
parsedCertificates?: Array<Certificate>
}
}const data = {
pin: "1234", // optional
osDialog: true // optional
}
oberthur.verifyPin(data).then(res => {
}, err => {
console.error(err)
}){
success: true,
data: {
"verfied": true
}
}const data = {
algorithm: "sha256",
data: "E1uHACbPvhLew0gGmBH83lvtKIAKxU2/RezfBOsT6Vs=",
id: "123"
}
const bulk = false;
oberthur.sign(data, bulk).then(res => {
}, err => {
console.error(err)
}){
success: true,
data: {
data: string
}
}var data = {
"algorithm":"sha256",
"data":"vl5He0ulthjX+VWNM46QX7vJ8VvXMq2k/Tq8Xq1bwEw=",
"osDialog": false,
"id": "1235s"
}
oberthur.signRaw(data, callback);diplad.resetBulkPin().then(res => {
}, err => {
console.error(err)
}){
"success": true,
"data": true
}const data = {
algorithm: "sha256",
data: "E1uHACbPvhLew0gGmBH83lvtKIAKxU2/RezfBOsT6Vs="
id: "123"
}
oberthur.authenticate(data).then(res => {
}, err => {
console.error(err)
}){
success: true,
data: {
data: string
}
}oberthur.allAlgoRefs(data).then(res => {
}, err => {
console.error(err)
}){
success: true,
data: {
ref: ['sha256', 'md5']
}
}const body = {
"algorithm": 'sha256',
"hash": '...',
"signedHash": '...',
"osDialog": false,
"id": 'cert_id',
"pin": 'pin_code',
"timeout": 120 //timeout in seconds
}
safenet.validateSignature(body).then(response => {
response.valid
).catch(error => {
errorHandler(error)}
){
"success": true,
"data": {
"valid": true
}
}export interface AbstractCamerfirma {
allCerts(parseCerts?: boolean, filters?: string[] | Options, callback?: (error: T1CLibException, data: TokenAllCertsResponse) => void): Promise<TokenAllCertsResponse>;
authenticationCertificate(parseCerts?: boolean, callback?: (error: T1CLibException, data: TokenCertificateResponse) => void): Promise<TokenCertificateResponse>;
nonRepudiationCertificate(parseCerts?: boolean, callback?: (error: T1CLibException, data: TokenCertificateResponse) => void): Promise<TokenCertificateResponse>;
allCertsExtended(parseCerts?: boolean, filters?: string[] | Options, callback?: (error: T1CLibException, data: TokenAllCertsExtendedResponse) => void): Promise<TokenAllCertsExtendedResponse>;
authenticationCertificateExtended(parseCerts?: boolean, callback?: (error: T1CLibException, data: TokenCertificateExtendedResponse) => void): Promise<TokenCertificateExtendedResponse>;
nonRepudiationCertificateExtended(parseCerts?: boolean, callback?: (error: T1CLibException, data: TokenCertificateExtendedResponse) => void): Promise<TokenCertificateExtendedResponse>;
validateSignature(body: TokenValidateSignatureRequest, callback?: (error: T1CLibException, data: TokenValidateSignatureResponse) => void): Promise<TokenValidateSignatureResponse>;
verifyPin(body: TokenVerifyPinData, callback?: (error: T1CLibException, data: TokenVerifyPinResponse) => void): Promise<TokenVerifyPinResponse>;
authenticate(body: TokenAuthenticateOrSignData, callback?: (error: T1CLibException, data: TokenAuthenticateResponse) => void): Promise<TokenAuthenticateResponse>;
sign(body: TokenAuthenticateOrSignData, bulk?: boolean, callback?: (error: T1CLibException, data: TokenSignResponse) => void): Promise<TokenSignResponse>;
signRaw(body: TokenAuthenticateOrSignData, bulk?: boolean, callback?: (error: T1CLibException, data: TokenSignResponse) => void): Promise<TokenSignResponse>;
allAlgoRefs(callback?: (error: T1CLibException, data: TokenAlgorithmReferencesResponse) => void): Promise<TokenAlgorithmReferencesResponse>
resetBulkPin(callback?: (error: T1CLibException, data: BoolDataResponse) => void): Promise<BoolDataResponse>;
tokenData(callback?: (error: T1CLibException, data: TokenInfoResponse) => void): Promise<TokenInfoResponse>;
}T1CSdk.T1CClient.initialize(config).then(res => {
client = res;
}, err => {
console.error(error)
});var core = client.core();
core.readersCardAvailable(callback);{
"data": [
// List of reader with cards found
],
"success": true
}const moduleName = "camerfirma";
var module = client.generic(selected_reader.id);var module = client.camerfirma(selected_reader.id);module.tokenData().then(res => {
// see response below
}){
"success": true,
"data": {
"info": {
"slot": "string",
"label": "string",
"manufacturerId": "string",
"model": "string",
"serialNumber": "string",
"flags": {
"isRandomNumberGenerator": "boolean",
"isWriteProtected": "boolean",
"isLoginRequired": "boolean",
"isUserPinInitialized": "boolean",
"isRestoreKeyNotNeeded": "boolean",
"isClockOnToken": "boolean",
"isProtectedAuthenticationPath": "boolean",
"isDualCryptoOperations": "boolean",
"isTokenInitialized": "boolean",
"isSecondaryAuthentication": "boolean",
"isUserPinCountLow": "boolean",
"isUserPinFinalTry": "boolean",
"isUserPinLocked": "boolean",
"isUserPinToBeChanged": "boolean",
"isSoPinCountLow": "boolean",
"isSoPinFinalTry": "boolean",
"isSoPinLocked": "boolean",
"isSoPinToBeChanged": "boolean"
},
"mechanisms": [
{
"mechanism": "string",
"flags": {
"isHardware": "boolean",
"isEncrypt": "boolean",
"isDecrypt": "boolean",
"isDigest": "boolean",
"isSign": "boolean",
"isSignRecover": "boolean",
"isVerify": "boolean",
"isVerifyRecover": "boolean",
"isGenerate": "boolean",
"isGenerateKeyPair": "boolean",
"isWrap": "boolean",
"isUnwrap": "boolean",
"isExtension": "boolean",
"isEcFP": "boolean",
"isEcNamedcurve": "boolean",
"isEcUncompress": "boolean",
"isEcCompress": "boolean"
},
"ulMinKeySize": "number",
"ulMaxKeySize": "number"
}
],
"ulMaxSessionCount": "number",
"ulSessionCount": "number",
"ulMaxRwSessionCount": "number",
"ulMaxPinLen": "number",
"ulMinPinLen": "number",
"ulTotalPubLicMemory": "number",
"ulFreePubMemory": "number",
"ulTotalPrivateMemory": "number",
"ulFreePrivateMemory": "number",
"hardwareVersion": "string",
"firmwareVersion": "string"
},
"infoType": "TokenInfoType"
}
}
//ENUM
TokenInfoType {
Token,
PKCS11,
File,
Payment,
HSM,
Vault,
Wallet,
}module.authenticationCertificate(module, parseCertsBoolean, callback);{
success: true,
data: {
certificate?: string,
certificates?: Array<string>,
certificateType?: string,
id?: string,
parsedCertificate?: Certificate,
parsedCertificates?: Array<Certificate>
}
}module.nonRepudiationCertificate(module, parseCertsBoolean, callback);{
success: true,
data: {
certificate?: string,
certificates?: Array<string>,
certificateType?: string,
id?: string,
parsedCertificate?: Certificate,
parsedCertificates?: Array<Certificate>
}
}var filter = [];
module.allCerts(module, parseCerts, { filters: filter}, callback);{
"authenticationCertificate": {
...
},
"nonRepudiationCertificate": {
...
}
}var filter = ['authenticationCertificate'];
module.allCerts(module, { filters: filter}, callback);{
"authenticationCertificate": {
...
}
}var filter = null;
module.allCerts(module, { filters: filter}, callback);{
"authenticationCertificate": {
...
},
"nonRepudiationCertificate": {
...
}
}var data = {
"pin":"...",
"algorithm":"sha1",
"data":"I2e+u/sgy7fYgh+DWA0p2jzXQ7E=",
"osDialog": true
}
module.sign(module, data, callback);{
"success": true,
"data": {
"data" : "W7wqvWA8m9S...="
}
}var data = {
"algorithm":"sha1",
"data":"I2e+u/sgy7fYgh+DWA0p2jzXQ7E=",
"osDialog": false
}
module.sign(module, data, callback);{
"success": true,
"data": {
"data" : "W7wqvWA8m9S...="
}
}var data = {
"algorithm":"sha256",
"data":"vl5He0ulthjX+VWNM46QX7vJ8VvXMq2k/Tq8Xq1bwEw=",
"osDialog": false
}
module.signRaw(data, callback);const data = {
algorithm: "sha256",
data: "E1uHACbPvhLew0gGmBH83lvtKIAKxU2/RezfBOsT6Vs=",
pin: "1234"
}
const bulk = true;
module.sign(module, data, bulk).then(res => {
}, err => {
console.error(err)
})module.resetBulkPin(module).then(res => {
}, err => {
console.error(err)
}){
"success": true,
"data": true
}var data = {
"pin":"..."
}
module.verifyPin(module, data, callback);{
"verified": true
}var data = {}
module.verifyPin(module, data, callback);{
"verified": true
}var data = {
"pin": "...",
"algorithm": "sha1",
"data":"I2e+u/sgy7fYgh+DWA0p2jzXQ7E="
}
module.authenticate(module, data, callback);{
"success": true,
"data": {
"data" : "W7wqvWA8m9S...="
}
}module.allAlgoRefs(module, callback);{
"success": true,
"data": ["sha1", "sha256"]
}const body = {
"algorithm": 'sha256',
"hash": '...',
"signedHash": '...',
"osDialog": false,
"id": 'cert_id',
"pin": 'pin_code',
"timeout": 120 //timeout in seconds
}
module.validateSignature(body).then(response => {
response.valid
).catch(error => {
errorHandler(error)}
){
"success": true,
"data": {
"valid": true
}
}export interface AbstractChambersign {
allCerts(parseCerts?: boolean, filters?: string[] | Options, callback?: (error: T1CLibException, data: TokenAllCertsResponse) => void): Promise<TokenAllCertsResponse>;
authenticationCertificate(parseCerts?: boolean, callback?: (error: T1CLibException, data: TokenCertificateResponse) => void): Promise<TokenCertificateResponse>;
nonRepudiationCertificate(parseCerts?: boolean, callback?: (error: T1CLibException, data: TokenCertificateResponse) => void): Promise<TokenCertificateResponse>;
allCertsExtended(parseCerts?: boolean, filters?: string[] | Options, callback?: (error: T1CLibException, data: TokenAllCertsExtendedResponse) => void): Promise<TokenAllCertsExtendedResponse>;
authenticationCertificateExtended(parseCerts?: boolean, callback?: (error: T1CLibException, data: TokenCertificateExtendedResponse) => void): Promise<TokenCertificateExtendedResponse>;
nonRepudiationCertificateExtended(parseCerts?: boolean, callback?: (error: T1CLibException, data: TokenCertificateExtendedResponse) => void): Promise<TokenCertificateExtendedResponse>;
validateSignature(body: TokenValidateSignatureRequest, callback?: (error: T1CLibException, data: TokenValidateSignatureResponse) => void): Promise<TokenValidateSignatureResponse>;
verifyPin(body: TokenVerifyPinData, callback?: (error: T1CLibException, data: TokenVerifyPinResponse) => void): Promise<TokenVerifyPinResponse>;
authenticate(body: TokenAuthenticateOrSignData, callback?: (error: T1CLibException, data: TokenAuthenticateResponse) => void): Promise<TokenAuthenticateResponse>;
sign(body: TokenAuthenticateOrSignData, bulk?: boolean, callback?: (error: T1CLibException, data: TokenSignResponse) => void): Promise<TokenSignResponse>;
signRaw(body: TokenAuthenticateOrSignData, bulk?: boolean, callback?: (error: T1CLibException, data: TokenSignResponse) => void): Promise<TokenSignResponse>;
allAlgoRefs(callback?: (error: T1CLibException, data: TokenAlgorithmReferencesResponse) => void): Promise<TokenAlgorithmReferencesResponse>
resetBulkPin(callback?: (error: T1CLibException, data: BoolDataResponse) => void): Promise<BoolDataResponse>;
tokenData(callback?: (error: T1CLibException, data: TokenInfoResponse) => void): Promise<TokenInfoResponse>;
}
T1CSdk.T1CClient.initialize(config).then(res => {
client = res;
}, err => {
console.error(error)
});var core = client.core();
core.readersCardAvailable(callback);{
"data": [
// List of reader with cards found
],
"success": true
}const moduleName = "chambersign";
var module = client.generic(selected_reader.id);var module = client.chambersign(selected_reader.id);module.tokenData().then(res => {
// see response below
}){
"success": true,
"data": {
"info": {
"slot": "string",
"label": "string",
"manufacturerId": "string",
"model": "string",
"serialNumber": "string",
"flags": {
"isRandomNumberGenerator": "boolean",
"isWriteProtected": "boolean",
"isLoginRequired": "boolean",
"isUserPinInitialized": "boolean",
"isRestoreKeyNotNeeded": "boolean",
"isClockOnToken": "boolean",
"isProtectedAuthenticationPath": "boolean",
"isDualCryptoOperations": "boolean",
"isTokenInitialized": "boolean",
"isSecondaryAuthentication": "boolean",
"isUserPinCountLow": "boolean",
"isUserPinFinalTry": "boolean",
"isUserPinLocked": "boolean",
"isUserPinToBeChanged": "boolean",
"isSoPinCountLow": "boolean",
"isSoPinFinalTry": "boolean",
"isSoPinLocked": "boolean",
"isSoPinToBeChanged": "boolean"
},
"mechanisms": [
{
"mechanism": "string",
"flags": {
"isHardware": "boolean",
"isEncrypt": "boolean",
"isDecrypt": "boolean",
"isDigest": "boolean",
"isSign": "boolean",
"isSignRecover": "boolean",
"isVerify": "boolean",
"isVerifyRecover": "boolean",
"isGenerate": "boolean",
"isGenerateKeyPair": "boolean",
"isWrap": "boolean",
"isUnwrap": "boolean",
"isExtension": "boolean",
"isEcFP": "boolean",
"isEcNamedcurve": "boolean",
"isEcUncompress": "boolean",
"isEcCompress": "boolean"
},
"ulMinKeySize": "number",
"ulMaxKeySize": "number"
}
],
"ulMaxSessionCount": "number",
"ulSessionCount": "number",
"ulMaxRwSessionCount": "number",
"ulMaxPinLen": "number",
"ulMinPinLen": "number",
"ulTotalPubLicMemory": "number",
"ulFreePubMemory": "number",
"ulTotalPrivateMemory": "number",
"ulFreePrivateMemory": "number",
"hardwareVersion": "string",
"firmwareVersion": "string"
},
"infoType": "TokenInfoType"
}
}
//ENUM
TokenInfoType {
Token,
PKCS11,
File,
Payment,
HSM,
Vault,
Wallet,
}module.authenticationCertificate(module, parseCertsBoolean, callback);{
success: true,
data: {
certificate?: string,
certificates?: Array<string>,
certificateType?: string,
id?: string,
parsedCertificate?: Certificate,
parsedCertificates?: Array<Certificate>
}
}module.nonRepudiationCertificate(module, parseCertsBoolean, callback);{
success: true,
data: {
certificate?: string,
certificates?: Array<string>,
certificateType?: string,
id?: string,
parsedCertificate?: Certificate,
parsedCertificates?: Array<Certificate>
}
}var filter = [];
module.allCerts(module, parseCerts, { filters: filter}, callback);{
"authenticationCertificate": {
...
},
"nonRepudiationCertificate": {
...
}
}var filter = ['authenticationCertificate'];
module.allCerts(module, { filters: filter}, callback);{
"authenticationCertificate": {
...
}
}var filter = null;
module.allCerts(module, { filters: filter}, callback);{
"authenticationCertificate": {
...
},
"nonRepudiationCertificate": {
...
}
}var data = {
"pin":"...",
"algorithm":"sha1",
"data":"I2e+u/sgy7fYgh+DWA0p2jzXQ7E=",
"osDialog": true
}
module.sign(module, data, callback);{
"success": true,
"data": {
"data" : "W7wqvWA8m9S...="
}
}var data = {
"algorithm":"sha1",
"data":"I2e+u/sgy7fYgh+DWA0p2jzXQ7E=",
"osDialog": false
}
module.sign(module, data, callback);{
"success": true,
"data": {
"data" : "W7wqvWA8m9S...="
}
}var data = {
"algorithm":"sha256",
"data":"vl5He0ulthjX+VWNM46QX7vJ8VvXMq2k/Tq8Xq1bwEw=",
"osDialog": false
}
chambersign.signRaw(data, callback);const data = {
algorithm: "sha256",
data: "E1uHACbPvhLew0gGmBH83lvtKIAKxU2/RezfBOsT6Vs=",
pin: "1234"
}
const bulk = true;
module.sign(module, data, bulk).then(res => {
}, err => {
console.error(err)
})module.resetBulkPin(module).then(res => {
}, err => {
console.error(err)
}){
"success": true,
"data": true
}var data = {
"pin":"..."
}
module.verifyPin(module, data, callback);{
"verified": true
}var data = {}
module.verifyPin(module, data, callback);{
"verified": true
}var data = {
"pin": "...",
"algorithm": "sha1",
"data":"I2e+u/sgy7fYgh+DWA0p2jzXQ7E="
}
module.authenticate(module, data, callback);{
"success": true,
"data": {
"data" : "W7wqvWA8m9S...="
}
}module.allAlgoRefs(module, callback);{
"success": true,
"data": ["sha1", "sha256"]
}const body = {
"algorithm": 'sha256',
"hash": '...',
"signedHash": '...',
"osDialog": false,
"id": 'cert_id',
"pin": 'pin_code',
"timeout": 120 //timeout in seconds
}
module.validateSignature(body).then(response => {
response.valid
).catch(error => {
errorHandler(error)}
){
"success": true,
"data": {
"valid": true
}
}export interface AbstractAventra {
allCerts(parseCerts?: boolean, filters?: string[] | Options, callback?: (error: T1CLibException, data: TokenAllCertsResponse) => void): Promise<TokenAllCertsResponse>;
tokenData(callback?: (error: T1CLibException, data: TokenInfoResponse) => void): Promise<TokenInfoResponse>;
rootCertificate(parseCerts?: boolean, callback?: (error: T1CLibException, data: TokenCertificateResponse) => void): Promise<TokenCertificateResponse>;
authenticationCertificate(parseCerts?: boolean, callback?: (error: T1CLibException, data: TokenCertificateResponse) => void): Promise<TokenCertificateResponse>;
nonRepudiationCertificate(parseCerts?: boolean, callback?: (error: T1CLibException, data: TokenCertificateResponse) => void): Promise<TokenCertificateResponse>;
encryptionCertificate(parseCerts?: boolean, callback?: (error: T1CLibException, data: TokenCertificateResponse) => void): Promise<TokenCertificateResponse>;
issuerCertificate(parseCerts?: boolean, callback?: (error: T1CLibException, data: TokenCertificateResponse) => void): Promise<TokenCertificateResponse>
allCertsExtended(parseCerts?: boolean, filters?: string[] | Options, callback?: (error: T1CLibException, data: TokenAllCertsExtendedResponse) => void): Promise<TokenAllCertsExtendedResponse>;
rootCertificateExtended(parseCerts?: boolean, callback?: (error: T1CLibException, data: TokenCertificateExtendedResponse) => void): Promise<TokenCertificateExtendedResponse>;
authenticationCertificateExtended(parseCerts?: boolean, callback?: (error: T1CLibException, data: TokenCertificateExtendedResponse) => void): Promise<TokenCertificateExtendedResponse>;
nonRepudiationCertificateExtended(parseCerts?: boolean, callback?: (error: T1CLibException, data: TokenCertificateExtendedResponse) => void): Promise<TokenCertificateExtendedResponse>;
encryptionCertificateExtended(parseCerts?: boolean, callback?: (error: T1CLibException, data: TokenCertificateExtendedResponse) => void): Promise<TokenCertificateExtendedResponse>;
issuerCertificateExtended(parseCerts?: boolean, callback?: (error: T1CLibException, data: TokenCertificateExtendedResponse) => void): Promise<TokenCertificateExtendedResponse>;
validateSignature(body: TokenValidateSignatureRequest, callback?: (error: T1CLibException, data: TokenValidateSignatureResponse) => void): Promise<TokenValidateSignatureResponse>;
verifyPin(body: TokenVerifyPinData, callback?: (error: T1CLibException, data: TokenVerifyPinResponse) => void): Promise<TokenVerifyPinResponse>;
authenticate(body: TokenAuthenticateOrSignData, callback?: (error: T1CLibException, data: TokenAuthenticateResponse) => void): Promise<TokenAuthenticateResponse>;
sign(body: TokenAuthenticateOrSignData, bulk?: boolean, callback?: (error: T1CLibException, data: TokenSignResponse) => void): Promise<TokenSignResponse>;
signRaw(body: TokenAuthenticateOrSignData, bulk?: boolean, callback?: (error: T1CLibException, data: TokenSignResponse) => void): Promise<TokenSignResponse>;
resetPin(body: TokenResetPinData, callback?: (error: T1CLibException, data: TokenResetPinResponse) => void): Promise<TokenResetPinResponse>
allAlgoRefs(callback?: (error: T1CLibException, data: TokenAlgorithmReferencesResponse) => void): Promise<TokenAlgorithmReferencesResponse>
resetBulkPin(callback?: (error: T1CLibException, data: BoolDataResponse) => void): Promise<BoolDataResponse>;
}
T1CSdk.T1CClient.initialize(config).then(res => {
const aventra = res.client.aventra(readerId);
}, err => {
console.error(error)
});module.tokenData().then(res => {
// see response below
}){
"success": true,
"data": {
"info": {
"slot": "string",
"label": "string",
"manufacturerId": "string",
"model": "string",
"serialNumber": "string",
"flags": {
"isRandomNumberGenerator": "boolean",
"isWriteProtected": "boolean",
"isLoginRequired": "boolean",
"isUserPinInitialized": "boolean",
"isRestoreKeyNotNeeded": "boolean",
"isClockOnToken": "boolean",
"isProtectedAuthenticationPath": "boolean",
"isDualCryptoOperations": "boolean",
"isTokenInitialized": "boolean",
"isSecondaryAuthentication": "boolean",
"isUserPinCountLow": "boolean",
"isUserPinFinalTry": "boolean",
"isUserPinLocked": "boolean",
"isUserPinToBeChanged": "boolean",
"isSoPinCountLow": "boolean",
"isSoPinFinalTry": "boolean",
"isSoPinLocked": "boolean",
"isSoPinToBeChanged": "boolean"
},
"mechanisms": [
{
"mechanism": "string",
"flags": {
"isHardware": "boolean",
"isEncrypt": "boolean",
"isDecrypt": "boolean",
"isDigest": "boolean",
"isSign": "boolean",
"isSignRecover": "boolean",
"isVerify": "boolean",
"isVerifyRecover": "boolean",
"isGenerate": "boolean",
"isGenerateKeyPair": "boolean",
"isWrap": "boolean",
"isUnwrap": "boolean",
"isExtension": "boolean",
"isEcFP": "boolean",
"isEcNamedcurve": "boolean",
"isEcUncompress": "boolean",
"isEcCompress": "boolean"
},
"ulMinKeySize": "number",
"ulMaxKeySize": "number"
}
],
"ulMaxSessionCount": "number",
"ulSessionCount": "number",
"ulMaxRwSessionCount": "number",
"ulMaxPinLen": "number",
"ulMinPinLen": "number",
"ulTotalPubLicMemory": "number",
"ulFreePubMemory": "number",
"ulTotalPrivateMemory": "number",
"ulFreePrivateMemory": "number",
"hardwareVersion": "string",
"firmwareVersion": "string"
},
"infoType": "TokenInfoType"
}
}
//ENUM
TokenInfoType {
Token,
PKCS11,
File,
Payment,
HSM,
Vault,
Wallet,
}aventra.allCertFilters().then(res => {
}, err => {
console.error(err)
}){
success: true,
data: ['rootCertificate', 'authenticationCertificate', 'encryptionCertificate', 'nonRepudiationCertificate', 'issuerCertificate']
}aventra.allKeyRefs().then(res => {
}, err => {
console.error(err)
}){
success: true,
data: ['authenticate', 'sign', 'encrypt']
}allCertsExtended(parseCerts?: boolean, filters?: string[] | Options, callback?: (error: T1CLibException, data: TokenAllCertsExtendedResponse) => void): Promise<TokenAllCertsExtendedResponse>;
rootCertificateExtended(parseCerts?: boolean, callback?: (error: T1CLibException, data: TokenCertificateExtendedResponse) => void): Promise<TokenCertificateExtendedResponse>;
authenticationCertificateExtended(parseCerts?: boolean, callback?: (error: T1CLibException, data: TokenCertificateExtendedResponse) => void): Promise<TokenCertificateExtendedResponse>;
nonRepudiationCertificateExtended(parseCerts?: boolean, callback?: (error: T1CLibException, data: TokenCertificateExtendedResponse) => void): Promise<TokenCertificateExtendedResponse>;
encryptionCertificateExtended(parseCerts?: boolean, callback?: (error: T1CLibException, data: TokenCertificateExtendedResponse) => void): Promise<TokenCertificateExtendedResponse>;
issuerCertificateExtended(parseCerts?: boolean, callback?: (error: T1CLibException, data: TokenCertificateExtendedResponse) => void): Promise<TokenCertificateExtendedResponse>;{
"success" : true
"data" : {
"certificates": [{
"certificate"?: string,
"certificateType"?: string,
"id"?: string,
"subject"?: string,
"issuer"?: string,
"serialNumber"?: string,
"url"?: string,
"hashSubPubKey"?: string,
"hashIssPubKey"?: string,
"exponent"?: string,
"remainder"?: string,
"parsedCertificate"?: Certificate
}]
}
}{
"success" : true
"data" : {
"rootCertificate": {
"certificates": [...]
},
"authenticationCertificate": {
"certificates": [...]
},
"nonRepudiationCertificate": {
"certificates": [...]
},
"encryptionCertificates": {
"certificates": [...]
},
"issuerCertificates": {
"certificates": [...]
}
}
}const filter = ['rootCertificate', 'authenticationCertificate', 'encryptionCertificate'];
aventra.allCerts(parseCertsBoolean, filter).then(res => {
res.data
}, err => {
console.error(err)
}){
"rootCertificate": {
...
},
"authenticationCertificate": {
...
},
"nonRepudiationCertificate": {
...
},
"intermediateCertificates": {
...
},
"encryptionCertificate": {
...
}
}aventra.tokenData().then(res => {
}, err => {
console.error(err)
}){
success: true,
data: {
version?: string,
serialNumber?: string,
label?: string,
changeCounter?: number,
}
}aventra.rootCertificate(parseCertsBoolean).then(res => {
}, err => {
console.error(err)
})aventra.authenticationCertificate(parseCertsBoolean).then(res => {
}, err => {
console.error(err)
})aventra.nonRepudiationCertificate(parseCertsBoolean).then(res => {
}, err => {
console.error(err)
})aventra.issuerCertificate(parseCertsBoolean).then(res => {
}, err => {
console.error(err)
})aventra.encryptionCertificate(parseCertsBoolean).then(res => {
}, err => {
console.error(err)
}){
success: true,
data: {
certificate?: string,
certificates?: Array<string>,
certificateType?: string,
id?: string,
parsedCertificate?: Certificate,
parsedCertificates?: Array<Certificate>
}
}const data = {
pin: "1234", // optional
osDialog: true // optional
}
aventra.verifyPin(data).then(res => {
}, err => {
console.error(err)
}){
success: true,
data: {
"verfied": true
}
}const data = {
algorithm: "sha256",
data: "E1uHACbPvhLew0gGmBH83lvtKIAKxU2/RezfBOsT6Vs=",
id: "123"
}
const bulk = false;
aventra.sign(data, bulk).then(res => {
}, err => {
console.error(err)
}){
success: true,
data: {
data: string
}
}var data = {
"algorithm":"sha256",
"data":"vl5He0ulthjX+VWNM46QX7vJ8VvXMq2k/Tq8Xq1bwEw=",
"osDialog": false,
"id": "1ooidifhv183"
}
aventra.signRaw(data, callback);aventra.resetBulkPin().then(res => {
}, err => {
console.error(err)
}){
"success": true,
"data": true
}const data = {
algorithm: "sha256",
data: "E1uHACbPvhLew0gGmBH83lvtKIAKxU2/RezfBOsT6Vs=",
id: "123"
}
aventra.authenticate(data).then(res => {
}, err => {
console.error(err)
}){
success: true,
data: {
data: string
}
}const data = {
pin: "3214", //optional
puk: "123123"
}
aventra.resetPin(data).then(res => {
}, err => {
console.error(err)
}){
success: true,
data: {
verified: boolean
}
}aventra.allAlgoRefs(data).then(res => {
}, err => {
console.error(err)
}){
success: true,
data: {
ref: ['sha256', 'md5']
}
}const body = {
"algorithm": 'sha256',
"hash": '...',
"signedHash": '...',
"osDialog": false,
"id": 'cert_id',
"pin": 'pin_code',
"timeout": 120 //timeout in seconds
}
safenet.validateSignature(body).then(response => {
response.valid
).catch(error => {
errorHandler(error)}
){
"success": true,
"data": {
"valid": true
}
}export class GCLConfigOptions {
constructor(public gclUrl?: string,
public gwOrProxyUrl?: string,
public apiKey?: string,
public gwJwt?: string,
public tokenExchangeContextPath?: string,
public ocvContextPath?: string,
public dsContextPath?: string,
public dsFileContextPath?: string,
public pkcs11Config?: Pkcs11ModuleConfig,
public agentPort?: number,
public implicitDownload?: boolean,
public forceHardwarePinpad?: boolean,
public sessionTimeout?: number,
public consentDuration?: number,
public consentTimeout?: number,
public syncManaged?: boolean,
public osPinDialog?: boolean,
public containerDownloadTimeout?: number,
public localTestMode?: boolean,
public lang?: string,
public providedContainers?: T1CContainerid[]) {
}
}class T1CConfigOptions {
constructor(
public t1cApiUrl?: string,
public t1cApiPort?: string,
public t1cProxyUrl?: string, // deprecated
public t1cProxyPort?: string, // deprecated
public jwt?: string,
public applicationDomain?: string, // "rmc.t1t.be"
) {}
}config = new GCLLib.GCLConfig(configoptions);
GCLLib.GCLClient.initialize(config).then(res => {
client = res;
core = client.core();
console.log("GCLClient: ", res)
}, err => {
console.log("GCL error:", err)
})config = new T1CSdk.T1CConfig(configoptions);
T1CSdk.T1CClient.initialize(config).then(res => {
client = res;
console.log("Client config: ", client.localConfig)
core = client.core();
}, err => {
errorHandler(err);
});var data = {
"pin": "...",
"algorithm": "sha1",
"data":"I2e+u/sgy7fYgh+DWA0p2jzXQ7E="
}
client.beid(reader_id).authenticate(data, callback);export interface AbstractEidBE {
allData(filters?: string[] | Options, callback?: (error: T1CLibException, data: TokenAllDataResponse) => void): Promise<TokenAllDataResponse>;
biometric(callback?: (error: T1CLibException, data: TokenBiometricDataResponse) => void): Promise<TokenBiometricDataResponse>;
tokenData(callback?: (error: T1CLibException, data: TokenInfoResponse) => void): Promise<TokenInfoResponse>;
address(callback?: (error: T1CLibException, data: TokenAddressResponse) => void): Promise<TokenAddressResponse>;
picture(callback?: (error: T1CLibException, data: TokenPictureResponse) => void): Promise<TokenPictureResponse>;
allCerts(parseCerts?: boolean, filters?: string[] | Options, callback?: (error: T1CLibException, data: TokenAllCertsResponse) => void): Promise<TokenAllCertsResponse>;
rootCertificate(parseCerts?: boolean, callback?: (error: T1CLibException, data: TokenCertificateResponse) => void): Promise<TokenCertificateResponse>;
intermediateCertificates(parseCerts?: boolean, callback?: (error: T1CLibException, data: TokenCertificateResponse) => void): Promise<TokenCertificateResponse>;
authenticationCertificate(parseCerts?: boolean, callback?: (error: T1CLibException, data: TokenCertificateResponse) => void): Promise<TokenCertificateResponse>;
nonRepudiationCertificate(parseCerts?: boolean, callback?: (error: T1CLibException, data: TokenCertificateResponse) => void): Promise<TokenCertificateResponse>;
encryptionCertificate(parseCerts?: boolean, callback?: (error: T1CLibException, data: TokenCertificateResponse) => void): Promise<TokenCertificateResponse>;
allCertsExtended(parseCerts?: boolean, filters?: string[] | Options, callback?: (error: T1CLibException, data: TokenAllCertsExtendedResponse) => void): Promise<TokenAllCertsExtendedResponse>;
rootCertificateExtended(parseCerts?: boolean, callback?: (error: T1CLibException, data: TokenCertificateExtendedResponse) => void): Promise<TokenCertificateExtendedResponse>;
intermediateCertificatesExtended(parseCerts?: boolean, callback?: (error: T1CLibException, data: TokenCertificateExtendedResponse) => void): Promise<TokenCertificateExtendedResponse>;
authenticationCertificateExtended(parseCerts?: boolean, callback?: (error: T1CLibException, data: TokenCertificateExtendedResponse) => void): Promise<TokenCertificateExtendedResponse>;
nonRepudiationCertificateExtended(parseCerts?: boolean, callback?: (error: T1CLibException, data: TokenCertificateExtendedResponse) => void): Promise<TokenCertificateExtendedResponse>;
encryptionCertificateExtended(parseCerts?: boolean, callback?: (error: T1CLibException, data: TokenCertificateExtendedResponse) => void): Promise<TokenCertificateExtendedResponse>;
verifyPin(body: TokenVerifyPinData, callback?: (error: T1CLibException, data: TokenVerifyPinResponse) => void): Promise<TokenVerifyPinResponse>;
authenticate(body: TokenAuthenticateOrSignData, callback?: (error: T1CLibException, data: TokenAuthenticateResponse) => void): Promise<TokenAuthenticateResponse>;
sign(body: TokenAuthenticateOrSignData, bulk?: boolean, callback?: (error: T1CLibException, data: TokenSignResponse) => void): Promise<TokenSignResponse>;
signRaw(body: TokenAuthenticateOrSignData, bulk?: boolean, callback?: (error: T1CLibException, data: TokenSignResponse) => void): Promise<TokenSignResponse>;
allAlgoRefs(callback?: (error: T1CLibException, data: TokenAlgorithmReferencesResponse) => void): Promise<TokenAlgorithmReferencesResponse>
resetBulkPin(callback?: (error: T1CLibException, data: BoolDataResponse) => void): Promise<BoolDataResponse>;
}T1CSdk.T1CClient.initialize(config).then(res => {
client = res;
}, err => {
console.error(error)
});var beid = client.beid(reader_id);function callback(err,data) {
if(err){console.log("Error:",JSON.stringify(err, null, ' '));}
else {console.log(JSON.stringify(data, null, ' '));}
}
beid.biometric(callback);var core = client.core();
core.readersCardAvailable(callback);{
"data": [
{
"card": {
"atr": "3B9813400AA503010101AD1311",
"description": ["Belgian eID Card"]
},
"id": "57a3e2e71c48cee9",
"name": "Bit4id miniLector",
"pinpad": false
}
],
"success": true
}var beid = client.beid(reader_id);client.beid(reader_id).biometric(callback);function callback(err,data) {
if(err){
console.log("Error:",JSON.stringify(err, null, ' '));
}
else {
console.log(JSON.stringify(data, null, ' '));
}
}{
"birthDate": "15 JUL 1993",
"birthLocation": "Roeselare",
"cardDeliveryMunicipality": "Avelgem",
"cardNumber": "592..8233",
"cardValidityDateBegin": "27.05.2015",
"cardValidityDateEnd": "27.05.2025",
"chipNumber": "U0xHk...EstwAjEpJQQg==",
"documentType": "01",
"firstNames": "Gilles Frans",
"name": "Platteeuw",
"nationalNumber": "930...154",
"nationality": "Belg",
"nobleCondition": "",
"pictureHash": "Fqva9YCp...JKyn8=",
"rawData": "AQw1OTIxMjQwNTgy...TARFBar2vWAqTW+axEIuyskBgFySsp/",
"sex": "M",
"signature": "hKys9WMjUm4ipg...14xUCg/98Y9/gP/vgG7JTRZJoKgDXLLTvLZO4qlfA==",
"specialStatus": "0",
"thirdName": "J",
"version": "0"
}client.beid(reader_id).address(callback);{
"municipality": "Hoeselt",
"rawData": "ARJLZXJrc...AAAAAA==",
"signature": "mhPyeRg25H...w==",
"streetAndNumber": "Kerkstraat X",
"version": "0",
"zipcode": "3730"
}client.beid(reader_id).picture(callback);{
"data": "/9j/4AAQSkZJRgABA...59aVpcklSDzyKUTEDGK//9k=",
"success": true
}{
"info": {
"rawData": "string",
"version": "string",
"serialNumber": "string",
"label": "string",
"prnGeneration": "string",
"eidCompliant": "string",
"graphicalPersoVersion": "string",
"versionRfu": "string",
"electricalPersoVersion": "string",
"electricalPersoInterfaceVersion": "string",
"changeCounter": "number",
"activated": "string",
},
"infoType": "Token"
}allCertsExtended(parseCerts?: boolean, filters?: string[] | Options, callback?: (error: T1CLibException, data: TokenAllCertsExtendedResponse) => void): Promise<TokenAllCertsExtendedResponse>;
rootCertificateExtended(parseCerts?: boolean, callback?: (error: T1CLibException, data: TokenCertificateExtendedResponse) => void): Promise<TokenCertificateExtendedResponse>;
intermediateCertificatesExtended(parseCerts?: boolean, callback?: (error: T1CLibException, data: TokenCertificateExtendedResponse) => void): Promise<TokenCertificateExtendedResponse>;
authenticationCertificateExtended(parseCerts?: boolean, callback?: (error: T1CLibException, data: TokenCertificateExtendedResponse) => void): Promise<TokenCertificateExtendedResponse>;
nonRepudiationCertificateExtended(parseCerts?: boolean, callback?: (error: T1CLibException, data: TokenCertificateExtendedResponse) => void): Promise<TokenCertificateExtendedResponse>;
encryptionCertificateExtended(parseCerts?: boolean, callback?: (error: T1CLibException, data: TokenCertificateExtendedResponse) => void): Promise<TokenCertificateExtendedResponse>;{
"success" : true
"data" : {
"certificates": [{
"certificate"?: string,
"certificateType"?: string,
"id"?: string,
"subject"?: string,
"issuer"?: string,
"serialNumber"?: string,
"url"?: string,
"hashSubPubKey"?: string,
"hashIssPubKey"?: string,
"exponent"?: string,
"remainder"?: string,
"parsedCertificate"?: Certificate
}]
}
}{
"success" : true
"data" : {
"rootCertificate": {
"certificates": [...]
},
"authenticationCertificate": {
"certificates": [...]
},
"nonRepudiationCertificate": {
"certificates": [...]
},
"intermediateCertificates": {
"certificates": [...]
},
"encryptionCertificate": {
"certificates": [...]
}
}
}client.beid(reader_id).rootCertificate(parseCertsBoolean, callback);{
success: true,
data: {
certificate?: string,
certificates?: Array<string>,
certificateType?: string,
id?: string,
parsedCertificate?: Certificate,
parsedCertificates?: Array<Certificate>
}
}client.beid(reader_id).authenticationCertificate(parseCertsBoolean, callback);{
success: true,
data: {
certificate?: string,
certificates?: Array<string>,
certificateType?: string,
id?: string,
parsedCertificate?: Certificate,
parsedCertificates?: Array<Certificate>
}
}client.beid(reader_id).intermediateCertificates(parseCertsBoolean, callback);{
success: true,
data: {
certificate?: string,
certificates?: Array<string>,
certificateType?: string,
id?: string,
parsedCertificate?: Certificate,
parsedCertificates?: Array<Certificate>
}
}client.beid(reader_id).nonRepudiationCertificate(parseCertsBoolean, callback);{
success: true,
data: {
certificate?: string,
certificates?: Array<string>,
certificateType?: string,
id?: string,
parsedCertificate?: Certificate,
parsedCertificates?: Array<Certificate>
}
}client.beid(reader_id).encryptionCertificate(parseCertsBoolean, callback);{
success: true,
data: {
certificate?: string,
certificates?: Array<string>,
certificateType?: string,
id?: string,
parsedCertificate?: Certificate,
parsedCertificates?: Array<Certificate>
}
}var filter = [];
client.beid(reader_id).allData({ filters: filter}, callback);{
"picture": {
"picture": "/9j/4AAQSkZJRgABAgEBLAEsAAD/.../wAALCADIAIwBAREA/8QA0gAAAQUBAQEBAQEAAAAAAAAAAAECAwQFBgcICQoLEAACAQMDAgQDBQUEBAAAAX0BAgMABBEFEiExQQYTUWEHInEUMoGRoQgjQrHBFVLR8CQzYnKCCQoWFxgZGiUmJygpKjQ1Njc4OTpDREVGR0hJSlNUVVZXWFlaY2RlZmdoaWpzdHV2d3h5eoOEhYaHiImKkpOUlZaXmJmaoqOkpaanqKmqsrO0tba3uLm6wsPExcbHyMnK0tPU1dbX2Nna4eLj5OXm5+jp6vHy8/T19vf4+fr/2gAIAQEAAD8A9JpKKWiikooooopaKSilooooopKr3d9bWaFriVEwM4J5Ncjq3jUxkixQADozjJNcze+L9WndWF20OOCI/lzRb+KtYjhIN67Z7vyf1qT/AIS3Wc5F2OnQgY/lWrovjC7hYLqJ86IkksPvCustPEumXbbUuAjYzh+K1UkWRA6MGU9CDkGn0UUUUUUUhOBk8CuY1zxOls/kWjbnH3pAMgewrz7VtWmu7gvJIzZ65NZk1wSBjOagWbn5lB+vagy7+2KlilUE7eRj1qS3ncSEE4X3qwzNs81Dgg9K19G8VXumTLFv8yDOWjb+len6bqMGp2qz2zZU8Ed1PpVyiiiiio5pkgiaSRgqKMkmuH8ReKXlMlpAAkHRnB5b29q4+e5HzAHjPFZkoLyhevH6014XUcjBqAow5xQEYjFPClDxkCnq20AkZ/xqyl2oUK4xu6n0qwgguZQ28K2Ofc1v6Pqs2lSRGJzsLAOv94d69MtriO6gSaFgyMMg1LS0UUlcn491FbfS/sicyzEH6AGvOCzuApPOakt7CWYk7TjNXE0iUNnyyfpVqPQ53XiNwPepYfDMhb94GAq5/wAIzbhc4IPpVK/8OYjzEMmsWbRZ0XIUnHtVRrR4/vqR9RSwQGXdt4Zav2rbFww6DI5ruvBuqIIjaSuMu2Y8/TpXYUtFFIa8r8W6h9v1d9mCqHYuO4FVdM0t7iZWb8a6y10+KNQCOlXFijQfKop6g9hUmw4pjoRzmopEyvIqrJEjDGKpXGnwzoQ68+1YNxpv2Ry8RPHrVGUqse4MN38Qq7o8o8kOh+dG3AjsRXpejapHqVsDkLMo+dM8/WtOiis/WrxrHTJp1GWAwOeme9eWqqzTln6k5rqNLhWKFcDmtJRk1aSPPWp0i21J5dRSx8VWKVXkQA1WmwvGDzWVegSRsp4zXNT2WwMASSxqa1kNimMBkOB9fWt7QLx4ddgaNCyyLtIHevR6Wiuf8ZsRobAdWcD+dcLYQZlHck/lXWQKEjUVZj69OlXI+manXnvTiADioXPJ4qBhVaQ/NVWbkZ7VlXeDmqRYY27Rn1rOmkDXOwKBgH8av6XOba9guVz8hA2+1epg5GaWiuf8ZqTom4fwyKf5iuS0uFiQcV0MYwgBqxH1FWl6VLGeKcxOOaaRmoZAcVTkBqrOcL61j3B5NVgducVXkeOOXLKMt1p9tIsyjaAMGvVI+I1+gp9FZXiOAT6LcKRnaN35Vy+lhfKJ9Kv+cifeYACpIry3A5kA+tW1uYmXKuD+NSRzDseKl3gjrTS47UhYAGqFxINxqhcSA8ZrPlQmq8kZArNujljkdBUuhAy3cUOOWdRXrY4FLRUN0iSW8iSkBGUg5riLGMrbzxq3IkI3CozpuWZmnkye+6qT6TlmPnkk9M1Smsbq3OUuOOvWtDTrq4j+V5CRn1rpIZy6ZNSbiBz1qneXphFcpqmqzyNiJiBnqKyl+33DDZJL9dxq2i6pDg7mYehNX7a/lx5d5EADwGHUVBeR/MfT2q/4It2n10vtykY3H29K9MpaSsLxKJJo4oI5Ci53NjvWbbweUGAH3sE5qG8DpnqB7CsKNru7umitUKgdXbqay3m1L7cluxlMm/DAqMYrqLfTW5DKAw7joa1LRCnDVNelYo91cXq13NcMfLDbAcA+tVbXTppyzMrNtGSq9RTP7VhgZY44HBP+1k1Zi1LzZNgbOexGCKS8kwQcc1LM4ayeT0Sl8M+IhpDzfuA4kwCe+BXqFldxXtrHcQnKOMjNWKSsfV48zI3qMVVwpIA5xxTpI1bqBVNrRQ25EwfVaja3cybtgz/eK81ahjKrz1pTwR6k1U1aQ/Zm57VhQKDGhAyBWxatHACUXbuHOO9Yt3plol01wkWSTnGazLixaW5EsSbSO4q5HZu6Ey9R0qLUQYNOcdA3FY1vGS4wK9f8NQtBolurdSC2PrWtRWfqoHlI3cHFZUXJJ9TU3U4xxTguKdsyM1FINtQNjcKpauC1uwHORWLYsAAhPStqOPKAjoaHhU8Fc1G0KDouKgmUBTisDXCTBGoxgtk1W02AysoUclgK9it4hDBHGOiKFqWiqWppvtT7EGsgKoGVJB7ip161KoWlY4qrctjGOpqCJd74JqLUlVYic8YrlI22ySSKehzXUWDCa2RxzkVaaMVUnXaDWXdzBVIzziuf1Pc80MS9x1rd8Maa39qxRucqhDtj2r0elopkiCRGRuhGKxJreaFipQlB/EBTA2Dih5tg4ySeAKlUnbufr6VBOpkBA4PassR3NtIZJJ/MB/h24xWDr+rySYihU+/NZULXMkXlrHyepFdfoYaG1RG5IFa7yZTIrNv5gqHmudnn3zgdeazrjL3+7PyggV6J4QgY28ly643YRT64610tFFJTXXcjL6jFc+/BIP8ACcUKoEm888YFI13GuVkbafehZ4uu8UOYpVwGGazp9KtmYs2AfempZQx524pyusRAyKkEuXU9jxWNrUxUsnc1k26F50U9WIFd1F4N08XCzu0rdCUJ4Jro0RY0VEUKqjAA7U+iiikrCvV2Xki9ic1BExDYPOKL6xhvIdrqM9j6VjmwNuNiu6/8CzUiW0uw73bOOCADVO7hulGRIxY9iOKy5RfgnbKB+NLZWWp3EwMtwBHnPU8106xrFGiZzt5JNcpqdyLnVWVOUU81a0GL7TrdsmMgOCfoDmvUaWiiiikrM1aHlJh0HBrNBAcZqcnH0qJ1EnBGaqvGy/dPFU51mfv+tVRaNnLc/Wp0cRLgHmqup35hs2AJ8xxgYrBijKRlm+8eSa6nwLbbryW4b+EYFd5RRRRRRVXURmxlz7fzrmDJ820noavoQ0WCcmlQZpXjBGarMijpzVedBtJNZczbSTmsW6k864BY/Kvaomk3sFB4rtfBO398F6BcV19FFFFFFVr/AJs5fpXLXEJK716imWt5tOxzir6Tqe9JLcAcbhUTTrt4Iqhc3IOQGrA1C/CcZ56VkPOzHr1p0JZ32r07mu/8ELsaYZ5K5rsKKKKSloqtfnFnL9KwkAP41Qv7I53R9ax5ri5tzhg31qm+qzdDzUb6zKBjAqlNqkrZxwTWe8jSOSSSalhiaRgO1a1tAsYA711/hA7bpx6qa7CikpaSio1njZioYZHWs/UdQtmhlgjnjeUYyinJHPes2M5HNPYDbiqr28cvyuoIqjceH7eQ5AI+lZ0vhyME4Z/zqjPoiRZ5aqBslRulXbe3woOKtLGc8itvQJxbXqseh4NdRPqaxpujjMnqAcYHrToNShlAz8h96mkvLeJQ0k8aKe7MBT0uIZF3JNGy+qsCKqajfx2gUFvmJ6ZrB1HxUkSttIGOOtcpfeK5jC8dsxDP1f0+laehxeVp8cjcyTfOxPU1uRmpm6VAchqkEmKjkcYz0rJvGDZrJMe+Tgd6vRwbU6UpTBqS1O2ZT71vRkSJtakaARITyy+3UVyXiXUTvijEqugB+6en1rJi1AqmN7D6Gut8S61a6XKipbieSRSSXPSuBv8AUZbyQlwFXP3VGAKp7q9B0OTzdLtG/wBnH5VtR1Z6ionXnIprDI6VWkjB/i5qnPCMHAqCCAeZyKutGoWqsvBqOM4cH3rcgOQKvRNxisbxB4ettQgaZcRToM7gOv1rgEvzAvl+VE+D1K1//9k="
},
"biometric": {
"birthDate": "15 JUL 1993",
"birthLocation": "Roeselare",
"cardDeliveryMunicipality": "Avelgem",
"cardNumber": "592124058233",
"cardValidityDateBegin": "27.05.2015",
"cardValidityDateEnd": "27.05.2025",
"chipNumber": "...==",
"documentType": "01",
"firstNames": "Gilles Frans",
"name": "Platteeuw",
"nationalNumber": "...",
"nationality": "Belg",
"nobleCondition": "",
"pictureHash": "...=",
"rawData": "...+axEIuyskBgFySsp/",
"sex": "M",
"signature": ".../OlA44h4YCM/h+J14xUCg/98Y9/.../C/RB2dtVbHwFvDuafmr4ZEshTlZTLidHKlISFvFWOtsLAEPCbl5LjfQwcOKe0pDADtHb4IStBnr+aaE8oHsTaKq66Y+zt+AbwdmWOrMA5URKKf7dZkY7jt3h8KZDw36VjcytUgjxVIdqwHsDkmIjK6mJtakIwybS5wn3RiQj33/vgG7JTRZJoKgDXLLTvLZO4qlfA==",
"specialStatus": "0",
"thirdName": "J",
"version": "0"
},
"address": {
"municipality": "Hoeselt",
"rawData": "...==",
"signature": "...+Evety1PnTE4pqXaHgBxIpk+P8kRL5W3zDV+../../..+YoHBC9KqTmSpl5KULxdnKiyCt+2RyJdzE2wyoymjRmysIhJy1wW9PRnx99S1TFqQLuc0tyBmkBPR4aFqmOq4a7zqd0q2Q1g+BbnwJ4d3oa10ia5+0kBXf0THoXv3HYIHlnwhBMfAtWzPnFrYBuAKTwyl7yBF5IFfXFpGWuVZUTJElgNcmNvsHMnAhVwDw==",
"streetAndNumber": "Kerkstraat X",
"version": "0",
"zipcode": "3730"
}
}var filter = ['biometric'];
client.beid().allData({ filters: filter }, callback);{
"biometric": {
"birthDate": "15 JUL 1993",
"birthLocation": "Roeselare",
"cardDeliveryMunicipality": "Avelgem",
"cardNumber": "592124058233",
"cardValidityDateBegin": "27.05.2015",
"cardValidityDateEnd": "27.05.2025",
"chipNumber": "...==",
"documentType": "01",
"firstNames": "Gilles Frans",
"name": "Platteeuw",
"nationalNumber": "...",
"nationality": "Belg",
"nobleCondition": "",
"pictureHash": "...=",
"rawData": "...+axEIuyskBgFySsp/",
"sex": "M",
"signature": ".../OlA44h4YCM/h+J14xUCg/98Y9/.../C/RB2dtVbHwFvDuafmr4ZEshTlZTLidHKlISFvFWOtsLAEPCbl5LjfQwcOKe0pDADtHb4IStBnr+aaE8oHsTaKq66Y+zt+AbwdmWOrMA5URKKf7dZkY7jt3h8KZDw36VjcytUgjxVIdqwHsDkmIjK6mJtakIwybS5wn3RiQj33/vgG7JTRZJoKgDXLLTvLZO4qlfA==",
"specialStatus": "0",
"thirdName": "J",
"version": "0"
}
}var filter = [];
client.beid(reader_id).allCerts(parseCerts, { filters: filter}, callback);{
"rootCertificate": {
...
},
"authenticationCertificate": {
...
},
"nonRepudiationCertificate": {
...
},
"intermediateCertificates": {
...
},
"encryptionCertificate": {
...
}
}var filter = ['rootCertificate'];
client.beid(reader_id).allCerts(parseCerts, { filters: filter}, callback);{
"rootCertificate": {
...
}
}var filter = null;
client.beid(reader_id).allCerts(parseCerts, { filters: filter}, callback);{
"rootCertificate": {
...
},
"authenticationCertificate": {
...
},
"nonRepudiationCertificate": {
...
},
"intermediateCertificates": {
...
},
"encryptionCertificate": {
...
}
}var data = {
"pin":"...",
"algorithm":"sha1",
"data":"I2e+u/sgy7fYgh+DWA0p2jzXQ7E=",
"osDialog": true,
"txId": "1234",
"language": "fr"
}
client.beid(reader_id).sign(data, callback);var data = {
"pin":"...",
"algorithm":"sha1",
"data":"I2e+u/sgy7fYgh+DWA0p2jzXQ7E=",
"osDialog": true
}
client.beid(reader_id).sign(data, callback);{
"success": true,
"data": {
"data" : "W7wqvWA8m9S...="
}
}var data = {
"algorithm":"sha1",
"data":"I2e+u/sgy7fYgh+DWA0p2jzXQ7E=",
"osDialog": false
}
client.beid(reader_id).sign(data, callback);{
"success": true,
"data": {
"data" : "W7wqvWA8m9S...="
}
}var data = {
"algorithm":"sha256",
"data":"vl5He0ulthjX+VWNM46QX7vJ8VvXMq2k/Tq8Xq1bwEw=",
"osDialog": false
}
beid.signRaw(data, callback);const data = {
algorithm: "sha256",
data: "E1uHACbPvhLew0gGmBH83lvtKIAKxU2/RezfBOsT6Vs=",
pin: "1234"
}
const bulk = true;
beid.sign(data, bulk).then(res => {
}, err => {
console.error(err)
})beid.resetBulkPin().then(res => {
}, err => {
console.error(err)
}){
"success": true,
"data": true
}This is sample text to demonstrate siging with Belgian eID135b870026cfbe12dec348069811fcde5bed28800ac54dbf45ecdf04eb13e95bE1uHACbPvhLew0gGmBH83lvtKIAKxU2/RezfBOsT6Vs=var data = {
"pin":"...",
"algorithm":"sha256",
"data":"E1uHACbPvhLew0gGmBH83lvtKIAKxU2/RezfBOsT6Vs="
}
client.beid(reader_id).signData(data, callback);{
"success": true,
"data": {
"data" : "W7wqvWA8m9S...="
}
}var data = {
"pin":"..."
}
client.beid(reader_id).verifyPin(data, callback);{
"verified": true
}var data = {}
client.beid(reader_id).verifyPin(data, callback);{
"verified": true
} $("#buttonValidate").on('click', function () {
var _body={};
_body.pin = $("#psw").val(); //only when no pin-pad available
var beid = client.beid(reader_id);
beid.verifyPin(_body, validationCallback);
});The calculated digest of the hash is prefixed with:
DigestInfo ::= SEQUENCE {
digestAlgorithm AlgorithmIdentifier,
digest OCTET STRING
}
Make sure this has been taken into consideration in order to validate the signature in a backend process.generic.allAlgoRefs(module, callback);{
"success": true,
"data": ["sha1", "sha256"]
}{
"success": true,
"data": {
"data" : "W7wqvWA8m9S...="
}
}export interface AbstractEherkenning {
allCerts(parseCerts?: boolean, filters?: string[] | Options, callback?: (error: T1CLibException, data: TokenAllCertsResponse) => void): Promise<TokenAllCertsResponse>;
authenticationCertificate(parseCerts?: boolean, callback?: (error: T1CLibException, data: TokenCertificateResponse) => void): Promise<TokenCertificateResponse>;
nonRepudiationCertificate(parseCerts?: boolean, callback?: (error: T1CLibException, data: TokenCertificateResponse) => void): Promise<TokenCertificateResponse>;
allCertsExtended(parseCerts?: boolean, filters?: string[] | Options, callback?: (error: T1CLibException, data: TokenAllCertsExtendedResponse) => void): Promise<TokenAllCertsExtendedResponse>;
authenticationCertificateExtended(parseCerts?: boolean, callback?: (error: T1CLibException, data: TokenCertificateExtendedResponse) => void): Promise<TokenCertificateExtendedResponse>;
nonRepudiationCertificateExtended(parseCerts?: boolean, callback?: (error: T1CLibException, data: TokenCertificateExtendedResponse) => void): Promise<TokenCertificateExtendedResponse>;
validateSignature(body: TokenValidateSignatureRequest, callback?: (error: T1CLibException, data: TokenValidateSignatureResponse) => void): Promise<TokenValidateSignatureResponse>;
verifyPin(body: TokenVerifyPinData, callback?: (error: T1CLibException, data: TokenVerifyPinResponse) => void): Promise<TokenVerifyPinResponse>;
authenticate(body: TokenAuthenticateOrSignData, callback?: (error: T1CLibException, data: TokenAuthenticateResponse) => void): Promise<TokenAuthenticateResponse>;
sign(body: TokenAuthenticateOrSignData, bulk?: boolean, callback?: (error: T1CLibException, data: TokenSignResponse) => void): Promise<TokenSignResponse>;
signRaw(body: TokenAuthenticateOrSignData, bulk?: boolean, callback?: (error: T1CLibException, data: TokenSignResponse) => void): Promise<TokenSignResponse>;
allAlgoRefs(callback?: (error: T1CLibException, data: TokenAlgorithmReferencesResponse) => void): Promise<TokenAlgorithmReferencesResponse>
resetBulkPin(callback?: (error: T1CLibException, data: BoolDataResponse) => void): Promise<BoolDataResponse>;
}module.tokenData().then(res => {
// see response below
}){
"success": true,
"data": {
"info": {
"slot": "string",
"label": "string",
"manufacturerId": "string",
"model": "string",
"serialNumber": "string",
"flags": {
"isRandomNumberGenerator": "boolean",
"isWriteProtected": "boolean",
"isLoginRequired": "boolean",
"isUserPinInitialized": "boolean",
"isRestoreKeyNotNeeded": "boolean",
"isClockOnToken": "boolean",
"isProtectedAuthenticationPath": "boolean",
"isDualCryptoOperations": "boolean",
"isTokenInitialized": "boolean",
"isSecondaryAuthentication": "boolean",
"isUserPinCountLow": "boolean",
"isUserPinFinalTry": "boolean",
"isUserPinLocked": "boolean",
"isUserPinToBeChanged": "boolean",
"isSoPinCountLow": "boolean",
"isSoPinFinalTry": "boolean",
"isSoPinLocked": "boolean",
"isSoPinToBeChanged": "boolean"
},
"mechanisms": [
{
"mechanism": "string",
"flags": {
"isHardware": "boolean",
"isEncrypt": "boolean",
"isDecrypt": "boolean",
"isDigest": "boolean",
"isSign": "boolean",
"isSignRecover": "boolean",
"isVerify": "boolean",
"isVerifyRecover": "boolean",
"isGenerate": "boolean",
"isGenerateKeyPair": "boolean",
"isWrap": "boolean",
"isUnwrap": "boolean",
"isExtension": "boolean",
"isEcFP": "boolean",
"isEcNamedcurve": "boolean",
"isEcUncompress": "boolean",
"isEcCompress": "boolean"
},
"ulMinKeySize": "number",
"ulMaxKeySize": "number"
}
],
"ulMaxSessionCount": "number",
"ulSessionCount": "number",
"ulMaxRwSessionCount": "number",
"ulMaxPinLen": "number",
"ulMinPinLen": "number",
"ulTotalPubLicMemory": "number",
"ulFreePubMemory": "number",
"ulTotalPrivateMemory": "number",
"ulFreePrivateMemory": "number",
"hardwareVersion": "string",
"firmwareVersion": "string"
},
"infoType": "TokenInfoType"
}
}
//ENUM
TokenInfoType {
Token,
PKCS11,
File,
Payment,
HSM,
Vault,
Wallet,
}allCertsExtended(parseCerts?: boolean, filters?: string[] | Options, callback?: (error: T1CLibException, data: TokenAllCertsExtendedResponse) => void): Promise<TokenAllCertsExtendedResponse>;
authenticationCertificateExtended(parseCerts?: boolean, callback?: (error: T1CLibException, data: TokenCertificateExtendedResponse) => void): Promise<TokenCertificateExtendedResponse>;
nonRepudiationCertificateExtended(parseCerts?: boolean, callback?: (error: T1CLibException, data: TokenCertificateExtendedResponse) => void): Promise<TokenCertificateExtendedResponse>;
encryptionCertificateExtended(parseCerts?: boolean, callback?: (error: T1CLibException, data: TokenCertificateExtendedResponse) => void): Promise<TokenCertificateExtendedResponse>;
rootCertificateExtended(parseCerts?: boolean, callback?: (error: T1CLibException, data: TokenCertificateExtendedResponse) => void): Promise<TokenCertificateExtendedResponse>;{
"success" : true
"data" : {
"certificates": [{
"certificate"?: string,
"certificateType"?: string,
"id"?: string,
"subject"?: string,
"issuer"?: string,
"serialNumber"?: string,
"url"?: string,
"hashSubPubKey"?: string,
"hashIssPubKey"?: string,
"exponent"?: string,
"remainder"?: string,
"parsedCertificate"?: Certificate
}]
}
}{
"success" : true
"data" : {
"authenticationCertificate": {
"certificates": [...]
},
"nonRepudiationCertificate": {
"certificates": [...]
},
"encryptionCertificate": {
"certificates": [...]
},
"rootCertificate": {
"certificates": [...]
}
}
}generic.authenticationCertificate(module, parseCertsBoolean, callback);{
success: true,
data: {
certificate?: string,
certificates?: Array<string>,
certificateType?: string,
id?: string,
parsedCertificate?: Certificate,
parsedCertificates?: Array<Certificate>
}
}generic.nonRepudiationCertificate(module, parseCertsBoolean, callback);{
success: true,
data: {
certificate?: string,
certificates?: Array<string>,
certificateType?: string,
id?: string,
parsedCertificate?: Certificate,
parsedCertificates?: Array<Certificate>
}
}generic.nonRepudiationCertificate(module, parseCertsBoolean, callback);{
success: true,
data: {
certificate?: string,
certificates?: Array<string>,
certificateType?: string,
id?: string,
parsedCertificate?: Certificate,
parsedCertificates?: Array<Certificate>
}
}generic.rootCertificate(module, parseCertsBoolean, callback);{
success: true,
data: {
certificate?: string,
certificates?: Array<string>,
certificateType?: string,
id?: string,
parsedCertificate?: Certificate,
parsedCertificates?: Array<Certificate>
}
}var filter = [];
generic.allCerts(module, parseCerts, { filters: filter}, callback);{
"authenticationCertificate": {
...
},
"nonRepudiationCertificate": {
...
},
"encryptionCertificate": {
...
}
}var filter = ['authenticationCertificate'];
generic.allCerts(module, { filters: filter}, callback);{
"authenticationCertificate": {
...
}
}var filter = null;
module.allCerts({ filters: filter}, callback);{
"authenticationCertificate": {
...
},
"nonRepudiationCertificate": {
...
}
}var data = {
"algorithm":"sha256",
"data":"vl5He0ulthjX+VWNM46QX7vJ8VvXMq2k/Tq8Xq1bwEw=",
"osDialog": false
}
module.signRaw(data, callback);var data = {
"pin":"...",
"algorithm":"sha256",
"data":"n4bQgYhMfWWaL+qgxVrQFaO/TxsrC4Is0V1sFbDwCgg="
"osDialog": true
}
module.sign(data, callback);{
"success": true,
"data": {
"data" : "W7wqvWA8m9S...="
}
}var data = {
"algorithm": "sha256",
"data":"n4bQgYhMfWWaL+qgxVrQFaO/TxsrC4Is0V1sFbDwCgg="
"osDialog": false
}
module.sign(data, callback);{
"success": true,
"data": {
"data" : "W7wqvWA8m9S...="
}
}const body = {
"algorithm": 'sha256',
"hash": '...',
"signedHash": '...',
"osDialog": false,
"id": 'cert_id',
"pin": 'pin_code',
"timeout": 120 //timeout in seconds
}
safenet.validateSignature(body).then(response => {
response.valid
).catch(error => {
errorHandler(error)}
){
"success": true,
"data": {
"valid": true
}
}export interface AbstractEidGeneric {
allCerts(parseCerts?: boolean, filters?: string[] | Options, callback?: (error: T1CLibException, data: TokenAllCertsResponse) => void): Promise<TokenAllCertsResponse>;
authenticationCertificate(parseCerts?: boolean, callback?: (error: T1CLibException, data: TokenCertificateResponse) => void): Promise<TokenCertificateResponse>;
nonRepudiationCertificate(parseCerts?: boolean, callback?: (error: T1CLibException, data: TokenCertificateResponse) => void): Promise<TokenCertificateResponse>;
rootCertificate(parseCerts?: boolean, callback?: (error: T1CLibException, data: TokenCertificateResponse) => void): Promise<TokenCertificateResponse>;
encryptionCertificate(parseCerts?: boolean, callback?: (error: T1CLibException, data: TokenCertificateResponse) => void): Promise<TokenCertificateResponse>;
issuerCertificate(parseCerts?: boolean, callback?: (error: T1CLibException, data: TokenCertificateResponse) => void): Promise<TokenCertificateResponse>;
allCertsExtended(parseCerts?: boolean, filters?: string[] | Options, callback?: (error: T1CLibException, data: TokenAllCertsExtendedResponse) => void): Promise<TokenAllCertsExtendedResponse>;
rootCertificateExtended(parseCerts?: boolean, callback?: (error: T1CLibException, data: TokenCertificateExtendedResponse) => void): Promise<TokenCertificateExtendedResponse>;
authenticationCertificateExtended(parseCerts?: boolean, callback?: (error: T1CLibException, data: TokenCertificateExtendedResponse) => void): Promise<TokenCertificateExtendedResponse>;
nonRepudiationCertificateExtended(parseCerts?: boolean, callback?: (error: T1CLibException, data: TokenCertificateExtendedResponse) => void): Promise<TokenCertificateExtendedResponse>;
encryptionCertificateExtended(parseCerts?: boolean, callback?: (error: T1CLibException, data: TokenCertificateExtendedResponse) => void): Promise<TokenCertificateExtendedResponse>;
issuerCertificateExtended(parseCerts?: boolean, callback?: (error: T1CLibException, data: TokenCertificateExtendedResponse) => void): Promise<TokenCertificateExtendedResponse>;
validateSignature(body: TokenValidateSignatureRequest, callback?: (error: T1CLibException, data: TokenValidateSignatureResponse) => void): Promise<TokenValidateSignatureResponse>;
verifyPin(body: TokenVerifyPinData, callback?: (error: T1CLibException, data: TokenVerifyPinResponse) => void): Promise<TokenVerifyPinResponse>;
authenticate(body: TokenAuthenticateOrSignData, callback?: (error: T1CLibException, data: TokenAuthenticateResponse) => void): Promise<TokenAuthenticateResponse>;
sign(body: TokenAuthenticateOrSignData, bulk?: boolean, callback?: (error: T1CLibException, data: TokenSignResponse) => void): Promise<TokenSignResponse>;
signRaw(body: TokenAuthenticateOrSignData, bulk?: boolean, callback?: (error: T1CLibException, data: TokenSignResponse) => void): Promise<TokenSignResponse>;
allAlgoRefs(callback?: (error: T1CLibException, data: TokenAlgorithmReferencesResponse) => void): Promise<TokenAlgorithmReferencesResponse>
resetBulkPin(callback?: (error: T1CLibException, data: BoolDataResponse) => void): Promise<BoolDataResponse>;
}T1CSdk.T1CClient.initialize(config).then(res => {
client = res;
}, err => {
console.error(error)
});var core = client.core();
core.readersCardAvailable(callback);{
"data": [
// List of reader with cards found
],
"success": true
}const moduleName = "airbus";
var module = client.generic(selected_reader.id);var module = client.airbus(selected_reader.id);module.tokenData().then(res => {
// see response below
}){
"success": true,
"data": {
"info": {
"slot": "string",
"label": "string",
"manufacturerId": "string",
"model": "string",
"serialNumber": "string",
"flags": {
"isRandomNumberGenerator": "boolean",
"isWriteProtected": "boolean",
"isLoginRequired": "boolean",
"isUserPinInitialized": "boolean",
"isRestoreKeyNotNeeded": "boolean",
"isClockOnToken": "boolean",
"isProtectedAuthenticationPath": "boolean",
"isDualCryptoOperations": "boolean",
"isTokenInitialized": "boolean",
"isSecondaryAuthentication": "boolean",
"isUserPinCountLow": "boolean",
"isUserPinFinalTry": "boolean",
"isUserPinLocked": "boolean",
"isUserPinToBeChanged": "boolean",
"isSoPinCountLow": "boolean",
"isSoPinFinalTry": "boolean",
"isSoPinLocked": "boolean",
"isSoPinToBeChanged": "boolean"
},
"mechanisms": [
{
"mechanism": "string",
"flags": {
"isHardware": "boolean",
"isEncrypt": "boolean",
"isDecrypt": "boolean",
"isDigest": "boolean",
"isSign": "boolean",
"isSignRecover": "boolean",
"isVerify": "boolean",
"isVerifyRecover": "boolean",
"isGenerate": "boolean",
"isGenerateKeyPair": "boolean",
"isWrap": "boolean",
"isUnwrap": "boolean",
"isExtension": "boolean",
"isEcFP": "boolean",
"isEcNamedcurve": "boolean",
"isEcUncompress": "boolean",
"isEcCompress": "boolean"
},
"ulMinKeySize": "number",
"ulMaxKeySize": "number"
}
],
"ulMaxSessionCount": "number",
"ulSessionCount": "number",
"ulMaxRwSessionCount": "number",
"ulMaxPinLen": "number",
"ulMinPinLen": "number",
"ulTotalPubLicMemory": "number",
"ulFreePubMemory": "number",
"ulTotalPrivateMemory": "number",
"ulFreePrivateMemory": "number",
"hardwareVersion": "string",
"firmwareVersion": "string"
},
"infoType": "TokenInfoType"
}
}
//ENUM
TokenInfoType {
Token,
PKCS11,
File,
Payment,
HSM,
Vault,
Wallet,
}allCertsExtended(parseCerts?: boolean, filters?: string[] | Options, callback?: (error: T1CLibException, data: TokenAllCertsExtendedResponse) => void): Promise<TokenAllCertsExtendedResponse>;
authenticationCertificateExtended(parseCerts?: boolean, callback?: (error: T1CLibException, data: TokenCertificateExtendedResponse) => void): Promise<TokenCertificateExtendedResponse>;
nonRepudiationCertificateExtended(parseCerts?: boolean, callback?: (error: T1CLibException, data: TokenCertificateExtendedResponse) => void): Promise<TokenCertificateExtendedResponse>;
encryptionCertificateExtended(parseCerts?: boolean, callback?: (error: T1CLibException, data: TokenCertificateExtendedResponse) => void): Promise<TokenCertificateExtendedResponse>;
rootCertificateExtended(parseCerts?: boolean, callback?: (error: T1CLibException, data: TokenCertificateExtendedResponse) => void): Promise<TokenCertificateExtendedResponse>;{
"success" : true
"data" : {
"certificates": [{
"certificate"?: string,
"certificateType"?: string,
"id"?: string,
"subject"?: string,
"issuer"?: string,
"serialNumber"?: string,
"url"?: string,
"hashSubPubKey"?: string,
"hashIssPubKey"?: string,
"exponent"?: string,
"remainder"?: string,
"parsedCertificate"?: Certificate
}]
}
}{
"success" : true
"data" : {
"authenticationCertificate": {
"certificates": [...]
},
"nonRepudiationCertificate": {
"certificates": [...]
},
"encryptionCertificate": {
"certificates": [...]
},
"rootCertificate": {
"certificates": [...]
}
}
}module.authenticationCertificate(module, parseCertsBoolean, callback);{
success: true,
data: {
certificate?: string,
certificates?: Array<string>,
certificateType?: string,
id?: string,
parsedCertificate?: Certificate,
parsedCertificates?: Array<Certificate>
}
}module.nonRepudiationCertificate(module, parseCertsBoolean, callback);{
success: true,
data: {
certificate?: string,
certificates?: Array<string>,
certificateType?: string,
id?: string,
parsedCertificate?: Certificate,
parsedCertificates?: Array<Certificate>
}
}module.nonRepudiationCertificate(module, parseCertsBoolean, callback);{
success: true,
data: {
certificate?: string,
certificates?: Array<string>,
certificateType?: string,
id?: string,
parsedCertificate?: Certificate,
parsedCertificates?: Array<Certificate>
}
}module.rootCertificate(module, parseCertsBoolean, callback);{
success: true,
data: {
certificate?: string,
certificates?: Array<string>,
certificateType?: string,
id?: string,
parsedCertificate?: Certificate,
parsedCertificates?: Array<Certificate>
}
}var filter = [];
module.allCerts(module, parseCerts, { filters: filter}, callback);{
"authenticationCertificate": {
...
},
"nonRepudiationCertificate": {
...
},
"encryptionCertificate": {
...
}
}var filter = ['authenticationCertificate'];
module.allCerts(module, { filters: filter}, callback);{
"authenticationCertificate": {
...
}
}var filter = null;
module.allCerts(module, { filters: filter}, callback);{
"authenticationCertificate": {
...
},
"nonRepudiationCertificate": {
...
}
}var data = {
"pin":"...",
"algorithm":"sha1",
"data":"I2e+u/sgy7fYgh+DWA0p2jzXQ7E=",
"osDialog": true,
"id": "id.."
}
module.sign(module, data, callback);{
"success": true,
"data": {
"data" : "W7wqvWA8m9S...="
}
}var data = {
"algorithm":"sha1",
"data":"I2e+u/sgy7fYgh+DWA0p2jzXQ7E=",
"osDialog": false,
"id": "id.."
}
module.sign(module, data, callback);{
"success": true,
"data": {
"data" : "W7wqvWA8m9S...="
}
}var data = {
"algorithm":"sha256",
"data":"vl5He0ulthjX+VWNM46QX7vJ8VvXMq2k/Tq8Xq1bwEw=",
"osDialog": false
}
module.signRaw(data, callback);const data = {
algorithm: "sha256",
data: "E1uHACbPvhLew0gGmBH83lvtKIAKxU2/RezfBOsT6Vs=",
pin: "1234",
id: "id.."
}
const bulk = true;
module.sign(module, data, bulk).then(res => {
}, err => {
console.error(err)
})module.resetBulkPin(module).then(res => {
}, err => {
console.error(err)
}){
"success": true,
"data": true
}var data = {
"pin":"..."
}
module.verifyPin(module, data, callback);{
"verified": true
}var data = {}
module.verifyPin(module, data, callback);{
"verified": true
}var data = {
"pin": "...",
"algorithm": "sha1",
"data":"I2e+u/sgy7fYgh+DWA0p2jzXQ7E=",
"id": "id.."
}
module.authenticate(module, data, callback);{
"success": true,
"data": {
"data" : "W7wqvWA8m9S...="
}
}module.verifyPin(module, data, callback);module.allAlgoRefs(module, callback);{
"success": true,
"data": ["sha1", "sha256"]
}const body = {
"algorithm": 'sha256',
"hash": '...',
"signedHash": '...',
"osDialog": false,
"id": 'cert_id',
"pin": 'pin_code',
"timeout": 120 //timeout in seconds
}
module.validateSignature(body).then(response => {
response.valid
).catch(error => {
errorHandler(error)}
){
"success": true,
"data": {
"valid": true
}
}export interface AbstractCertinomis {
allCerts(parseCerts?: boolean, filters?: string[] | Options, callback?: (error: T1CLibException, data: TokenAllCertsResponse) => void): Promise<TokenAllCertsResponse>;
authenticationCertificate(parseCerts?: boolean, callback?: (error: T1CLibException, data: TokenCertificateResponse) => void): Promise<TokenCertificateResponse>;
nonRepudiationCertificate(parseCerts?: boolean, callback?: (error: T1CLibException, data: TokenCertificateResponse) => void): Promise<TokenCertificateResponse>;
allCertsExtended(parseCerts?: boolean, filters?: string[] | Options, callback?: (error: T1CLibException, data: TokenAllCertsExtendedResponse) => void): Promise<TokenAllCertsExtendedResponse>;
authenticationCertificateExtended(parseCerts?: boolean, callback?: (error: T1CLibException, data: TokenCertificateExtendedResponse) => void): Promise<TokenCertificateExtendedResponse>;
nonRepudiationCertificateExtended(parseCerts?: boolean, callback?: (error: T1CLibException, data: TokenCertificateExtendedResponse) => void): Promise<TokenCertificateExtendedResponse>;
validateSignature(body: TokenValidateSignatureRequest, callback?: (error: T1CLibException, data: TokenValidateSignatureResponse) => void): Promise<TokenValidateSignatureResponse>;
verifyPin(body: TokenVerifyPinData, callback?: (error: T1CLibException, data: TokenVerifyPinResponse) => void): Promise<TokenVerifyPinResponse>;
authenticate(body: TokenAuthenticateOrSignData, callback?: (error: T1CLibException, data: TokenAuthenticateResponse) => void): Promise<TokenAuthenticateResponse>;
sign(body: TokenAuthenticateOrSignData, bulk?: boolean, callback?: (error: T1CLibException, data: TokenSignResponse) => void): Promise<TokenSignResponse>;
signRaw(body: TokenAuthenticateOrSignData, bulk?: boolean, callback?: (error: T1CLibException, data: TokenSignResponse) => void): Promise<TokenSignResponse>;
allAlgoRefs(callback?: (error: T1CLibException, data: TokenAlgorithmReferencesResponse) => void): Promise<TokenAlgorithmReferencesResponse>
resetBulkPin(callback?: (error: T1CLibException, data: BoolDataResponse) => void): Promise<BoolDataResponse>;
tokenData(callback?: (error: T1CLibException, data: TokenInfoResponse) => void): Promise<TokenInfoResponse>;
}T1CSdk.T1CClient.initialize(config).then(res => {
client = res;
}, err => {
console.error(error)
});var core = client.core();
core.readersCardAvailable(callback);{
"data": [
// List of reader with cards found
],
"success": true
}const moduleName = 'certinomis';
var client = client.generic(selected_reader.id);var client = client.camerfirma(selected_reader.id);client.tokenData().then(res => {
// see response below
}){
"success": true,
"data": {
"info": {
"slot": "string",
"label": "string",
"manufacturerId": "string",
"model": "string",
"serialNumber": "string",
"flags": {
"isRandomNumberGenerator": "boolean",
"isWriteProtected": "boolean",
"isLoginRequired": "boolean",
"isUserPinInitialized": "boolean",
"isRestoreKeyNotNeeded": "boolean",
"isClockOnToken": "boolean",
"isProtectedAuthenticationPath": "boolean",
"isDualCryptoOperations": "boolean",
"isTokenInitialized": "boolean",
"isSecondaryAuthentication": "boolean",
"isUserPinCountLow": "boolean",
"isUserPinFinalTry": "boolean",
"isUserPinLocked": "boolean",
"isUserPinToBeChanged": "boolean",
"isSoPinCountLow": "boolean",
"isSoPinFinalTry": "boolean",
"isSoPinLocked": "boolean",
"isSoPinToBeChanged": "boolean"
},
"mechanisms": [
{
"mechanism": "string",
"flags": {
"isHardware": "boolean",
"isEncrypt": "boolean",
"isDecrypt": "boolean",
"isDigest": "boolean",
"isSign": "boolean",
"isSignRecover": "boolean",
"isVerify": "boolean",
"isVerifyRecover": "boolean",
"isGenerate": "boolean",
"isGenerateKeyPair": "boolean",
"isWrap": "boolean",
"isUnwrap": "boolean",
"isExtension": "boolean",
"isEcFP": "boolean",
"isEcNamedcurve": "boolean",
"isEcUncompress": "boolean",
"isEcCompress": "boolean"
},
"ulMinKeySize": "number",
"ulMaxKeySize": "number"
}
],
"ulMaxSessionCount": "number",
"ulSessionCount": "number",
"ulMaxRwSessionCount": "number",
"ulMaxPinLen": "number",
"ulMinPinLen": "number",
"ulTotalPubLicMemory": "number",
"ulFreePubMemory": "number",
"ulTotalPrivateMemory": "number",
"ulFreePrivateMemory": "number",
"hardwareVersion": "string",
"firmwareVersion": "string"
},
"infoType": "TokenInfoType"
}
}
//ENUM
TokenInfoType {
Token,
PKCS11,
File,
Payment,
HSM,
Vault,
Wallet,
}allCertsExtended(parseCerts?: boolean, filters?: string[] | Options, callback?: (error: T1CLibException, data: TokenAllCertsExtendedResponse) => void): Promise<TokenAllCertsExtendedResponse>;
authenticationCertificateExtended(parseCerts?: boolean, callback?: (error: T1CLibException, data: TokenCertificateExtendedResponse) => void): Promise<TokenCertificateExtendedResponse>;
nonRepudiationCertificateExtended(parseCerts?: boolean, callback?: (error: T1CLibException, data: TokenCertificateExtendedResponse) => void): Promise<TokenCertificateExtendedResponse>;{
"success" : true
"data" : {
"certificates": [{
"certificate"?: string,
"certificateType"?: string,
"id"?: string,
"subject"?: string,
"issuer"?: string,
"serialNumber"?: string,
"url"?: string,
"hashSubPubKey"?: string,
"hashIssPubKey"?: string,
"exponent"?: string,
"remainder"?: string,
"parsedCertificate"?: Certificate
}]
}
}{
"success" : true
"data" : {
"authenticationCertificate": {
"certificates": [...]
},
"nonRepudiationCertificate": {
"certificates": [...]
}
}
}client.authenticationCertificate(parseCertsBoolean, callback);{
success: true,
data: {
certificate?: string,
certificates?: Array<string>,
certificateType?: string,
id?: string,
parsedCertificate?: Certificate,
parsedCertificates?: Array<Certificate>
}
}client.nonRepudiationCertificate(parseCertsBoolean, callback);{
success: true,
data: {
certificate?: string,
certificates?: Array<string>,
certificateType?: string,
id?: string,
parsedCertificate?: Certificate,
parsedCertificates?: Array<Certificate>
}
}var filter = [];
client.allCerts(parseCerts, { filters: filter}, callback);{
success: true,
data: {
certificate?: string,
certificates?: Array<string>,
certificateType?: string,
id?: string,
parsedCertificate?: Certificate,
parsedCertificates?: Array<Certificate>
}
}var filter = ['authenticationCertificate'];
client.allCerts({ filters: filter}, callback);{
success: true,
data: {
certificate?: string,
certificates?: Array<string>,
certificateType?: string,
id?: string,
parsedCertificate?: Certificate,
parsedCertificates?: Array<Certificate>
}
}var filter = null;
client.allCerts({ filters: filter}, callback);{
"authenticationCertificate": {
...
},
"nonRepudiationCertificate": {
...
}
}var data = {
"pin":"...",
"algorithm":"sha256",
"data":"dGVzdA=="
"osDialog": true
}
client.sign(data, callback);{
"success": true,
"data": {
"data" : "W7wqvWA8m9S...="
}
}var data = {
"algorithm":"sha256",
"data":"vl5He0ulthjX+VWNM46QX7vJ8VvXMq2k/Tq8Xq1bwEw=",
"osDialog": false
}
client.signRaw(data, callback);const data = {
algorithm: "sha256",
data: "dGVzdA==",
pin: "1234"
}
const bulk = true;
client.sign(data, bulk).then(res => {
}, err => {
console.error(err)
})client.resetBulkPin(module).then(res => {
}, err => {
console.error(err)
}){
"success": true,
"data": true
}var data = {
"pin":"..."
}
client.verifyPin(data, callback);{
"verified": true
}var data = {}
client.verifyPin(data, callback);{
"verified": true
}var data = {
"pin": "...",
"algorithm": "sha256",
"data":"dGVzdA=="
}
client.authenticate(data, callback);{
"success": true,
"data": {
"data" : "W7wqvWA8m9S...="
}
}client.allAlgoRefs(callback);{
"success": true,
"data": ["sha256"]
}const body = {
"algorithm": 'sha256',
"hash": '...',
"signedHash": '...',
"osDialog": false,
"id": 'cert_id',
"pin": 'pin_code',
"timeout": 120 //timeout in seconds
}
client.validateSignature(body).then(response => {
response.valid
).catch(error => {
errorHandler(error)}
){
"success": true,
"data": {
"valid": true
}
}export interface AbstractEidDiplad {
allData(filters: string[] | Options, callback?: (error: T1CLibException, data: TokenAllDataResponse) => void): Promise<TokenAllDataResponse>;
allCerts(parseCerts?: boolean, filters?: string[] | Options, callback?: (error: T1CLibException, data: TokenAllCertsResponse) => void): Promise<TokenAllCertsResponse>;
biometric(callback?: (error: T1CLibException, data: TokenBiometricDataResponse) => void): Promise<TokenBiometricDataResponse>;
tokenData(callback?: (error: T1CLibException, data: TokenInfoResponse) => void): Promise<TokenInfoResponse>;
address(callback?: (error: T1CLibException, data: TokenAddressResponse) => void): Promise<TokenAddressResponse>;
picture(callback?: (error: T1CLibException, data: TokenPictureResponse) => void): Promise<TokenPictureResponse>;
rootCertificate(parseCerts?: boolean, callback?: (error: T1CLibException, data: TokenCertificateResponse) => void): Promise<TokenCertificateResponse>;
intermediateCertificates(parseCerts?: boolean, callback?: (error: T1CLibException, data: TokenCertificateResponse) => void): Promise<TokenCertificateResponse>;
authenticationCertificate(parseCerts?: boolean, callback?: (error: T1CLibException, data: TokenCertificateResponse) => void): Promise<TokenCertificateResponse>;
nonRepudiationCertificate(parseCerts?: boolean, callback?: (error: T1CLibException, data: TokenCertificateResponse) => void): Promise<TokenCertificateResponse>;
encryptionCertificate(parseCerts?: boolean, callback?: (error: T1CLibException, data: TokenCertificateResponse) => void): Promise<TokenCertificateResponse>;
allCertsExtended(parseCerts?: boolean, filters?: string[] | Options, callback?: (error: T1CLibException, data: TokenAllCertsExtendedResponse) => void): Promise<TokenAllCertsExtendedResponse>;
rootCertificateExtended(parseCerts?: boolean, callback?: (error: T1CLibException, data: TokenCertificateExtendedResponse) => void): Promise<TokenCertificateExtendedResponse>;
intermediateCertificatesExtended(parseCerts?: boolean, callback?: (error: T1CLibException, data: TokenCertificateExtendedResponse) => void): Promise<TokenCertificateExtendedResponse>;
authenticationCertificateExtended(parseCerts?: boolean, callback?: (error: T1CLibException, data: TokenCertificateExtendedResponse) => void): Promise<TokenCertificateExtendedResponse>;
nonRepudiationCertificateExtended(parseCerts?: boolean, callback?: (error: T1CLibException, data: TokenCertificateExtendedResponse) => void): Promise<TokenCertificateExtendedResponse>;
encryptionCertificateExtended(parseCerts?: boolean, callback?: (error: T1CLibException, data: TokenCertificateExtendedResponse) => void): Promise<TokenCertificateExtendedResponse>;
verifyPin(body: TokenVerifyPinData, callback?: (error: T1CLibException, data: TokenVerifyPinResponse) => void): Promise<TokenVerifyPinResponse>;
authenticate(body: TokenAuthenticateOrSignData, callback?: (error: T1CLibException, data: TokenAuthenticateResponse) => void): Promise<TokenAuthenticateResponse>;
sign(body: TokenAuthenticateOrSignData, bulk?: boolean, callback?: (error: T1CLibException, data: TokenSignResponse) => void): Promise<TokenSignResponse>;
allAlgoRefs(callback?: (error: T1CLibException, data: TokenAlgorithmReferencesResponse) => void): Promise<TokenAlgorithmReferencesResponse>
resetBulkPin(callback?: (error: T1CLibException, data: BoolDataResponse) => void): Promise<BoolDataResponse>;
}T1cSdk.initialize(config).then(res => {
const diplad = res.client.createEidDiplad(readerId);
}, err => {
console.error(error)
});diplad.allData().then(res => {
}, err => {
console.log(err);
}{
"data": {
"biometric": {
"cardNumber": "cardNumber",
"cardValidityDateEnd": "2021-01-08",
"chipNumber": "c57c0a3f-d034-46c9-831e-a208b2e44fb6",
"firstNames": "Tom",
"name": "Van Cammen",
"nationality": "BE",
"rawData": "BASE64_ENCODED_CARD_DATA",
"version": "1",
"issuer": ""
},
"picture": {
"picture": "BASE64_ENCODED_BYTE_ARRAY"
}
},
"success": true
}diplad.biometric().then(res => {
}, err => {
console.log(err);
}{
"data": {
"cardNumber": "cardNumber",
"cardValidityDateEnd": "2021-01-08",
"chipNumber": "c57c0a3f-d034-46c9-831e-a208b2e44fb6",
"firstNames": "Tom",
"name": "Van Cammen",
"nationality": "BE",
"rawData": "BASE64_ENCODED_CARD_DATA",
"version": "1",
"issuer": ""
},
"success": true
}diplad.picture().then(res => {
}, err => {
console.log(err);
}{
"data": {
"picture": "BASE64_ENCODED_BYTE_ARRAY"
},
"success": true
}const filter = ['rootCertificate', 'authenticationCertificate', 'nonRepudiationCertificate'];
diplad.allCerts(parseCertsBoolean, filter).then(res => {
}, err => {
console.log(err);
}{
success: true,
data: {
authenticationCertificate?: {
certificate?: string,
certificates?: Array<string>,
certificateType?: string,
id?: string,
parsedCertificate?: Certificate,
parsedCertificates?: Array<Certificate>
},
nonRepudiationCertificate?: {
certificate?: string,
certificates?: Array<string>,
certificateType?: string,
id?: string,
parsedCertificate?: Certificate,
parsedCertificates?: Array<Certificate>
},
rootCertificate?: {
certificate?: string,
certificates?: Array<string>,
certificateType?: string,
id?: string,
parsedCertificate?: Certificate,
parsedCertificates?: Array<Certificate>
},
}
}diplad.rootCertificate(parseCertsBoolean).then(res => {
}, err => {
console.log(err);
}{
success: true,
data: {
certificate?: string,
certificates?: Array<string>,
certificateType?: string,
id?: string,
parsedCertificate?: Certificate,
parsedCertificates?: Array<Certificate>
}
}diplad.authenticationCertificate(parseCertsBoolean).then(res => {
}, err => {
console.log(err);
}{
success: true,
data: {
certificate?: string,
certificates?: Array<string>,
certificateType?: string,
id?: string,
parsedCertificate?: Certificate,
parsedCertificates?: Array<Certificate>
}
}diplad.nonRepudiationCertificate(parseCertsBoolean).then(res => {
}, err => {
console.log(err);
}{
success: true,
data: {
certificate?: string,
certificates?: Array<string>,
certificateType?: string,
id?: string,
parsedCertificate?: Certificate,
parsedCertificates?: Array<Certificate>
}
}const data = {
pin: "1234", // optional
osDialog: true // optional
}
diplad.verifyPin(data).then(res => {
}, err => {
console.error(err)
}){
"success": true,
"data": {
"verified": true
}
}const data = {
algorithm: "sha256",
data: "E1uHACbPvhLew0gGmBH83lvtKIAKxU2/RezfBOsT6Vs=",
pin: "1234"
}
const bulk = false;
diplad.sign(data, bulk).then(res => {
}, err => {
console.error(err)
}){
"success": true,
"data": {
"data": "..."
}
}const data = {
algorithm: "sha256",
data: "E1uHACbPvhLew0gGmBH83lvtKIAKxU2/RezfBOsT6Vs=",
pin: "1234"
}
diplad.authenticate(data).then(res => {
}, err => {
console.error(err)
}){
"success": true,
"data": {
"data": "..."
}
}diplad.allAlgoRefs().then(res => {
}, err => {
console.error(err)
}){
"success": true,
"data": {
"ref": ["sha1", "sha256", "sha512"]
}
}diplad.resetBulkPin().then(res => {
}, err => {
console.error(err)
}){
"success": true,
"data": true
}export interface AbstractCertigna {
allCertFilters(): string[];
allKeyRefs(): string[];
allCerts(parseCerts?: boolean, filters?: string[] | Options, callback?: (error: T1CLibException, data: TokenAllCertsResponse) => void): Promise<TokenAllCertsResponse>;
authenticationCertificate(parseCerts?: boolean, callback?: (error: T1CLibException, data: TokenCertificateResponse) => void): Promise<TokenCertificateResponse>;
nonRepudiationCertificate(parseCerts?: boolean, callback?: (error: T1CLibException, data: TokenCertificateResponse) => void): Promise<TokenCertificateResponse>;
verifyPin(body: TokenVerifyPinData, callback?: (error: T1CLibException, data: TokenVerifyPinResponse) => void): Promise<TokenVerifyPinResponse>;
authenticate(body: TokenAuthenticateOrSignData, callback?: (error: T1CLibException, data: TokenAuthenticateResponse) => void): Promise<TokenAuthenticateResponse>;
sign(body: TokenAuthenticateOrSignData, bulk?: boolean, callback?: (error: T1CLibException, data: TokenSignResponse) => void): Promise<TokenSignResponse>;
signRaw(body: TokenAuthenticateOrSignData, bulk?: boolean, callback?: (error: T1CLibException, data: TokenSignResponse) => void): Promise<TokenSignResponse>;
allAlgoRefs(callback?: (error: T1CLibException, data: TokenAlgorithmReferencesResponse) => void): Promise<TokenAlgorithmReferencesResponse>
resetBulkPin(callback?: (error: T1CLibException, data: BoolDataResponse) => void): Promise<BoolDataResponse>;
}T1CSdk.T1CClient.initialize(config).then(res => {
client = res;
}, err => {
console.error(error)
});var core = client.core();
core.readersCardAvailable(callback);{
"data": [
// List of reader with cards found
],
"success": true
}const moduleName = 'certigna';
var module = client.generic(selected_reader.id);var module = client.certigna(selected_reader.id);module.tokenData().then(res => {
// see response below
}){
"success": true,
"data": {
"info": {
"slot": "string",
"label": "string",
"manufacturerId": "string",
"model": "string",
"serialNumber": "string",
"flags": {
"isRandomNumberGenerator": "boolean",
"isWriteProtected": "boolean",
"isLoginRequired": "boolean",
"isUserPinInitialized": "boolean",
"isRestoreKeyNotNeeded": "boolean",
"isClockOnToken": "boolean",
"isProtectedAuthenticationPath": "boolean",
"isDualCryptoOperations": "boolean",
"isTokenInitialized": "boolean",
"isSecondaryAuthentication": "boolean",
"isUserPinCountLow": "boolean",
"isUserPinFinalTry": "boolean",
"isUserPinLocked": "boolean",
"isUserPinToBeChanged": "boolean",
"isSoPinCountLow": "boolean",
"isSoPinFinalTry": "boolean",
"isSoPinLocked": "boolean",
"isSoPinToBeChanged": "boolean"
},
"mechanisms": [
{
"mechanism": "string",
"flags": {
"isHardware": "boolean",
"isEncrypt": "boolean",
"isDecrypt": "boolean",
"isDigest": "boolean",
"isSign": "boolean",
"isSignRecover": "boolean",
"isVerify": "boolean",
"isVerifyRecover": "boolean",
"isGenerate": "boolean",
"isGenerateKeyPair": "boolean",
"isWrap": "boolean",
"isUnwrap": "boolean",
"isExtension": "boolean",
"isEcFP": "boolean",
"isEcNamedcurve": "boolean",
"isEcUncompress": "boolean",
"isEcCompress": "boolean"
},
"ulMinKeySize": "number",
"ulMaxKeySize": "number"
}
],
"ulMaxSessionCount": "number",
"ulSessionCount": "number",
"ulMaxRwSessionCount": "number",
"ulMaxPinLen": "number",
"ulMinPinLen": "number",
"ulTotalPubLicMemory": "number",
"ulFreePubMemory": "number",
"ulTotalPrivateMemory": "number",
"ulFreePrivateMemory": "number",
"hardwareVersion": "string",
"firmwareVersion": "string"
},
"infoType": "TokenInfoType"
}
}
//ENUM
TokenInfoType {
Token,
PKCS11,
File,
Payment,
HSM,
Vault,
Wallet,
}allCertsExtended(parseCerts?: boolean, filters?: string[] | Options, callback?: (error: T1CLibException, data: TokenAllCertsExtendedResponse) => void): Promise<TokenAllCertsExtendedResponse>;
authenticationCertificateExtended(parseCerts?: boolean, callback?: (error: T1CLibException, data: TokenCertificateExtendedResponse) => void): Promise<TokenCertificateExtendedResponse>;
nonRepudiationCertificateExtended(parseCerts?: boolean, callback?: (error: T1CLibException, data: TokenCertificateExtendedResponse) => void): Promise<TokenCertificateExtendedResponse>;{
"success" : true
"data" : {
"certificates": [{
"certificate"?: string,
"certificateType"?: string,
"id"?: string,
"subject"?: string,
"issuer"?: string,
"serialNumber"?: string,
"url"?: string,
"hashSubPubKey"?: string,
"hashIssPubKey"?: string,
"exponent"?: string,
"remainder"?: string,
"parsedCertificate"?: Certificate
}]
}
}{
"success" : true
"data" : {
"authenticationCertificate": {
"certificates": [...]
},
"nonRepudiationCertificate": {
"certificates": [...]
}
}
}module.authenticationCertificate(parseCertsBoolean, callback);{
success: true,
data: {
certificate?: string,
certificates?: Array<string>,
certificateType?: string,
id?: string,
parsedCertificate?: Certificate,
parsedCertificates?: Array<Certificate>
}
}module.nonRepudiationCertificate(parseCertsBoolean, callback);{
success: true,
data: {
certificate?: string,
certificates?: Array<string>,
certificateType?: string,
id?: string,
parsedCertificate?: Certificate,
parsedCertificates?: Array<Certificate>
}
}var filter = [];
module.allCerts(parseCerts, { filters: filter}, callback);{
success: true,
data: {
certificate?: string,
certificates?: Array<string>,
certificateType?: string,
id?: string,
parsedCertificate?: Certificate,
parsedCertificates?: Array<Certificate>
}
}var filter = ['authenticationCertificate'];
module.allCerts({ filters: filter}, callback);{
success: true,
data: {
certificate?: string,
certificates?: Array<string>,
certificateType?: string,
id?: string,
parsedCertificate?: Certificate,
parsedCertificates?: Array<Certificate>
}
}var filter = null;
module.allCerts({ filters: filter}, callback);{
"authenticationCertificate": {
...
},
"nonRepudiationCertificate": {
...
}
}var data = {
"pin":"...",
"algorithm":"sha256",
"data":"n4bQgYhMfWWaL+qgxVrQFaO/TxsrC4Is0V1sFbDwCgg="
"osDialog": true
}
module.sign(data, callback);{
"success": true,
"data": {
"data" : "W7wqvWA8m9S...="
}
}var data = {
"algorithm": "sha256",
"data":"n4bQgYhMfWWaL+qgxVrQFaO/TxsrC4Is0V1sFbDwCgg="
"osDialog": false
}
module.sign(data, callback);{
"success": true,
"data": {
"data" : "W7wqvWA8m9S...="
}
}var data = {
"algorithm":"sha256",
"data":"vl5He0ulthjX+VWNM46QX7vJ8VvXMq2k/Tq8Xq1bwEw=",
"osDialog": false
}
module.signRaw(data, callback);const data = {
algorithm: "sha256",
data: "E1uHACbPvhLew0gGmBH83lvtKIAKxU2/RezfBOsT6Vs=",
pin: "1234"
}
const bulk = true;
module.sign(data, bulk).then(res => {
}, err => {
console.error(err)
})client.resetBulkPin(module).then(res => {
}, err => {
console.error(err)
}){
"success": true,
"data": true
}var data = {
"pin":"..."
}
module.verifyPin(data, callback);{
"verified": true
}var data = {}
module.verifyPin(data, callback);{
"verified": true
}var data = {
"pin": "...",
"algorithm": "sha256",
"data":"n4bQgYhMfWWaL+qgxVrQFaO/TxsrC4Is0V1sFbDwCgg="
}
module.authenticate(data, callback);{
"success": true,
"data": {
"data" : "W7wqvWA8m9S...="
}
}module.allAlgoRefs(callback);{
"success": true,
"data": ["sha256"]
}const body = {
"algorithm": 'sha256',
"hash": '...',
"signedHash": '...',
"osDialog": false,
"id": 'cert_id',
"pin": 'pin_code',
"timeout": 120 //timeout in seconds
}
module.validateSignature(body).then(response => {
response.valid
).catch(error => {
errorHandler(error)}
){
"success": true,
"data": {
"valid": true
}
}export interface AbstractEidGeneric {
allData(module: string, filters?: string[] | Options, callback?: (error: T1CLibException, data: TokenAllDataResponse) => void): Promise<TokenAllDataResponse>;
allCerts(module: string, parseCerts?: boolean, filters?: string[] | Options, callback?: (error: T1CLibException, data: TokenAllCertsResponse) => void): Promise<TokenAllCertsResponse>;
biometric(module: string, callback?: (error: T1CLibException, data: TokenBiometricDataResponse) => void): Promise<TokenBiometricDataResponse>;
tokenData(module: string, callback?: (error: T1CLibException, data: TokenInfoResponse) => void): Promise<TokenInfoResponse>;
address(module: string, callback?: (error: T1CLibException, data: TokenAddressResponse) => void): Promise<TokenAddressResponse>;
picture(module: string, callback?: (error: T1CLibException, data: TokenPictureResponse) => void): Promise<TokenPictureResponse>;
rootCertificate(module: string, parseCerts?: boolean, callback?: (error: T1CLibException, data: TokenCertificateResponse) => void): Promise<TokenCertificateResponse>;
intermediateCertificates(module: string, parseCerts?: boolean, callback?: (error: T1CLibException, data: TokenCertificateResponse) => void): Promise<TokenCertificateResponse>;
authenticationCertificate(module: string, parseCerts?: boolean, callback?: (error: T1CLibException, data: TokenCertificateResponse) => void): Promise<TokenCertificateResponse>;
nonRepudiationCertificate(module: string, parseCerts?: boolean, callback?: (error: T1CLibException, data: TokenCertificateResponse) => void): Promise<TokenCertificateResponse>;
encryptionCertificate(module: string, parseCerts?: boolean, callback?: (error: T1CLibException, data: TokenCertificateResponse) => void): Promise<TokenCertificateResponse>;
issuerCertificate(module: string, parseCerts?: boolean, callback?: (error: T1CLibException, data: TokenCertificateResponse) => void): Promise<TokenCertificateResponse>;
allCertsExtended(module: string, parseCerts?: boolean, filters?: string[] | Options, callback?: (error: T1CLibException, data: TokenAllCertsExtendedResponse) => void): Promise<TokenAllCertsExtendedResponse>;
rootCertificateExtended(module: string, parseCerts?: boolean, callback?: (error: T1CLibException, data: TokenCertificateExtendedResponse) => void): Promise<TokenCertificateExtendedResponse>;
intermediateCertificatesExtended(module: string, parseCerts?: boolean, callback?: (error: T1CLibException, data: TokenCertificateExtendedResponse) => void): Promise<TokenCertificateExtendedResponse>;
authenticationCertificateExtended(module: string, parseCerts?: boolean, callback?: (error: T1CLibException, data: TokenCertificateExtendedResponse) => void): Promise<TokenCertificateExtendedResponse>;
nonRepudiationCertificateExtended(module: string, parseCerts?: boolean, callback?: (error: T1CLibException, data: TokenCertificateExtendedResponse) => void): Promise<TokenCertificateExtendedResponse>;
encryptionCertificateExtended(module: string, parseCerts?: boolean, callback?: (error: T1CLibException, data: TokenCertificateExtendedResponse) => void): Promise<TokenCertificateExtendedResponse>;
issuerCertificateExtended(module: string, parseCerts?: boolean, callback?: (error: T1CLibException, data: TokenCertificateExtendedResponse) => void): Promise<TokenCertificateExtendedResponse>;
verifyPin(module: string, body: TokenVerifyPinData, callback?: (error: T1CLibException, data: TokenVerifyPinResponse) => void): Promise<TokenVerifyPinResponse>;
authenticate(module: string, body: TokenAuthenticateOrSignData, callback?: (error: T1CLibException, data: TokenAuthenticateResponse) => void): Promise<TokenAuthenticateResponse>;
sign(module: string, body: TokenAuthenticateOrSignData, bulk?: boolean, callback?: (error: T1CLibException, data: TokenSignResponse) => void): Promise<TokenSignResponse>;
signRaw(module: string, body: TokenAuthenticateOrSignData, bulk?: boolean, callback?: (error: T1CLibException, data: TokenSignResponse) => void): Promise<TokenSignResponse>;
allAlgoRefs(module: string, callback?: (error: T1CLibException, data: TokenAlgorithmReferencesResponse) => void): Promise<TokenAlgorithmReferencesResponse>
resetBulkPin(module: string, callback?: (error: T1CLibException, data: BoolDataResponse) => void): Promise<BoolDataResponse>;
}T1CSdk.T1CClient.initialize(config).then(res => {
client = res;
}, err => {
console.error(error)
});var core = client.core();
core.readersCardAvailable(callback);{
"data": [
{
"card": {
"atr": "3B9813400AA503010101AD1311",
"description": ["Belgian eID Card"]
},
"id": "57a3e2e71c48cee9",
"name": "Bit4id miniLector",
"pinpad": false,
"suggestedModule": "beid"
}
],
"success": true
}var generic = client.generic(selected_reader.id, pin, pinType);generic.biometric(module, options, callback);function callback(err,data) {
if(err){
console.log("Error:",JSON.stringify(err, null, ' '));
}
else {
console.log(JSON.stringify(data, null, ' '));
}
}{
"birthDate": "15 JUL 1993",
"birthLocation": "Roeselare",
"cardDeliveryMunicipality": "Avelgem",
"cardNumber": "592..8233",
"cardValidityDateBegin": "27.05.2015",
"cardValidityDateEnd": "27.05.2025",
"chipNumber": "U0xHk...EstwAjEpJQQg==",
"documentType": "01",
"firstNames": "Gilles Frans",
"name": "Platteeuw",
"nationalNumber": "930...154",
"nationality": "Belg",
"nobleCondition": "",
"pictureHash": "Fqva9YCp...JKyn8=",
"rawData": "AQw1OTIxMjQwNTgy...TARFBar2vWAqTW+axEIuyskBgFySsp/",
"sex": "M",
"signature": "hKys9WMjUm4ipg...14xUCg/98Y9/gP/vgG7JTRZJoKgDXLLTvLZO4qlfA==",
"specialStatus": "0",
"thirdName": "J",
"version": "0"
}generic.address(module, callback);{
"municipality": "Hoeselt",
"rawData": "ARJLZXJrc...AAAAAA==",
"signature": "mhPyeRg25H...w==",
"streetAndNumber": "Kerkstraat X",
"version": "0",
"zipcode": "3730"
}generic.picture(module, callback);{
"data": "/9j/4AAQSkZJRgABA...59aVpcklSDzyKUTEDGK//9k=",
"success": true
}{
"data": {
"eid_compliant":48,
"electrical_perso_interface_version":0,
"electrical_perso_version":3,
"graphical_perso_version":7,
"label":"BELPIC",
"prn_generation":4,
"raw_data":"MCcCAQAEEFNMSU4z...JFTFBJQwMCBDCeBAcDAAA=",
"serial_number":"534C494E..1231C",
"version":0,
"version_rfu":0
},
"success": true
}allCertsExtended(module: string, parseCerts?: boolean, filters?: string[] | Options, callback?: (error: T1CLibException, data: TokenAllCertsExtendedResponse) => void): Promise<TokenAllCertsExtendedResponse>;
rootCertificateExtended(module: string, parseCerts?: boolean, callback?: (error: T1CLibException, data: TokenCertificateExtendedResponse) => void): Promise<TokenCertificateExtendedResponse>;
intermediateCertificatesExtended(module: string, parseCerts?: boolean, callback?: (error: T1CLibException, data: TokenCertificateExtendedResponse) => void): Promise<TokenCertificateExtendedResponse>;
authenticationCertificateExtended(module: string, parseCerts?: boolean, callback?: (error: T1CLibException, data: TokenCertificateExtendedResponse) => void): Promise<TokenCertificateExtendedResponse>;
nonRepudiationCertificateExtended(module: string, parseCerts?: boolean, callback?: (error: T1CLibException, data: TokenCertificateExtendedResponse) => void): Promise<TokenCertificateExtendedResponse>;
encryptionCertificateExtended(module: string, parseCerts?: boolean, callback?: (error: T1CLibException, data: TokenCertificateExtendedResponse) => void): Promise<TokenCertificateExtendedResponse>;
issuerCertificateExtended(module: string, parseCerts?: boolean, callback?: (error: T1CLibException, data: TokenCertificateExtendedResponse) => void): Promise<TokenCertificateExtendedResponse>;{
"success" : true
"data" : {
"certificates": [{
"certificate"?: string,
"certificateType"?: string,
"id"?: string,
"subject"?: string,
"issuer"?: string,
"serialNumber"?: string,
"url"?: string,
"hashSubPubKey"?: string,
"hashIssPubKey"?: string,
"exponent"?: string,
"remainder"?: string,
"parsedCertificate"?: Certificate
}]
}
}{
"success" : true
"data" : {
"rootCertificate": {
"certificates": [...]
},
"authenticationCertificate": {
"certificates": [...]
},
"nonRepudiationCertificate": {
"certificates": [...]
},
"intermediateCertificates": {
"certificates": [...]
},
"encryptionCertificate": {
"certificates": [...]
}
}
}generic.rootCertificate(module, parseCertsBoolean, callback);{
success: true,
data: {
certificate?: string,
certificates?: Array<string>,
certificateType?: string,
id?: string,
parsedCertificate?: Certificate,
parsedCertificates?: Array<Certificate>
}
}{
"success" : true
"data" : {
"certificates": [
"certificate"?: string,
"certificateType"?: string,
"id"?: string,
"subject"?: string,
"issuer"?: string,
"serialNumber"?: string,
"url"?: string,
"hashSubPubKey"?: string,
"hashIssPubKey"?: string,
"exponent"?: string,
"remainder"?: string,
"parsedCertificate"?: Certificate
]
}
}generic.authenticationCertificate(module, parseCertsBoolean, callback);{
success: true,
data: {
certificate?: string,
certificates?: Array<string>,
certificateType?: string,
id?: string,
parsedCertificate?: Certificate,
parsedCertificates?: Array<Certificate>
}
}{
"success" : true
"data" : {
"certificates": [
"certificate"?: string,
"certificateType"?: string,
"id"?: string,
"subject"?: string,
"issuer"?: string,
"serialNumber"?: string,
"url"?: string,
"hashSubPubKey"?: string,
"hashIssPubKey"?: string,
"exponent"?: string,
"remainder"?: string,
"parsedCertificate"?: Certificate
]
}
}generic.intermediateCertificates(module, parseCertsBoolean, callback);{
success: true,
data: {
certificate?: string,
certificates?: Array<string>,
certificateType?: string,
id?: string,
parsedCertificate?: Certificate,
parsedCertificates?: Array<Certificate>
}
}{
"success" : true
"data" : {
"certificates": [
"certificate"?: string,
"certificateType"?: string,
"id"?: string,
"subject"?: string,
"issuer"?: string,
"serialNumber"?: string,
"url"?: string,
"hashSubPubKey"?: string,
"hashIssPubKey"?: string,
"exponent"?: string,
"remainder"?: string,
"parsedCertificate"?: Certificate
]
}
}generic.nonRepudiationCertificate(module, parseCertsBoolean, callback);{
success: true,
data: {
certificate?: string,
certificates?: Array<string>,
certificateType?: string,
id?: string,
parsedCertificate?: Certificate,
parsedCertificates?: Array<Certificate>
}
}{
"success" : true
"data" : {
"certificates": [
"certificate"?: string,
"certificateType"?: string,
"id"?: string,
"subject"?: string,
"issuer"?: string,
"serialNumber"?: string,
"url"?: string,
"hashSubPubKey"?: string,
"hashIssPubKey"?: string,
"exponent"?: string,
"remainder"?: string,
"parsedCertificate"?: Certificate
]
}
}generic.encryptionCertificate(module, parseCertsBoolean, callback);{
success: true,
data: {
certificate?: string,
certificates?: Array<string>,
certificateType?: string,
id?: string,
parsedCertificate?: Certificate,
parsedCertificates?: Array<Certificate>
}
}{
"success" : true
"data" : {
"certificates": [
"certificate"?: string,
"certificateType"?: string,
"id"?: string,
"subject"?: string,
"issuer"?: string,
"serialNumber"?: string,
"url"?: string,
"hashSubPubKey"?: string,
"hashIssPubKey"?: string,
"exponent"?: string,
"remainder"?: string,
"parsedCertificate"?: Certificate
]
}
}generic.allCerts(module, parseCertsBoolean, callback);{
"rootCertificate": {
...
},
"authenticationCertificate": {
...
},
"nonRepudiationCertificate": {
...
},
"intermediateCertificates": {
...
},
"encryptionCertificate": {
...
}
}{
"success" : true
"data" : {
"rootCertificate": {
"certificates": [...]
},
"authenticationCertificate": {
"certificates": [...]
},
"nonRepudiationCertificate": {
"certificates": [...]
},
"intermediateCertificates": {
"certificates": [...]
},
"encryptionCertificate": {
"certificates": [...]
}
}
}var filter = [];
generic.allData(module, { filters: filter}, callback);{
"picture": {
"picture": "/9j/4AAQSkZJRgABAgEBLAEsAAD/.../wAALCADIAIwBAREA/8QA0gAAAQUBAQEBAQEAAAAAAAAAAAECAwQFBgcICQoLEAACAQMDAgQDBQUEBAAAAX0BAgMABBEFEiExQQYTUWEHInEUMoGRoQgjQrHBFVLR8CQzYnKCCQoWFxgZGiUmJygpKjQ1Njc4OTpDREVGR0hJSlNUVVZXWFlaY2RlZmdoaWpzdHV2d3h5eoOEhYaHiImKkpOUlZaXmJmaoqOkpaanqKmqsrO0tba3uLm6wsPExcbHyMnK0tPU1dbX2Nna4eLj5OXm5+jp6vHy8/T19vf4+fr/2gAIAQEAAD8A9JpKKWiikooooopaKSilooooopKr3d9bWaFriVEwM4J5Ncjq3jUxkixQADozjJNcze+L9WndWF20OOCI/lzRb+KtYjhIN67Z7vyf1qT/AIS3Wc5F2OnQgY/lWrovjC7hYLqJ86IkksPvCustPEumXbbUuAjYzh+K1UkWRA6MGU9CDkGn0UUUUUUUhOBk8CuY1zxOls/kWjbnH3pAMgewrz7VtWmu7gvJIzZ65NZk1wSBjOagWbn5lB+vagy7+2KlilUE7eRj1qS3ncSEE4X3qwzNs81Dgg9K19G8VXumTLFv8yDOWjb+len6bqMGp2qz2zZU8Ed1PpVyiiiiio5pkgiaSRgqKMkmuH8ReKXlMlpAAkHRnB5b29q4+e5HzAHjPFZkoLyhevH6014XUcjBqAow5xQEYjFPClDxkCnq20AkZ/xqyl2oUK4xu6n0qwgguZQ28K2Ofc1v6Pqs2lSRGJzsLAOv94d69MtriO6gSaFgyMMg1LS0UUlcn491FbfS/sicyzEH6AGvOCzuApPOakt7CWYk7TjNXE0iUNnyyfpVqPQ53XiNwPepYfDMhb94GAq5/wAIzbhc4IPpVK/8OYjzEMmsWbRZ0XIUnHtVRrR4/vqR9RSwQGXdt4Zav2rbFww6DI5ruvBuqIIjaSuMu2Y8/TpXYUtFFIa8r8W6h9v1d9mCqHYuO4FVdM0t7iZWb8a6y10+KNQCOlXFijQfKop6g9hUmw4pjoRzmopEyvIqrJEjDGKpXGnwzoQ68+1YNxpv2Ry8RPHrVGUqse4MN38Qq7o8o8kOh+dG3AjsRXpejapHqVsDkLMo+dM8/WtOiis/WrxrHTJp1GWAwOeme9eWqqzTln6k5rqNLhWKFcDmtJRk1aSPPWp0i21J5dRSx8VWKVXkQA1WmwvGDzWVegSRsp4zXNT2WwMASSxqa1kNimMBkOB9fWt7QLx4ddgaNCyyLtIHevR6Wiuf8ZsRobAdWcD+dcLYQZlHck/lXWQKEjUVZj69OlXI+manXnvTiADioXPJ4qBhVaQ/NVWbkZ7VlXeDmqRYY27Rn1rOmkDXOwKBgH8av6XOba9guVz8hA2+1epg5GaWiuf8ZqTom4fwyKf5iuS0uFiQcV0MYwgBqxH1FWl6VLGeKcxOOaaRmoZAcVTkBqrOcL61j3B5NVgducVXkeOOXLKMt1p9tIsyjaAMGvVI+I1+gp9FZXiOAT6LcKRnaN35Vy+lhfKJ9Kv+cifeYACpIry3A5kA+tW1uYmXKuD+NSRzDseKl3gjrTS47UhYAGqFxINxqhcSA8ZrPlQmq8kZArNujljkdBUuhAy3cUOOWdRXrY4FLRUN0iSW8iSkBGUg5riLGMrbzxq3IkI3CozpuWZmnkye+6qT6TlmPnkk9M1Smsbq3OUuOOvWtDTrq4j+V5CRn1rpIZy6ZNSbiBz1qneXphFcpqmqzyNiJiBnqKyl+33DDZJL9dxq2i6pDg7mYehNX7a/lx5d5EADwGHUVBeR/MfT2q/4It2n10vtykY3H29K9MpaSsLxKJJo4oI5Ci53NjvWbbweUGAH3sE5qG8DpnqB7CsKNru7umitUKgdXbqay3m1L7cluxlMm/DAqMYrqLfTW5DKAw7joa1LRCnDVNelYo91cXq13NcMfLDbAcA+tVbXTppyzMrNtGSq9RTP7VhgZY44HBP+1k1Zi1LzZNgbOexGCKS8kwQcc1LM4ayeT0Sl8M+IhpDzfuA4kwCe+BXqFldxXtrHcQnKOMjNWKSsfV48zI3qMVVwpIA5xxTpI1bqBVNrRQ25EwfVaja3cybtgz/eK81ahjKrz1pTwR6k1U1aQ/Zm57VhQKDGhAyBWxatHACUXbuHOO9Yt3plol01wkWSTnGazLixaW5EsSbSO4q5HZu6Ey9R0qLUQYNOcdA3FY1vGS4wK9f8NQtBolurdSC2PrWtRWfqoHlI3cHFZUXJJ9TU3U4xxTguKdsyM1FINtQNjcKpauC1uwHORWLYsAAhPStqOPKAjoaHhU8Fc1G0KDouKgmUBTisDXCTBGoxgtk1W02AysoUclgK9it4hDBHGOiKFqWiqWppvtT7EGsgKoGVJB7ip161KoWlY4qrctjGOpqCJd74JqLUlVYic8YrlI22ySSKehzXUWDCa2RxzkVaaMVUnXaDWXdzBVIzziuf1Pc80MS9x1rd8Maa39qxRucqhDtj2r0elopkiCRGRuhGKxJreaFipQlB/EBTA2Dih5tg4ySeAKlUnbufr6VBOpkBA4PassR3NtIZJJ/MB/h24xWDr+rySYihU+/NZULXMkXlrHyepFdfoYaG1RG5IFa7yZTIrNv5gqHmudnn3zgdeazrjL3+7PyggV6J4QgY28ly643YRT64610tFFJTXXcjL6jFc+/BIP8ACcUKoEm888YFI13GuVkbafehZ4uu8UOYpVwGGazp9KtmYs2AfempZQx524pyusRAyKkEuXU9jxWNrUxUsnc1k26F50U9WIFd1F4N08XCzu0rdCUJ4Jro0RY0VEUKqjAA7U+iiikrCvV2Xki9ic1BExDYPOKL6xhvIdrqM9j6VjmwNuNiu6/8CzUiW0uw73bOOCADVO7hulGRIxY9iOKy5RfgnbKB+NLZWWp3EwMtwBHnPU8106xrFGiZzt5JNcpqdyLnVWVOUU81a0GL7TrdsmMgOCfoDmvUaWiiiikrM1aHlJh0HBrNBAcZqcnH0qJ1EnBGaqvGy/dPFU51mfv+tVRaNnLc/Wp0cRLgHmqup35hs2AJ8xxgYrBijKRlm+8eSa6nwLbbryW4b+EYFd5RRRRRRVXURmxlz7fzrmDJ820noavoQ0WCcmlQZpXjBGarMijpzVedBtJNZczbSTmsW6k864BY/Kvaomk3sFB4rtfBO398F6BcV19FFFFFFVr/AJs5fpXLXEJK716imWt5tOxzir6Tqe9JLcAcbhUTTrt4Iqhc3IOQGrA1C/CcZ56VkPOzHr1p0JZ32r07mu/8ELsaYZ5K5rsKKKKSloqtfnFnL9KwkAP41Qv7I53R9ax5ri5tzhg31qm+qzdDzUb6zKBjAqlNqkrZxwTWe8jSOSSSalhiaRgO1a1tAsYA711/hA7bpx6qa7CikpaSio1njZioYZHWs/UdQtmhlgjnjeUYyinJHPes2M5HNPYDbiqr28cvyuoIqjceH7eQ5AI+lZ0vhyME4Z/zqjPoiRZ5aqBslRulXbe3woOKtLGc8itvQJxbXqseh4NdRPqaxpujjMnqAcYHrToNShlAz8h96mkvLeJQ0k8aKe7MBT0uIZF3JNGy+qsCKqajfx2gUFvmJ6ZrB1HxUkSttIGOOtcpfeK5jC8dsxDP1f0+laehxeVp8cjcyTfOxPU1uRmpm6VAchqkEmKjkcYz0rJvGDZrJMe+Tgd6vRwbU6UpTBqS1O2ZT71vRkSJtakaARITyy+3UVyXiXUTvijEqugB+6en1rJi1AqmN7D6Gut8S61a6XKipbieSRSSXPSuBv8AUZbyQlwFXP3VGAKp7q9B0OTzdLtG/wBnH5VtR1Z6ionXnIprDI6VWkjB/i5qnPCMHAqCCAeZyKutGoWqsvBqOM4cH3rcgOQKvRNxisbxB4ettQgaZcRToM7gOv1rgEvzAvl+VE+D1K1//9k="
},
"biometric": {
"birthDate": "15 JUL 1993",
"birthLocation": "Roeselare",
"cardDeliveryMunicipality": "Avelgem",
"cardNumber": "592124058233",
"cardValidityDateBegin": "27.05.2015",
"cardValidityDateEnd": "27.05.2025",
"chipNumber": "...==",
"documentType": "01",
"firstNames": "Gilles Frans",
"name": "Platteeuw",
"nationalNumber": "...",
"nationality": "Belg",
"nobleCondition": "",
"pictureHash": "...=",
"rawData": "...+axEIuyskBgFySsp/",
"sex": "M",
"signature": ".../OlA44h4YCM/h+J14xUCg/98Y9/.../C/RB2dtVbHwFvDuafmr4ZEshTlZTLidHKlISFvFWOtsLAEPCbl5LjfQwcOKe0pDADtHb4IStBnr+aaE8oHsTaKq66Y+zt+AbwdmWOrMA5URKKf7dZkY7jt3h8KZDw36VjcytUgjxVIdqwHsDkmIjK6mJtakIwybS5wn3RiQj33/vgG7JTRZJoKgDXLLTvLZO4qlfA==",
"specialStatus": "0",
"thirdName": "J",
"version": "0"
},
"address": {
"municipality": "Hoeselt",
"rawData": "...==",
"signature": "...+Evety1PnTE4pqXaHgBxIpk+P8kRL5W3zDV+../../..+YoHBC9KqTmSpl5KULxdnKiyCt+2RyJdzE2wyoymjRmysIhJy1wW9PRnx99S1TFqQLuc0tyBmkBPR4aFqmOq4a7zqd0q2Q1g+BbnwJ4d3oa10ia5+0kBXf0THoXv3HYIHlnwhBMfAtWzPnFrYBuAKTwyl7yBF5IFfXFpGWuVZUTJElgNcmNvsHMnAhVwDw==",
"streetAndNumber": "Kerkstraat X",
"version": "0",
"zipcode": "3730"
}
}var filter = ['biometric'];
generic.allData(module, { filters: filter }, callback);{
"biometric": {
"birthDate": "15 JUL 1993",
"birthLocation": "Roeselare",
"cardDeliveryMunicipality": "Avelgem",
"cardNumber": "592124058233",
"cardValidityDateBegin": "27.05.2015",
"cardValidityDateEnd": "27.05.2025",
"chipNumber": "...==",
"documentType": "01",
"firstNames": "Gilles Frans",
"name": "Platteeuw",
"nationalNumber": "...",
"nationality": "Belg",
"nobleCondition": "",
"pictureHash": "...=",
"rawData": "...+axEIuyskBgFySsp/",
"sex": "M",
"signature": ".../OlA44h4YCM/h+J14xUCg/98Y9/.../C/RB2dtVbHwFvDuafmr4ZEshTlZTLidHKlISFvFWOtsLAEPCbl5LjfQwcOKe0pDADtHb4IStBnr+aaE8oHsTaKq66Y+zt+AbwdmWOrMA5URKKf7dZkY7jt3h8KZDw36VjcytUgjxVIdqwHsDkmIjK6mJtakIwybS5wn3RiQj33/vgG7JTRZJoKgDXLLTvLZO4qlfA==",
"specialStatus": "0",
"thirdName": "J",
"version": "0"
}
}var filter = [];
generic.allCerts(module, parseCerts, { filters: filter}, callback);{
"rootCertificate": {
...
},
"authenticationCertificate": {
...
},
"nonRepudiationCertificate": {
...
},
"intermediateCertificates": {
...
},
"encryptionCertificate": {
...
}
}var filter = ['rootCertificate'];
generic.allCerts(module, { filters: filter}, callback);{
"rootCertificate": {
...
}
}var filter = null;
generic.allCerts(module, { filters: filter}, callback);{
"rootCertificate": {
...
},
"authenticationCertificate": {
...
},
"nonRepudiationCertificate": {
...
},
"intermediateCertificates": {
...
},
"encryptionCertificate": {
...
}
}var data = {
"pin":"...",
"algorithm":"sha1",
"data":"I2e+u/sgy7fYgh+DWA0p2jzXQ7E=",
"osDialog": true
}
generic.sign(module, data, callback);{
"success": true,
"data": {
"data" : "W7wqvWA8m9S...="
}
}var data = {
"algorithm":"sha1",
"data":"I2e+u/sgy7fYgh+DWA0p2jzXQ7E=",
"osDialog": false
}
generic.sign(module, data, callback);{
"success": true,
"data": {
"data" : "W7wqvWA8m9S...="
}
}var data = {
"algorithm":"sha256",
"data":"vl5He0ulthjX+VWNM46QX7vJ8VvXMq2k/Tq8Xq1bwEw=",
"osDialog": false
}
generic.signRaw(module, data, callback);const data = {
algorithm: "sha256",
data: "E1uHACbPvhLew0gGmBH83lvtKIAKxU2/RezfBOsT6Vs=",
pin: "1234"
}
const bulk = true;
generic.sign(module, data, bulk).then(res => {
}, err => {
console.error(err)
})generic.resetBulkPin(module).then(res => {
}, err => {
console.error(err)
}){
"success": true,
"data": true
}var data = {
"pin":"..."
}
generic.verifyPin(module, data, callback);{
"verified": true
}var data = {}
generic.verifyPin(module, data, callback);{
"verified": true
}var data = {
"pin": "...",
"algorithm": "sha1",
"data":"I2e+u/sgy7fYgh+DWA0p2jzXQ7E="
}
generic.authenticate(module, data, callback);{
"success": true,
"data": {
"data" : "W7wqvWA8m9S...="
}
}generic.allAlgoRefs(module, callback);{
"success": true,
"data": ["sha1", "sha256"]
export interface AbstractEmv {
readApplicationData(callback?: (error: T1CLibException, data: PaymentReadApplicationDataResponse) => void): Promise<PaymentReadApplicationDataResponse>;
readData(callback?: (error: T1CLibException, data: PaymentReadDataResponse) => void): Promise<PaymentReadDataResponse>;
allCerts(aid: string, filters: string[] | Options, callback?: (error: T1CLibException, data: PaymentAllCertsResponse | TokenAllCertsExtendedResponse) => void): Promise<PaymentAllCertsResponse | TokenAllCertsExtendedResponse>;
issuerPublicCertificate(aid: string, callback?: (error: T1CLibException, data: PaymentCertificateResponse) => void): Promise<PaymentCertificateResponse>;
iccPublicCertificate(aid: string, callback?: (error: T1CLibException, data: PaymentCertificateResponse) => void): Promise<PaymentCertificateResponse>;
allCertsExtended(aid: string, filters: string[] | Options, callback?: (error: T1CLibException, data: TokenAllCertsExtendedResponse) => void): Promise<TokenAllCertsExtendedResponse>;
issuerPublicCertificateExtended(aid: string, callback?: (error: T1CLibException, data: TokenCertificateExtendedResponse) => void): Promise<TokenCertificateExtendedResponse>;
iccPublicCertificateExtended(aid: string, callback?: (error: T1CLibException, data: TokenCertificateExtendedResponse) => void): Promise<TokenCertificateExtendedResponse>;
verifyPin(body: PaymentVerifyPinData, callback?: (error: T1CLibException, data: PaymentVerifyPinResponse) => void): Promise<PaymentVerifyPinResponse>;
}T1CSdk.initialize(config).then(res => {
}, err => {
console.error(error)
});var emv = client.emv(reader_id);function callback(err,data) {
if(err){console.log("Error:",JSON.stringify(err, null, ' '));}
else {console.log(JSON.stringify(data, null, ' '));}
}
emv.readData(callback)var coreService = client.core();
core.readersCardAvailable(callback);var emv = client.emv(reader_id);client.emv(reader_id).readData(callback);function callback(err,data) {
if(err){
console.log("Error:",JSON.stringify(err, null, ' '));
}
else {
console.log(JSON.stringify(data, null, ' '));
}
}{
"data": [
{
"aid": "A0000000048002",
"name": "MAESTRO",
"priority": 1
},{
"aid": "A0000000048008",
"name": "MASTERCARD",
"priority": 1
}
],
"success": true
}client.emv(reader_id).readApplicationData(callback);function callback(err,data) {
if(err){
console.log("Error:",JSON.stringify(err, null, ' '));
}
else {
console.log(JSON.stringify(data, null, ' '));
}
}{
"country": "BE",
"countryCode": "0056",
"effectiveDate": "190201",
"expirationDate": "241231",
"language": "nlen",
"name": "",
"pan": "670...001"
}allCertsExtended(parseCerts?: boolean, filters?: string[] | Options, callback?: (error: T1CLibException, data: TokenAllCertsExtendedResponse) => void): Promise<TokenAllCertsExtendedResponse>;
iccPublicCertificateExtended(parseCerts?: boolean, callback?: (error: T1CLibException, data: TokenCertificateExtendedResponse) => void): Promise<TokenCertificateExtendedResponse>;
issuerPublicCertificateExtended(parseCerts?: boolean, callback?: (error: T1CLibException, data: TokenCertificateExtendedResponse) => void): Promise<TokenCertificateExtendedResponse>;{
"success" : true
"data" : {
"certificates": [{
"certificate"?: string,
"exponent"?: string,
"remainder"?: string,
"parsedCertificate"?: Certificate
}]
}
}{
"success" : true
"data" : {
"issuerPublicCertificate": {
"certificates": [...]
},
"iccPublicCertificate": {
"certificates": [...]
}
}
}// Application ID can be retrieved with the Applications endpoint
var aid = "..."
client.emv(reader_id).issuerPublicCertificate(aid, callback);function callback(err,data) {
if(err){
console.log("Error:",JSON.stringify(err, null, ' '));
}
else {
console.log(JSON.stringify(data, null, ' '));
}
}{
"data": {
"data": "base64 encoded data",
"exponent": "base64 encoded data",
"remainder": "base64 encoded data"
},
"success": true
}// Application ID can be retrieved with the Applications endpoint
var aid = "..."
client.emv(reader_id).iccPublicCertificate(aid, callback);function callback(err,data) {
if(err){
console.log("Error:",JSON.stringify(err, null, ' '));
}
else {
console.log(JSON.stringify(data, null, ' '));
}
}{
"certificate": "dxL8JnkxHneX36tdQCzz...HC3Wpt/qppk008q9OMDgVp0F7NJjCC2mXg3b/qD7c09WFXUwZ+XdkmIefhoZT/kme4QEoD49+ppQiqSeCaRjn6N0OetcjleWkPej8vE0QG4mLlG/edWTVbfMGbED9Kbjf4ooauNnq+iAVwgHedsDpdDWJLhV8sDSLQgZ1B3fMQuyZIaD79+X+H9fbhmJg+j7Lr638srglWM9VlthaWjRbFH2HzNEiQ9sOE20lmj6WM6zdYas9+Z4hcwZqWbeiTeIJDwDc6w==",
"exponent": "AQAB",
"remainder": ""
}var data = {
"pin": "...."
}
client.emv().verifyPin(data, callback);{
"verified": true
}var data = {}
client.emv().verifyPin(data, callback);{
"verified": true
} $("#buttonValidate").on('click', function () {
var _body={};
_body.pin = $("#psw").val(); //only when no pin-pad available
var emv = connector.emv(reader_id);
emv.verifyPin(_body, validationCallback);
});{
"code": 301,
"description": "Wrong pin, 2 tries remaining",
"success": false
}{
"code": 301,
"description": "Wrong pin, 1 try remaining",
"success": false
}function callback(err,data) {
if(err){
console.log("Error:",JSON.stringify(err, null, ' '));
}
else {
console.log(JSON.stringify(data, null, ' '));
}
}{
success: false,
description: "some error description",
code: "some error code"
}export interface AbstractJcop {
allCerts(parseCerts?: boolean, filters?: string[] | Options, callback?: (error: T1CLibException, data: TokenAllCertsResponse) => void): Promise<TokenAllCertsResponse>;
authenticationCertificate(parseCerts?: boolean, callback?: (error: T1CLibException, data: TokenCertificateResponse) => void): Promise<TokenCertificateResponse>;
nonRepudiationCertificate(parseCerts?: boolean, callback?: (error: T1CLibException, data: TokenCertificateResponse) => void): Promise<TokenCertificateResponse>;
encryptionCertificate(parseCerts?: boolean, callback?: (error: T1CLibException, data: TokenCertificateResponse) => void): Promise<TokenCertificateResponse>;
allCertsExtended(parseCerts?: boolean, filters?: string[] | Options, callback?: (error: T1CLibException, data: TokenAllCertsExtendedResponse) => void): Promise<TokenAllCertsExtendedResponse>;
authenticationCertificateExtended(parseCerts?: boolean, callback?: (error: T1CLibException, data: TokenCertificateExtendedResponse) => void): Promise<TokenCertificateExtendedResponse>;
nonRepudiationCertificateExtended(parseCerts?: boolean, callback?: (error: T1CLibException, data: TokenCertificateExtendedResponse) => void): Promise<TokenCertificateExtendedResponse>;
encryptionCertificateExtended(parseCerts?: boolean, callback?: (error: T1CLibException, data: TokenCertificateExtendedResponse) => void): Promise<TokenCertificateExtendedResponse>;
validateSignature(body: TokenValidateSignatureRequest, callback?: (error: T1CLibException, data: TokenValidateSignatureResponse) => void): Promise<TokenValidateSignatureResponse>;
verifyPin(body: TokenVerifyPinData, callback?: (error: T1CLibException, data: TokenVerifyPinResponse) => void): Promise<TokenVerifyPinResponse>;
authenticate(body: TokenAuthenticateOrSignData, callback?: (error: T1CLibException, data: TokenAuthenticateResponse) => void): Promise<TokenAuthenticateResponse>;
sign(body: TokenAuthenticateOrSignData, bulk?: boolean, callback?: (error: T1CLibException, data: TokenSignResponse) => void): Promise<TokenSignResponse>;
signRaw(body: TokenAuthenticateOrSignData, bulk?: boolean, callback?: (error: T1CLibException, data: TokenSignResponse) => void): Promise<TokenSignResponse>;
allAlgoRefs(callback?: (error: T1CLibException, data: TokenAlgorithmReferencesResponse) => void): Promise<TokenAlgorithmReferencesResponse>
resetBulkPin(callback?: (error: T1CLibException, data: BoolDataResponse) => void): Promise<BoolDataResponse>;
}T1CSdk.T1CClient.initialize(config).then(res => {
client = res;
}, err => {
console.error(error)
});var core = client.core();
core.readersCardAvailable(callback);{
"data": [
// List of reader with cards found
],
"success": true
}const moduleName = "jcop3";
var module = client.generic(selected_reader.id);var module = client.jcop3(selected_reader.id);module.tokenData().then(res => {
// see response below
}){
"success": true,
"data": {
"info": {
"slot": "string",
"label": "string",
"manufacturerId": "string",
"model": "string",
"serialNumber": "string",
"flags": {
"isRandomNumberGenerator": "boolean",
"isWriteProtected": "boolean",
"isLoginRequired": "boolean",
"isUserPinInitialized": "boolean",
"isRestoreKeyNotNeeded": "boolean",
"isClockOnToken": "boolean",
"isProtectedAuthenticationPath": "boolean",
"isDualCryptoOperations": "boolean",
"isTokenInitialized": "boolean",
"isSecondaryAuthentication": "boolean",
"isUserPinCountLow": "boolean",
"isUserPinFinalTry": "boolean",
"isUserPinLocked": "boolean",
"isUserPinToBeChanged": "boolean",
"isSoPinCountLow": "boolean",
"isSoPinFinalTry": "boolean",
"isSoPinLocked": "boolean",
"isSoPinToBeChanged": "boolean"
},
"mechanisms": [
{
"mechanism": "string",
"flags": {
"isHardware": "boolean",
"isEncrypt": "boolean",
"isDecrypt": "boolean",
"isDigest": "boolean",
"isSign": "boolean",
"isSignRecover": "boolean",
"isVerify": "boolean",
"isVerifyRecover": "boolean",
"isGenerate": "boolean",
"isGenerateKeyPair": "boolean",
"isWrap": "boolean",
"isUnwrap": "boolean",
"isExtension": "boolean",
"isEcFP": "boolean",
"isEcNamedcurve": "boolean",
"isEcUncompress": "boolean",
"isEcCompress": "boolean"
},
"ulMinKeySize": "number",
"ulMaxKeySize": "number"
}
],
"ulMaxSessionCount": "number",
"ulSessionCount": "number",
"ulMaxRwSessionCount": "number",
"ulMaxPinLen": "number",
"ulMinPinLen": "number",
"ulTotalPubLicMemory": "number",
"ulFreePubMemory": "number",
"ulTotalPrivateMemory": "number",
"ulFreePrivateMemory": "number",
"hardwareVersion": "string",
"firmwareVersion": "string"
},
"infoType": "TokenInfoType"
}
}
//ENUM
TokenInfoType {
Token,
PKCS11,
File,
Payment,
HSM,
Vault,
Wallet,
}allCertsExtended(parseCerts?: boolean, filters?: string[] | Options, callback?: (error: T1CLibException, data: TokenAllCertsExtendedResponse) => void): Promise<TokenAllCertsExtendedResponse>;
authenticationCertificateExtended(parseCerts?: boolean, callback?: (error: T1CLibException, data: TokenCertificateExtendedResponse) => void): Promise<TokenCertificateExtendedResponse>;
nonRepudiationCertificateExtended(parseCerts?: boolean, callback?: (error: T1CLibException, data: TokenCertificateExtendedResponse) => void): Promise<TokenCertificateExtendedResponse>;
encryptionCertificateExtended(parseCerts?: boolean, callback?: (error: T1CLibException, data: TokenCertificateExtendedResponse) => void): Promise<TokenCertificateExtendedResponse>;{
"success" : true
"data" : {
"certificates": [{
"certificate"?: string,
"certificateType"?: string,
"id"?: string,
"subject"?: string,
"issuer"?: string,
"serialNumber"?: string,
"url"?: string,
"hashSubPubKey"?: string,
"hashIssPubKey"?: string,
"exponent"?: string,
"remainder"?: string,
"parsedCertificate"?: Certificate
}]
}
}{
"success" : true
"data" : {
"authenticationCertificate": {
"certificates": [...]
},
"nonRepudiationCertificate": {
"certificates": [...]
}
"encryptionCertificate": {
"certificates": [...]
}
}
}module.authenticationCertificate(module, parseCertsBoolean, callback);{
success: true,
data: {
certificate?: string,
certificates?: Array<string>,
certificateType?: string,
id?: string,
parsedCertificate?: Certificate,
parsedCertificates?: Array<Certificate>
}
}module.nonRepudiationCertificate(module, parseCertsBoolean, callback);{
success: true,
data: {
certificate?: string,
certificates?: Array<string>,
certificateType?: string,
id?: string,
parsedCertificate?: Certificate,
parsedCertificates?: Array<Certificate>
}
}module.encryptionCertificate(module, parseCertsBoolean, callback);{
success: true,
data: {
certificate?: string,
certificates?: Array<string>,
certificateType?: string,
id?: string,
parsedCertificate?: Certificate,
parsedCertificates?: Array<Certificate>
}
}var filter = [];
module.allCerts(module, parseCerts, { filters: filter}, callback);{
"authenticationCertificate": {
...
},
"nonRepudiationCertificate": {
...
},
"encryptionCertificate": {
...
}
}var filter = ['authenticationCertificate'];
module.allCerts(module, { filters: filter}, callback);{
"authenticationCertificate": {
...
}
}var filter = null;
module.allCerts(module, { filters: filter}, callback);{
"authenticationCertificate": {
...
},
"nonRepudiationCertificate": {
...
}
}var data = {
"pin":"...",
"algorithm":"sha1",
"data":"I2e+u/sgy7fYgh+DWA0p2jzXQ7E=",
"osDialog": true,
"id": "id.."
}
module.sign(module, data, callback);{
"success": true,
"data": {
"data" : "W7wqvWA8m9S...="
}
}var data = {
"algorithm":"sha1",
"data":"I2e+u/sgy7fYgh+DWA0p2jzXQ7E=",
"osDialog": false,
"id": "id.."
}
module.sign(module, data, callback);{
"success": true,
"data": {
"data" : "W7wqvWA8m9S...="
}
}var data = {
"algorithm":"sha256",
"data":"vl5He0ulthjX+VWNM46QX7vJ8VvXMq2k/Tq8Xq1bwEw=",
"osDialog": false
}
module.signRaw(data, callback);const data = {
algorithm: "sha256",
data: "E1uHACbPvhLew0gGmBH83lvtKIAKxU2/RezfBOsT6Vs=",
pin: "1234",
id: "id.."
}
const bulk = true;
module.sign(module, data, bulk).then(res => {
}, err => {
console.error(err)
})module.resetBulkPin(module).then(res => {
}, err => {
console.error(err)
}){
"success": true,
"data": true
}var data = {
"pin":"..."
}
module.verifyPin(module, data, callback);{
"verified": true
}var data = {}
module.verifyPin(module, data, callback);{
"verified": true
}var data = {
"pin": "...",
"algorithm": "sha1",
"data":"I2e+u/sgy7fYgh+DWA0p2jzXQ7E=",
"id": "id.."
}
module.authenticate(module, data, callback);{
"success": true,
"data": {
"data" : "W7wqvWA8m9S...="
}
}module.verifyPin(module, data, callback);module.allAlgoRefs(module, callback);{
"success": true,
"data": ["sha1", "sha256"]
}const body = {
"algorithm": 'sha256',
"hash": '...',
"signedHash": '...',
"osDialog": false,
"id": 'cert_id',
"pin": 'pin_code',
"timeout": 120 //timeout in seconds
}
module.validateSignature(body).then(response => {
response.valid
).catch(error => {
errorHandler(error)}
){
"success": true,
"data": {
"valid": true
}
}(prerequisite: driver installation neeeded)
export interface AbstractLuxTrust {
allCerts(parseCerts?: boolean, filters?: string[] | Options, callback?: (error: T1CLibException, data: TokenAllCertsResponse) => void): Promise<TokenAllCertsResponse>;
rootCertificate(parseCerts?: boolean, callback?: (error: T1CLibException, data: TokenCertificateResponse) => void): Promise<TokenCertificateResponse>;
authenticationCertificate(parseCerts?: boolean, callback?: (error: T1CLibException, data: TokenCertificateResponse) => void): Promise<TokenCertificateResponse>;
nonRepudiationCertificate(parseCerts?: boolean, callback?: (error: T1CLibException, data: TokenCertificateResponse) => void): Promise<TokenCertificateResponse>;
allCertsExtended(parseCerts?: boolean, filters?: string[] | Options, callback?: (error: T1CLibException, data: TokenAllCertsExtendedResponse) => void): Promise<TokenAllCertsExtendedResponse>;
rootCertificateExtended(parseCerts?: boolean, callback?: (error: T1CLibException, data: TokenCertificateExtendedResponse) => void): Promise<TokenCertificateExtendedResponse>;
authenticationCertificateExtended(parseCerts?: boolean, callback?: (error: T1CLibException, data: TokenCertificateExtendedResponse) => void): Promise<TokenCertificateExtendedResponse>;
nonRepudiationCertificateExtended(parseCerts?: boolean, callback?: (error: T1CLibException, data: TokenCertificateExtendedResponse) => void): Promise<TokenCertificateExtendedResponse>;
verifyPin(body: TokenVerifyPinData, callback?: (error: T1CLibException, data: TokenVerifyPinResponse) => void): Promise<TokenVerifyPinResponse>;
authenticate(body: TokenAuthenticateOrSignData, callback?: (error: T1CLibException, data: TokenAuthenticateResponse) => void): Promise<TokenAuthenticateResponse>;
sign(body: TokenAuthenticateOrSignData, bulk?: boolean, callback?: (error: T1CLibException, data: TokenSignResponse) => void): Promise<TokenSignResponse>;
signRaw(body: TokenAuthenticateOrSignData, bulk?: boolean, callback?: (error: T1CLibException, data: TokenSignResponse) => void): Promise<TokenSignResponse>;
allAlgoRefs(callback?: (error: T1CLibException, data: TokenAlgorithmReferencesResponse) => void): Promise<TokenAlgorithmReferencesResponse>
resetBulkPin(callback?: (error: T1CLibException, data: BoolDataResponse) => void): Promise<BoolDataResponse>;
}function callback(err,data) {
if(err){console.log("Error:",JSON.stringify(err, null, ' '));}
else {console.log(JSON.stringify(data, null, ' '));}T1CSdk.T1CClient.initialize(config).then(res => {
client = res;
client.core().readers(callback);
}, err => {
console.error(error)
});{
"data": [
{
"card": {
"atr": "3B7D94000080318065B0831100C883009000",
"description": [
"personal identity card (ID card)",
"LuxTrust card"
]
},
"id": "c8d31f8fed44d952",
"name": "Identiv uTrust 4701 F Dual Interface Reader(1)",
"pinpad": false
},
{
"id": "ec3109c84ee9eeb5",
"name": "Identiv uTrust 4701 F Dual Interface Reader(2)",
"pinpad": false
}
],
"success": true
}allCertsExtended(parseCerts?: boolean, filters?: string[] | Options, callback?: (error: T1CLibException, data: TokenAllCertsExtendedResponse) => void): Promise<TokenAllCertsExtendedResponse>;
authenticationCertificateExtended(parseCerts?: boolean, callback?: (error: T1CLibException, data: TokenCertificateExtendedResponse) => void): Promise<TokenCertificateExtendedResponse>;
nonRepudiationCertificateExtended(parseCerts?: boolean, callback?: (error: T1CLibException, data: TokenCertificateExtendedResponse) => void): Promise<TokenCertificateExtendedResponse>;
rootCertificateExtended(parseCerts?: boolean, callback?: (error: T1CLibException, data: TokenCertificateExtendedResponse) => void): Promise<TokenCertificateExtendedResponse>;{
"success" : true
"data" : {
"certificates": [{
"certificate"?: string,
"certificateType"?: string,
"id"?: string,
"subject"?: string,
"issuer"?: string,
"serialNumber"?: string,
"url"?: string,
"hashSubPubKey"?: string,
"hashIssPubKey"?: string,
"exponent"?: string,
"remainder"?: string,
"parsedCertificate"?: Certificate
}]
}
}{
"success" : true
"data" : {
"authenticationCertificate": {
"certificates": [...]
},
"nonRepudiationCertificate": {
"certificates": [...]
},
"rootCertificate": {
"certificates": [...]
}
}
}client.luxtrust(reader_id).rootCertificate({ parseCerts: true }, callback);{
success: true,
data: {
certificate?: string,
certificates?: Array<string>,
certificateType?: string,
id?: string,
parsedCertificate?: Certificate,
parsedCertificates?: Array<Certificate>
}
}client.luxtrust(reader_id).authenticationCertificate({ parseCerts: true }, callback);{
success: true,
data: {
certificate?: string,
certificates?: Array<string>,
certificateType?: string,
id?: string,
parsedCertificate?: Certificate,
parsedCertificates?: Array<Certificate>
}
}client.luxtrust(reader_id).signingCertificate({ parseCerts: true }, callback);{
success: true,
data: {
certificate?: string,
certificates?: Array<string>,
certificateType?: string,
id?: string,
parsedCertificate?: Certificate,
parsedCertificates?: Array<Certificate>
}
}var filter = [];
client.luxtrust(reader_id).allCerts({ filters: filter, parseCerts: true }, callback);{
"rootCertificate": {
...
},
"authenticationCertificate": {
...
},
"nonRepudiationCertificate": {
...
}
}var filter = ['authentication-certificate'];
client.luxtrust(reader_id).allCerts({ filters: filter, parseCerts: true }, callback);{
"rootCertificate": {
...
}
}var filter = ['root-certificates','authentication-certificate','signing-certificate'];
client.luxtrust(reader_id).allCertificates({ filters: filter, parseCerts: false }, callback);{
"rootCertificate": {
...
},
"authenticationCertificate": {
...
},
"nonRepudiationCertificate": {
...
}
}var data = {
"pin":"...",
"algorithm":"sha1",
"data":"I2e+u/sgy7fYgh+DWA0p2jzXQ7E="
}
client.luxtrust(reader_id).sign(data, callback);var data = {
"algorithm":"sha1",
"data":"I2e+u/sgy7fYgh+DWA0p2jzXQ7E="
}
client.luxtrust(reader_id).sign(data, callback);{
"success": true,
"data": "W7wqvWA8m9SBALZPxN0qUCZfB1O/WLaM/silenLzSXXmeR+0nzB7hXC/Lc/fMru82m/AAqCuGTYMPKcIpQG6MtZ/SGVpZUA/71jv3D9CatmGYGZc52cpcb7cqOVT7EmhrMtwo/jyUbi/Dy5c8G05owkbgx6QxnLEuTLkfoqsW9Q="
}This is sample text to demonstrate siging with LuxTrust smartcard or signing stick135b870026cfbe12dec348069811fcde5bed28800ac54dbf45ecdf04eb13e95bE1uHACbPvhLew0gGmBH83lvtKIAKxU2/RezfBOsT6Vs=var data = {
"pin":"...",
"algorithm":"sha256",
"data":"E1uHACbPvhLew0gGmBH83lvtKIAKxU2/RezfBOsT6Vs="
}
client.luxtrust(reader_id).sign(data, callback);{
"data": "C7SG5eix1+lzMcZXgL0bCL+rLxKhd8ngrSj6mvlgooWH7CloEU13Rj8QiQHdhHnZgAi4Q0fCMIqAc4dn9uW9OP+MRitimRpYZcaDsGrUehPi/JpOD1e+ko7xKZ67ijUU4KTmG4HXc114oJ7xxx3CGL7TNFfvuEphLbbZa+9IZSSnYDOOENJqhggqqu7paSbLJrxC2zaeMxODKb5WSexHnZH6NnLPl2OmvPTYtxiTUMrLbFRsDRAziF6/VQkgM8/xOm+1/9Expv5DSLRY8RQ+wha6/nMlJjx50JszYIj2aBQKp4AOxPVdPewVGEWF4NF9ffrPLrOA2v2d7t5M4q7yxA==",
"success": true
}var data = {
"algorithm":"sha256",
"data":"vl5He0ulthjX+VWNM46QX7vJ8VvXMq2k/Tq8Xq1bwEw=",
"osDialog": false
}
luxtrustClient.signRaw(data, callback);var data = {
"pin":"..."
}
client.luxtrust(reader_id).verifyPin(data, callback);var data = {}
client.luxtrust(reader_id).verifyPin(data, callback);{
"success": true
}var data = {
"pin": "...",
"algorithm_reference": "sha1",
"data":"I2e+u/sgy7fYgh+DWA0p2jzXQ7E="
}
client.luxtrust(reader_id).authenticate(data, callback);var data = {
"algorithm_reference": "sha1",
"data":"I2e+u/sgy7fYgh+DWA0p2jzXQ7E="
}
client.luxtrust(reader_id).authenticate(data, callback);{
"success": true,
"data": "W7wqvWA8m9SBALZPxN0qUCZfB1O/WLaM/silenLzSXXmeR+0nzB7hXC/Lc/fMru82m/AAqCuGTYMPKcIpQG6MtZ/SGVpZUA/71jv3D9CatmGYGZc52cpcb7cqOVT7EmhrMtwo/jyUbi/Dy5c8G05owkbgx6QxnLEuTLkfoqsW9Q="
}The calculated digest of the hash is prefixed with:
DigestInfo ::= SEQUENCE {
digestAlgorithm AlgorithmIdentifier,
digest OCTET STRING
}
Make sure this has been taken into consideration in order to validate the signature in a backend process.function callback(err,data) {
if(err){
console.log("Error:",JSON.stringify(err, null, ' '));
}
else {
console.log(JSON.stringify(data, null, ' '));
}
}{
success: false,
description: "some error description",
code: "some error code"
}var data = {
"pin": "...",
"algorithm": "sha1",
"data":"I2e+u/sgy7fYgh+DWA0p2jzXQ7E="
}
client.luxeid(reader_id, pin).authenticate(data, callback);export interface AbstractEidLux {
allData(filters: string[] | Options, callback?: (error: T1CLibException, data: TokenAllDataResponse) => void): Promise<TokenAllDataResponse>;
allCerts(parseCerts?: boolean, filters?: string[] | Options, callback?: (error: T1CLibException, data: TokenAllCertsResponse) => void): Promise<TokenAllCertsResponse>;
biometric(callback?: (error: T1CLibException, data: TokenBiometricDataResponse) => void): Promise<TokenBiometricDataResponse>;
tokenData(callback?: (error: T1CLibException, data: TokenInfoResponse) => void): Promise<TokenInfoResponse>;
address(callback?: (error: T1CLibException, data: TokenAddressResponse) => void): Promise<TokenAddressResponse>;
picture(callback?: (error: T1CLibException, data: TokenPictureResponse) => void): Promise<TokenPictureResponse>;
rootCertificate(parseCerts?: boolean, callback?: (error: T1CLibException, data: TokenCertificateResponse) => void): Promise<TokenCertificateResponse>;
authenticationCertificate(parseCerts?: boolean, callback?: (error: T1CLibException, data: TokenCertificateResponse) => void): Promise<TokenCertificateResponse>;
nonRepudiationCertificate(parseCerts?: boolean, callback?: (error: T1CLibException, data: TokenCertificateResponse) => void): Promise<TokenCertificateResponse>;
allCertsExtended(parseCerts?: boolean, filters?: string[] | Options, callback?: (error: T1CLibException, data: TokenAllCertsExtendedResponse) => void): Promise<TokenAllCertsExtendedResponse>;
rootCertificateExtended(parseCerts?: boolean, callback?: (error: T1CLibException, data: TokenCertificateExtendedResponse) => void): Promise<TokenCertificateExtendedResponse>;
authenticationCertificateExtended(parseCerts?: boolean, callback?: (error: T1CLibException, data: TokenCertificateExtendedResponse) => void): Promise<TokenCertificateExtendedResponse>;
nonRepudiationCertificateExtended(parseCerts?: boolean, callback?: (error: T1CLibException, data: TokenCertificateExtendedResponse) => void): Promise<TokenCertificateExtendedResponse>;
verifyPin(body: TokenVerifyPinData, callback?: (error: T1CLibException, data: TokenVerifyPinResponse) => void): Promise<TokenVerifyPinResponse>;
authenticate(body: TokenAuthenticateOrSignData, callback?: (error: T1CLibException, data: TokenAuthenticateResponse) => void): Promise<TokenAuthenticateResponse>;
sign(body: TokenAuthenticateOrSignData, bulk?: boolean, callback?: (error: T1CLibException, data: TokenSignResponse) => void): Promise<TokenSignResponse>;
signRaw(body: TokenAuthenticateOrSignData, bulk?: boolean, callback?: (error: T1CLibException, data: TokenSignResponse) => void): Promise<TokenSignResponse>;
allAlgoRefs(callback?: (error: T1CLibException, data: TokenAlgorithmReferencesResponse) => void): Promise<TokenAlgorithmReferencesResponse>
resetBulkPin(callback?: (error: T1CLibException, data: BoolDataResponse) => void): Promise<BoolDataResponse>;}
export class PinType {
static PIN = 'Pin';
static CAN = 'Can';
}
T1CSdk.T1CClient.initialize(config).then(res => {
client = res;
}, err => {
console.error(error)
});var module = client.luxeid(reader_id, pin, pinType);function callback(err,data) {
if(err){console.log("Error:",JSON.stringify(err, null, ' '));}
else {console.log(JSON.stringify(data, null, ' '));}
}
module.biometric(callback);var core = client.core();
core.readersCardAvailable(callback);{
"data": [
{
"card": {
"atr": "3B8F800180318065B0850300EF120FFF82900073",
"description":["Grand Duchy of Luxembourg / Identity card with LuxTrust certificate (eID)"
},
"id": "57a3e2e71c48cee9",
"name": "iDentiv CL",
"pinpad": false
}
],
"success": true
}var module = client.luxeid(reader_id, pin, pinType);client.luxeid(reader_id, pin, pinType).biometric(callback);function callback(err,data) {
if(err){
console.log("Error:",JSON.stringify(err, null, ' '));
}
else {
console.log(JSON.stringify(data, null, ' '));
}
}{
"data": {
"birthDate": "830819",
"documentNumber": "SPEC04168",
"documentType": "ID",
"firstName": "SPECIMEN",
"gender": "F",
"issuingState": "LUX",
"lastName": "SPECIMEN",
"nationality": "LUX",
"validityEndDate": "251116",
"validityStartDate": "151116"
},
"success": true
}client.luxeid(reader_id, pin, pinType).address(callback);{
"data": {
//TBD
},
"success": true
}client.luxeid(reader_id, pin, pinType).picture(callback);{
"data": {
"height": 320,
"image": "/0//UQAvAAAAAADwAAABQAAAAAAAAAAAAAAA8AAA....uq9eK159DRO61Ufrf9ICA/9k=",
"width": 240
},
"success": true
}client.luxeid(reader_id, pin, pinType).signatureImage(callback);{
"data": {
"image": "/0//UQAvAAAAAADwAAABQAAAAAAAAAAAAAAA8AAA....uq9eK159DRO61Ufrf9ICA/9k=",
"raw_data": "/0//UQAAAAAADwAAARLKEQDAAAAAAAAAAAAAA8AAA....dl42fgr367PCSA321/9k="
},
"success": true
}allCertsExtended(parseCerts?: boolean, filters?: string[] | Options, callback?: (error: T1CLibException, data: TokenAllCertsExtendedResponse) => void): Promise<TokenAllCertsExtendedResponse>;
authenticationCertificateExtended(parseCerts?: boolean, callback?: (error: T1CLibException, data: TokenCertificateExtendedResponse) => void): Promise<TokenCertificateExtendedResponse>;
nonRepudiationCertificateExtended(parseCerts?: boolean, callback?: (error: T1CLibException, data: TokenCertificateExtendedResponse) => void): Promise<TokenCertificateExtendedResponse>;
encryptionCertificateExtended(parseCerts?: boolean, callback?: (error: T1CLibException, data: TokenCertificateExtendedResponse) => void): Promise<TokenCertificateExtendedResponse>;{
"success" : true
"data" : {
"certificates": [{
"certificate"?: string,
"certificateType"?: string,
"id"?: string,
"subject"?: string,
"issuer"?: string,
"serialNumber"?: string,
"url"?: string,
"hashSubPubKey"?: string,
"hashIssPubKey"?: string,
"exponent"?: string,
"remainder"?: string,
"parsedCertificate"?: Certificate
}]
}
}{
"success" : true
"data" : {
"authenticationCertificate": {
"certificates": [...]
},
"nonRepudiationCertificate": {
"certificates": [...]
},
"rootCertificate": {
"certificates": [...]
}
}
}client.luxeid(reader_id, pin, pinType).rootCertificate({ parseCerts: true }, callback);{
success: true,
data: {
certificate?: string,
certificates?: Array<string>,
certificateType?: string,
id?: string,
parsedCertificate?: Certificate,
parsedCertificates?: Array<Certificate>
}
}client.luxeid(reader_id, pin, pinType).authenticationCertificate({ parseCerts: true }, callback);{
success: true,
data: {
certificate?: string,
certificates?: Array<string>,
certificateType?: string,
id?: string,
parsedCertificate?: Certificate,
parsedCertificates?: Array<Certificate>
}
}client.luxeid(reader_id, pin, pinType).nonRepudiationCertificate({ parseCerts: true }, callback);{
success: true,
data: {
certificate?: string,
certificates?: Array<string>,
certificateType?: string,
id?: string,
parsedCertificate?: Certificate,
parsedCertificates?: Array<Certificate>
}
}var filter = [];
client.luxeid(reader_id, pin, pinType).allData({ filters: filter, parseCerts: true }, callback);{
"data": {
"authentication_certificate": {
"base64": "MIIFjjCCA3agAwI...rTBDdrlEWVaLrY+M+xeIctrC0WnP7u4xg==",
"parsed": { // parsed certificate object }
},
"biometric": {
"birthDate": "830819",
"documentNumber": "SPEC04168",
"documentType": "ID",
"firstName": "SPECIMEN",
"gender": "F",
"issuingState": "LUX",
"lastName": "SPECIMEN",
"nationality": "LUX",
"validityEndDate": "251116",
"validityStartDate": "151116"
},
"non_repudiation_certificate": {
"base64": "MIIFjjCCA3agAwI...rTBDdrlEWVaLrY+M+xeIctrC0WnP7u4xg==",
"parsed": { // parsed certificate object }
},
"picture": {
"height": 320,
"image": "/0//UQAvAAAAAADwAAABQAAAAAAAAAA...f9ICA/9k=",
"width": 240
},
"root_certificates": [
{
"base64": "MIIFjjCCA3agAwI...rTBDdrlEWVaLrY+M+xeIctrC0WnP7u4xg==",
"parsed": { // parsed certificate object }
},
{
"base64": "MIIFjjCCA3agAwI...rTBDdrlEWVaLrY+M+xeIctrC0WnP7u4xg==",
"parsed": { // parsed certificate object }
}
]
},
"success": true
}// filter entries := ["authentication-certificate","biometric","non-repudiation-certificate","picture","root-certificates"]
var filter = ["biometric","authentication-certificate"];
client.luxeid(reader_id, pin, pinType).allData({ filters: filter, parseCerts: true }, callback);{
"data": {
"biometric": {
"birthDate": "830819",
"documentNumber": "SPEC04168",
"documentType": "ID",
"firstName": "SPECIMEN",
"gender": "F",
"issuingState": "LUX",
"lastName": "SPECIMEN",
"nationality": "LUX",
"validityEndDate": "251116",
"validityStartDate": "151116"
},
"authentication_certificate": {
"base64": "MIIFjjCCA3agAwI...rTBDdrlEWVaLrY+M+xeIctrC0WnP7u4xg==",
"parsed": { // parsed certificate object }
}
},
"success": true
}var filter = [];
client.luxeid(reader_id, pin, pinType).allCerts({ filters: filter, parseCerts: true }, callback);{
"rootCertificate": {
...
},
"authenticationCertificate": {
...
},
"nonRepudiationCertificate": {
...
},
"intermediateCertificates": {
...
},
"encryptionCertificate": {
...
}
}// filter entries := ["authentication-certificate","non-repudiation-certificate","root-certificates"];
var filter = ['authentication-certificate'];
client.luxeid(reader_id, pin, pinType).allCerts({ filters: filter, parseCerts: true }, callback);{
"authenticationCertificate": {
...
},
}var filter = ['root-certificates','authentication-certificate','non-repudiaton-certificate'];
client.luxeid(reader_id, pin, pinType).allCertificates({ filters: filter, parseCerts: false }, callback);{
"rootCertificate": {
...
},
"authenticationCertificate": {
...
},
"nonRepudiationCertificate": {
...
}
}var data = {
"pin":"...",
"algorithm":"sha1",
"data":"I2e+u/sgy7fYgh+DWA0p2jzXQ7E="
}
client.luxeid(reader_id, pin, pinType).sign(data, callback);{
"success": true,
"data": "W7wqvWA8m9SBALZPxN0qUCZfB1O/WLaM/silenLzSXXmeR+0nzB7hXC/Lc/fMru82m/AAqCuGTYMPKcIpQG6MtZ/SGVpZUA/71jv3D9CatmGYGZc52cpcb7cqOVT7EmhrMtwo/jyUbi/Dy5c8G05owkbgx6QxnLEuTLkfoqsW9Q="
}This is sample text to demonstrate siging with Luxembourg eID135b870026cfbe12dec348069811fcde5bed28800ac54dbf45ecdf04eb13e95bE1uHACbPvhLew0gGmBH83lvtKIAKxU2/RezfBOsT6Vs=var data = {
"pin":"...",
"algorithm":"sha256",
"data":"E1uHACbPvhLew0gGmBH83lvtKIAKxU2/RezfBOsT6Vs="
}
client.luxeid(reader_id, pin, pinType).sign(data, callback);{
"data": "C7SG5eix1+lzMcZXgL0bCL+rLxKhd8ngrSj6mvlgooWH7CloEU13Rj8QiQHdhHnZgAi4Q0fCMIqAc4dn9uW9OP+MRitimRpYZcaDsGrUehPi/JpOD1e+ko7xKZ67ijUU4KTmG4HXc114oJ7xxx3CGL7TNFfvuEphLbbZa+9IZSSnYDOOENJqhggqqu7paSbLJrxC2zaeMxODKb5WSexHnZH6NnLPl2OmvPTYtxiTUMrLbFRsDRAziF6/VQkgM8/xOm+1/9Expv5DSLRY8RQ+wha6/nMlJjx50JszYIj2aBQKp4AOxPVdPewVGEWF4NF9ffrPLrOA2v2d7t5M4q7yxA==",
"success": true
}var data = {
"algorithm":"sha256",
"data":"vl5He0ulthjX+VWNM46QX7vJ8VvXMq2k/Tq8Xq1bwEw=",
"osDialog": false
}
luxidClient.signRaw(data, callback);var data = {
"pin":"..."
}
client.luxeid(reader_id, pin, pinType).verifyPin(data, callback);{
"success": true
} $("#buttonValidate").on('click', function () {
var _body={};
_body.pin = $("#psw").val(); //only when no pin-pad available
var luxeid = client.luxeid(reader_id, pin, pinType));
luxeid.verifyPin(_body, validationCallback);
});The calculated digest of the hash is prefixed with:
DigestInfo ::= SEQUENCE {
digestAlgorithm AlgorithmIdentifier,
digest OCTET STRING
}
Make sure this has been taken into consideration in order to validate the signature in a backend process.function callback(err,data) {
if(err){
console.log("Error:",JSON.stringify(err, null, ' '));
}
else {
console.log(JSON.stringify(data, null, ' '));
}
}{
success: false,
description: "some error description",
code: "some error code"
}
{
"success": true,
"data": "W7wqvWA8m9SBALZPxN0qUCZfB1O/WLaM/silenLzSXXmeR+0nzB7hXC/Lc/fMru82m/AAqCuGTYMPKcIpQG6MtZ/SGVpZUA/71jv3D9CatmGYGZc52cpcb7cqOVT7EmhrMtwo/jyUbi/Dy5c8G05owkbgx6QxnLEuTLkfoqsW9Q="
}export class PaymentModuleDescriptionResponse extends DataObjectResponse {
constructor(public data: PaymentModuleDescription, public success: boolean) {
super(data, success);
}
}
export class PaymentModuleDescription {
constructor(
public desc: string
) {}
}
export class PaymentVerifyPinResponse extends DataObjectResponse {
constructor(public data: PaymentVerifyPinResponseData, public success: boolean) {
super(data, success);
}
}
export class PaymentVerifyPinResponseData {
constructor(
public verified: boolean
) {}
}
export class PaymentReadData {
constructor(
public applications: Array<PaymentApplication>,
) {}
}
export class PaymentApplication {
constructor(
public aid?: string,
public name?: string,
public priority?: number,
) {}
}
export class PaymentReadDataResponse extends DataObjectResponse {
constructor(public data: PaymentReadData, public success: boolean) {
super(data, success);
}
}
export class PaymentReadApplicationData {
constructor(
public country?: string,
public countryCode?: string,
public effectiveDate?: string,
public expirationDate?: string,
public language?: string,
public name?: string,
public pan?: string,
) {}
}
export class PaymentReadApplicationDataResponse extends DataObjectResponse {
constructor(public data: PaymentReadApplicationData, public success: boolean) {
super(data, success);
}
}
export class PaymentSignResponseData {
constructor(public success: boolean, public data?: string, public cardSignature?: string, public readerSignature?: string) {
}
}
export class PaymentSignResponse {
constructor(public data: PaymentSignResponseData, public success: boolean) {}
}export interface AbstractRawPrint {
list( callback?: (error: T1CLibException, data: PrinterListResponse) => void): Promise<PrinterListResponse>;
print(name: string, job: string, data: string, callback?: (error: T1CLibException, data: PrintResponse) => void): Promise<PrintResponse>;
}export class PrinterList {
constructor(public printers: Array<string>) {}
}
export class PrinterListResponse extends T1CResponse {
constructor(public data: PrinterList, public success: boolean) {
super(success, data);
}
}
export class Print {
constructor(public printed: boolean) {}
}
export class PrintResponse extends T1CResponse {
constructor(public data: Print, public success: boolean) {
super(success, data);
}
}
T1CSdk.T1CClient.initialize(config).then(res => {
client = res;
}, err => {
console.error(error)
});var print = client.rawprint();function callback(err,data) {
if(err){console.log("Error:",JSON.stringify(err, null, ' '));}
else {console.log(JSON.stringify(data, null, ' '));}
}
print.list(callback);client.rawprint().list(callback);function callback(err,data) {
if(err){
console.log("Error:",JSON.stringify(err, null, ' '));
}
else {
console.log(JSON.stringify(data, null, ' '));
}
}{
"printers": ["123"],
}const name = "test"
const job = "test-job-01"
const data = "SSdtIGRlZmluaXRseSBub3QgYSBNQUxBS0E="
client.rawprint().print(name, job, data, callback);function callback(err,data) {
if(err){
console.log("Error:",JSON.stringify(err, null, ' '));
}
else {
console.log(JSON.stringify(data, null, ' '));
}
}{
"printed": true/false,
}export interface AbstractSafenet {
allCerts(parseCerts?: boolean, filters?: string[] | Options, callback?: (error: T1CLibException, data: TokenAllCertsResponse) => void): Promise<TokenAllCertsResponse>;
authenticationCertificate(parseCerts?: boolean, callback?: (error: T1CLibException, data: TokenCertificateResponse) => void): Promise<TokenCertificateResponse>;
nonRepudiationCertificate(parseCerts?: boolean, callback?: (error: T1CLibException, data: TokenCertificateResponse) => void): Promise<TokenCertificateResponse>;
allCertsExtended(parseCerts?: boolean, filters?: string[] | Options, callback?: (error: T1CLibException, data: TokenAllCertsExtendedResponse) => void): Promise<TokenAllCertsExtendedResponse>;
authenticationCertificateExtended(parseCerts?: boolean, callback?: (error: T1CLibException, data: TokenCertificateExtendedResponse) => void): Promise<TokenCertificateExtendedResponse>;
nonRepudiationCertificateExtended(parseCerts?: boolean, callback?: (error: T1CLibException, data: TokenCertificateExtendedResponse) => void): Promise<TokenCertificateExtendedResponse>;
validateSignature(body: TokenValidateSignatureRequest, callback?: (error: T1CLibException, data: TokenValidateSignatureResponse) => void): Promise<TokenValidateSignatureResponse>;
verifyPin(body: TokenVerifyPinData, callback?: (error: T1CLibException, data: TokenVerifyPinResponse) => void): Promise<TokenVerifyPinResponse>;
authenticate(body: TokenAuthenticateOrSignData, callback?: (error: T1CLibException, data: TokenAuthenticateResponse) => void): Promise<TokenAuthenticateResponse>;
sign(body: TokenAuthenticateOrSignData, bulk?: boolean, callback?: (error: T1CLibException, data: TokenSignResponse) => void): Promise<TokenSignResponse>;
signRaw(body: TokenAuthenticateOrSignData, bulk?: boolean, callback?: (error: T1CLibException, data: TokenSignResponse) => void): Promise<TokenSignResponse>;
allAlgoRefs(callback?: (error: T1CLibException, data: TokenAlgorithmReferencesResponse) => void): Promise<TokenAlgorithmReferencesResponse>
resetBulkPin(callback?: (error: T1CLibException, data: BoolDataResponse) => void): Promise<BoolDataResponse>;
tokenData(callback?: (error: T1CLibException, data: TokenInfoResponse) => void): Promise<TokenInfoResponse>;
}T1CSdk.T1CClient.initialize(config).then(res => {
client = res;
}, err => {
console.error(error)
});var client = client.safenet(reader_id);function callback(err,data) {
if(err){console.log("Error:",JSON.stringify(err, null, ' '));}
else {console.log(JSON.stringify(data, null, ' '));}
}
beid.biometric(callback);var core = client.core();
core.readersCardAvailable(callback);{
"data": [
{
"card": {
"atr": "3B9813400AA503010101AD1311",
"description": [""]
},
"id": "57a3e2e71c48cee9",
"name": "JC Token",
"pinpad": false
}
],
"success": true
}client.tokenData().then(res => {
// see response below
}){
"success": true,
"data": {
"info": {
"slot": "string",
"label": "string",
"manufacturerId": "string",
"model": "string",
"serialNumber": "string",
"flags": {
"isRandomNumberGenerator": "boolean",
"isWriteProtected": "boolean",
"isLoginRequired": "boolean",
"isUserPinInitialized": "boolean",
"isRestoreKeyNotNeeded": "boolean",
"isClockOnToken": "boolean",
"isProtectedAuthenticationPath": "boolean",
"isDualCryptoOperations": "boolean",
"isTokenInitialized": "boolean",
"isSecondaryAuthentication": "boolean",
"isUserPinCountLow": "boolean",
"isUserPinFinalTry": "boolean",
"isUserPinLocked": "boolean",
"isUserPinToBeChanged": "boolean",
"isSoPinCountLow": "boolean",
"isSoPinFinalTry": "boolean",
"isSoPinLocked": "boolean",
"isSoPinToBeChanged": "boolean"
},
"mechanisms": [
{
"mechanism": "string",
"flags": {
"isHardware": "boolean",
"isEncrypt": "boolean",
"isDecrypt": "boolean",
"isDigest": "boolean",
"isSign": "boolean",
"isSignRecover": "boolean",
"isVerify": "boolean",
"isVerifyRecover": "boolean",
"isGenerate": "boolean",
"isGenerateKeyPair": "boolean",
"isWrap": "boolean",
"isUnwrap": "boolean",
"isExtension": "boolean",
"isEcFP": "boolean",
"isEcNamedcurve": "boolean",
"isEcUncompress": "boolean",
"isEcCompress": "boolean"
},
"ulMinKeySize": "number",
"ulMaxKeySize": "number"
}
],
"ulMaxSessionCount": "number",
"ulSessionCount": "number",
"ulMaxRwSessionCount": "number",
"ulMaxPinLen": "number",
"ulMinPinLen": "number",
"ulTotalPubLicMemory": "number",
"ulFreePubMemory": "number",
"ulTotalPrivateMemory": "number",
"ulFreePrivateMemory": "number",
"hardwareVersion": "string",
"firmwareVersion": "string"
},
"infoType": "TokenInfoType"
}
}
//ENUM
TokenInfoType {
Token,
PKCS11,
File,
Payment,
HSM,
Vault,
Wallet,
}allCertsExtended(parseCerts?: boolean, filters?: string[] | Options, callback?: (error: T1CLibException, data: TokenAllCertsExtendedResponse) => void): Promise<TokenAllCertsExtendedResponse>;
authenticationCertificateExtended(parseCerts?: boolean, callback?: (error: T1CLibException, data: TokenCertificateExtendedResponse) => void): Promise<TokenCertificateExtendedResponse>;
nonRepudiationCertificateExtended(parseCerts?: boolean, callback?: (error: T1CLibException, data: TokenCertificateExtendedResponse) => void): Promise<TokenCertificateExtendedResponse>;{
"success" : true
"data" : {
"certificates": [{
"certificate"?: string,
"certificateType"?: string,
"id"?: string,
"subject"?: string,
"issuer"?: string,
"serialNumber"?: string,
"url"?: string,
"hashSubPubKey"?: string,
"hashIssPubKey"?: string,
"exponent"?: string,
"remainder"?: string,
"parsedCertificate"?: Certificate
}]
}
}{
"success" : true
"data" : {
"authenticationCertificate": {
"certificates": [...]
},
"nonRepudiationCertificate": {
"certificates": [...]
},
}
}client.beid(reader_id).rootCertificate(parseCertsBoolean, callback);{
success: true,
data: {
certificate?: string,
certificates?: Array<string>,
certificateType?: string,
id?: string,
parsedCertificate?: Certificate,
parsedCertificates?: Array<Certificate>
}
}client.beid(reader_id).authenticationCertificate(parseCertsBoolean, callback);{
success: true,
data: {
certificate?: string,
certificates?: Array<string>,
certificateType?: string,
id?: string,
parsedCertificate?: Certificate,
parsedCertificates?: Array<Certificate>
}
}client.beid(reader_id).intermediateCertificates(parseCertsBoolean, callback);{
success: true,
data: {
certificate?: string,
certificates?: Array<string>,
certificateType?: string,
id?: string,
parsedCertificate?: Certificate,
parsedCertificates?: Array<Certificate>
}
}client.beid(reader_id).nonRepudiationCertificate(parseCertsBoolean, callback);{
success: true,
data: {
certificate?: string,
certificates?: Array<string>,
certificateType?: string,
id?: string,
parsedCertificate?: Certificate,
parsedCertificates?: Array<Certificate>
}
}client.beid(reader_id).encryptionCertificate(parseCertsBoolean, callback);{
success: true,
data: {
certificate?: string,
certificates?: Array<string>,
certificateType?: string,
id?: string,
parsedCertificate?: Certificate,
parsedCertificates?: Array<Certificate>
}
}var filter = [];
client.beid(reader_id).allCerts(parseCerts, { filters: filter}, callback);{
"rootCertificate": {
...
},
"authenticationCertificate": {
...
},
"nonRepudiationCertificate": {
...
},
"intermediateCertificates": {
...
},
"encryptionCertificate": {
...
}
}var filter = ['rootCertificate'];
client.safenet(reader_id).allCerts(parseCerts, { filters: filter}, callback);{
"rootCertificate": {
...
}
}var filter = null;
client.safenet(reader_id).allCerts(parseCerts, { filters: filter}, callback);{
"rootCertificate": {
...
},
"authenticationCertificate": {
...
},
"nonRepudiationCertificate": {
...
},
"intermediateCertificates": {
...
},
"encryptionCertificate": {
...
}
}var data = {
"pin":"...",
"algorithm":"sha1",
"data":"I2e+u/sgy7fYgh+DWA0p2jzXQ7E=",
"osDialog": true
}
client.safenet(reader_id).sign(data, callback);{
"success": true,
"data": {
"data" : "W7wqvWA8m9S...="
}
}var data = {
"algorithm":"sha1",
"data":"I2e+u/sgy7fYgh+DWA0p2jzXQ7E=",
"osDialog": false
}
client.safenet(reader_id).sign(data, callback);{
"success": true,
"data": {
"data" : "W7wqvWA8m9S...="
}
}var data = {
"algorithm":"sha256",
"data":"vl5He0ulthjX+VWNM46QX7vJ8VvXMq2k/Tq8Xq1bwEw=",
"osDialog": false
}
client.signRaw(data, callback);var data = {
"pin":"..."
}
client.safenet(reader_id).verifyPin(data, callback);{
"verified": true
}var data = {}
client.safenet(reader_id).verifyPin(data, callback);{
"verified": true
}var data = {
"pin": "...",
"algorithm": "sha1",
"data":"I2e+u/sgy7fYgh+DWA0p2jzXQ7E="
}
client.safenet(reader_id).authenticate(data, callback);The calculated digest of the hash is prefixed with:
DigestInfo ::= SEQUENCE {
digestAlgorithm AlgorithmIdentifier,
digest OCTET STRING
}
Make sure this has been taken into consideration in order to validate the signature in a backend process.client.allAlgoRefs(module, callback);{
"success": true,
"data": ["sha1", "sha256"]
}const body = {
"algorithm": 'sha256',
"hash": '...',
"signedHash": '...',
"osDialog": false,
"id": 'cert_id',
"pin": 'pin_code',
"timeout": 120 //timeout in seconds
}
client.validateSignature(body).then(response => {
response.valid
).catch(error => {
errorHandler(error)}
){
"success": true,
"data": {
"valid": true
}
}{
"success": true,
"data": {
"data" : "W7wqvWA8m9S...="
}
}export interface AbstractCrelan {
readApplicationData(callback?: (error: T1CLibException, data: PaymentReadApplicationDataResponse) => void): Promise<PaymentReadApplicationDataResponse>;
readData(callback?: (error: T1CLibException, data: PaymentReadDataResponse) => void): Promise<PaymentReadDataResponse>;
allCerts(aid: string, filters: string[] | Options, callback?: (error: T1CLibException, data: PaymentAllCertsResponse | TokenAllCertsExtendedResponse) => void): Promise<PaymentAllCertsResponse | TokenAllCertsExtendedResponse>;
issuerPublicCertificate(aid: string, callback?: (error: T1CLibException, data: PaymentCertificateResponse) => void): Promise<PaymentCertificateResponse>;
iccPublicCertificate(aid: string, callback?: (error: T1CLibException, data: PaymentCertificateResponse) => void): Promise<PaymentCertificateResponse>;
allCertsExtended(aid: string, filters: string[] | Options, callback?: (error: T1CLibException, data: TokenAllCertsExtendedResponse) => void): Promise<TokenAllCertsExtendedResponse>;
issuerPublicCertificateExtended(aid: string, callback?: (error: T1CLibException, data: TokenCertificateExtendedResponse) => void): Promise<TokenCertificateExtendedResponse>;
iccPublicCertificateExtended(aid: string, callback?: (error: T1CLibException, data: TokenCertificateExtendedResponse) => void): Promise<TokenCertificateExtendedResponse>;
verifyPin(body: PaymentVerifyPinData, callback?: (error: T1CLibException, data: PaymentVerifyPinResponse) => void): Promise<PaymentVerifyPinResponse>;
sign(body: PaymentSignData, bulk?: boolean, callback?: (error: T1CLibException, data: PaymentSignResponse) => void): Promise<PaymentSignResponse>;
resetBulkPin(callback?: (error: T1CLibException, data: BoolDataResponse) => void): Promise<BoolDataResponse>;
}T1CSdk.T1CClient.initialize(config).then(res => {
client = res;
}, err => {
console.error(error)
});var crelan = client.crelan(reader_id);function callback(err,data) {
if(err){console.log("Error:",JSON.stringify(err, null, ' '));}
else {console.log(JSON.stringify(data, null, ' '));}
}
crelan.readData(callback)var coreService = client.core();
core.readersCardAvailable(callback);var crelan = client.crelan(reader_id);client.crelan(reader_id).readData(callback);function callback(err,data) {
if(err){
console.log("Error:",JSON.stringify(err, null, ' '));
}
else {
console.log(JSON.stringify(data, null, ' '));
}
}{
"data": [
{
"aid": "A0000000048002",
"name": "MAESTRO",
"priority": 1
},{
"aid": "A0000000048008",
"name": "MASTERCARD",
"priority": 1
}
],
"success": true
}client.crelan(reader_id).readApplicationData(callback);function callback(err,data) {
if(err){
console.log("Error:",JSON.stringify(err, null, ' '));
}
else {
console.log(JSON.stringify(data, null, ' '));
}
}{
"country": "BE",
"countryCode": "0056",
"effectiveDate": "190201",
"expirationDate": "241231",
"language": "nlen",
"name": "",
"pan": "670...001"
}allCertsExtended(parseCerts?: boolean, filters?: string[] | Options, callback?: (error: T1CLibException, data: TokenAllCertsExtendedResponse) => void): Promise<TokenAllCertsExtendedResponse>;
iccPublicCertificateExtended(parseCerts?: boolean, callback?: (error: T1CLibException, data: TokenCertificateExtendedResponse) => void): Promise<TokenCertificateExtendedResponse>;
issuerPublicCertificateExtended(parseCerts?: boolean, callback?: (error: T1CLibException, data: TokenCertificateExtendedResponse) => void): Promise<TokenCertificateExtendedResponse>;{
"success" : true
"data" : {
"certificates": [{
"certificate"?: string,
"exponent"?: string,
"remainder"?: string,
"parsedCertificate"?: Certificate
}]
}
}{
"success" : true
"data" : {
"issuerPublicCertificate": {
"certificates": [...]
},
"iccPublicCertificate": {
"certificates": [...]
}
}
}// Application ID can be retrieved with the Applications endpoint
var aid = "..."
client.crelan(reader_id).issuerPublicCertificate(aid, callback);function callback(err,data) {
if(err){
console.log("Error:",JSON.stringify(err, null, ' '));
}
else {
console.log(JSON.stringify(data, null, ' '));
}
}{
"data": {
"data": "base64 encoded data",
"exponent": "base64 encoded data",
"remainder": "base64 encoded data"
},
"success": true
}// Application ID can be retrieved with the Applications endpoint
var aid = "..."
client.c(reader_id).iccPublicCertificate(aid, callback);function callback(err,data) {
if(err){
console.log("Error:",JSON.stringify(err, null, ' '));
}
else {
console.log(JSON.stringify(data, null, ' '));
}
}{
"certificate": "dxL8JnkxHneX36tdQCzz...HC3Wpt/qppk008q9OMDgVp0F7NJjCC2mXg3b/qD7c09WFXUwZ+XdkmIefhoZT/kme4QEoD49+ppQiqSeCaRjn6N0OetcjleWkPej8vE0QG4mLlG/edWTVbfMGbED9Kbjf4ooauNnq+iAVwgHedsDpdDWJLhV8sDSLQgZ1B3fMQuyZIaD79+X+H9fbhmJg+j7Lr638srglWM9VlthaWjRbFH2HzNEiQ9sOE20lmj6WM6zdYas9+Z4hcwZqWbeiTeIJDwDc6w==",
"exponent": "AQAB",
"remainder": ""
}var data = {
"pin": "...."
}
client.crelan(reader_id).verifyPin(data, callback);{
"verified": true
}var data = {}
client.crelan(reader_id).verifyPin(data, callback);{
"verified": true
} $("#buttonValidate").on('click', function () {
var _body={};
_body.pin = $("#psw").val(); //only when no pin-pad available
var crelan = connector.crelan(reader_id);
crelan.verifyPin(_body, validationCallback);
});{
"code": 301,
"description": "Wrong pin, 2 tries remaining",
"success": false
}{
"code": 301,
"description": "Wrong pin, 1 try remaining",
"success": false
}const data = {
txId: "Tx1",
data: "E1uHACbPvhLew0gGmBH83lvtKIAKxU2/RezfBOsT6Vs=",
language: "fr"
}
const bulk = false;
crelan.sign(data, bulk).then(res => {
}, err => {
console.error(err)
}){
"success": true,
"data": {
"data": "..."
"cardSignature": "...",
"readerSignature": "...",
}
}function callback(err,data) {
if(err){
console.log("Error:",JSON.stringify(err, null, ' '));
}
else {
console.log(JSON.stringify(data, null, ' '));
}
}{
success: false,
description: "some error description",
code: "some error code"
}This page summarized 'know' solution for connector connection troubleshooting
iVBORw0KGgoAAAANSUhEUgAAAXgAAABSCAIAAADRv1gVAAAAAXNSR0IArs4c6QAAAARnQU1BAACxjwv8YQUAAAAJcEhZcwAAHsIAAB7CAW7QdT4AAE1xSURBVHhe3b0HgBRF+v+NCIrEBZYFFnaBJeeMZEFBARVFVMyBQ+QMKKY70ymKCooBA/7OnFD0FPXM2VMU1FM8jIcJUVEMCJ6gIizv53mqeqZDdU/P7urd+/+6DtXVVU89uZ7qmZ2tVr51c/nW8vKtW/i/vHxzeTkNXjdvlU7p2Ur/VlrSKXdlJDBjKgFDPjWRyq+oFFQ6FSgEc9de/A/AKNlepIYKGJBC5fLoCE2HjEZ2dQMZrGPEHezt1DAWFTpBzvGZrfKTJ4QTAGOxMKzai98Fqp98VlQRbDsC1VgeVtbVbdtApsfTD0Cd37ZTQD3Ajpd1vbaFyBXSQ5Klqtl/7RDxM9OKRSK7unrgrrIonQnqDkA48YmXTjUyLEHKSsPQV35sTxrY9C2vqWSPl5f+/MWTtWNnid94d3XReD2L7EoqnlrFoFqND0Krbf8A2eds0wejN/NjuxIRGOmTSftt24FEDRjGlEIqW1cMsn4ChzHwywt7WdmDEFf1IyKvn05qWG14iabygAMnE5p7hMUEV84T3sYbUY0PaZSimqxCrtCpn58qcLiq5dCmjPRQy3lt/9ywbm106X3VvDRC0P741fPlzQdlM6ttE0thvUE8cfXw+BTIe5UIlEIV+IkFK7ukMGGSY8NLso1FVt6ksWY1A+MVYg57dNJeC6UVTyioypzpQ4bbpoHWV79N1rcKVXXIj+lNBx0cmKGazyFdEEzIJReC+7RnwLVya9h2UNB+A9MOcmVu+BCgE7lrIGMqmfqVE2HGRd9C5MXPpGU60sMIW7kEBHu2HYCStu3KwyghD4THq3o8ZRrkKzVj8xou9HnFNFWnBx/U/TzKKlegolGfTFBZokL9xoszcKUBAxVXjYpn2xGo6hOkE8Pr5IqmSJ/qc6yVBijbtv73IGqupHQkQVOV5KFtVUhQK8JJoEcIauILO0LGr0L9EajiA1xpuFZE3ryks1A/tO0UUKGyvDk3wjR61jE2N9muPFFNSNh2OojtAmoVs9mmB+lKSRXD25YfypVLpDwV7YDwbykY9WlHkGalV9FiwdNSlH56iF1RpuFHgsT25wlPUnWXiiNkd+s5buFUsXGalDvpZIkN49yyWPq5pFb2hJ/KaCYB4dVV8Byyq8tUytb2QmENYdtYxCRxMyxeamXCWFAauXhOhu9hcEYw9YJMW9cwzWy3A8qQbcfAnA4yFyGo5EoiiQ7OnWMVccGYJBUynq5WKfVVEKyb+YlFVlDPJwysFHobnZtOCxlpawGXA/lX9E/MOlNVwKdn5SSVhmN5rjwsD7zajkohnTg5kUotMByvE7VXViTRnkgqPb5DsX+6O2WL5kNu5IP6Rd52EZoyC24s5TweButMtVZ04TCfXFfUHsKbkNu0adMrS1+78cabZ8+efcEFF1xz9bWPPvbw999/r0NQjUqiI7Pw5iYhxRhVU9X4kxtRzn0QL4lqWODvRArnmBTwra7/JEjKEjn0ENg8IlBN5sOn+rVtR+G4G6WfRIEbkXvuwYbzZOn8kGF5Sfq7Q8UJCKt7km3HQcYEfUCNkGtaBPklmvzpVwQ/bdx4zz33jB2ze6dOndu3b9e+ffuuXbv26tVrzJgxp512msk1ArhxM4S9K5ImMupTk4QQcLjssqKT7IUzPSk1o7oI1QzETePvKiQB6aufk98UavFcXGmA6cgErtyaqQwgmIOzLBiYeuzvC9FuLtaMhu2FA8a1UgNTiFH5v+q8SOnZtkK9NGDx/N/eFtXkcpqs2zmEiXNKmN248ce777571KhRLVu2LCoqKiws5JV2mzZtOnbsSK4ZPnz4ddddZyfEQOjnsl5suMrcCiJOLuWlCsJM9xYXfYVKFOTdeFQcYNW7yz8ZzsU/PPvKVhaQKHZ1BxJXj9siLPy8Ga3qq0sDsJpEKQOlY9ux8K37PwThqqL+gzj6o0jyHz+i0YFSsoqJ0RILyK0opLM8VaJRI6UTVUYGmIhdPoKnnnpqt912I62QXxo1asRr8+bNKWe6devWuTOlTfuysrK+fftOmDDBFjWRtRyQ1QEloks1ztIxxK1SsO1EmEiwFz7o7FQU/FCdx+pNXMFuGnlT9mBkDyZW70KWdq8uTmObPiRzayGGiOVWKKRMZHGPhyNQu1uL+DnUtmn64e9So9tBTpuK8o3+Y6hl4JNaZEwaWhHEWioRwlRVc5KIvCsaUWtA9UEzqAG8tv03BLGQN0sa5ZtXr149bdq0Vq1aNWnShBTDK+099tjj9ttuW7r01Zdeemn27NkDBw6kqCHXDBs2bNmyZWZ6BupDGXWnTQ1+KFf8F+M04lXeDRp50U9lVAbkdBfIZMYE1V45aKgEVpeYz8d9oxTiEDfSsYv6RkZnyaWLjh9pM1cIecmSjyGiUgThl1cFrBB0FfOaj5PkGA8zwbsyOA8OExKNsJsMvZ9PyEWwefNmzkrUKRyRGjRoUFBQ0Lp16wMOOODVV1+V216Irl+/ns62bdu2bt2WwUzRm7haPqr8rwKPzOn36hwIrCZXp1QFaOkRdjsRXAfE0tRZRoV5OERloLZirSSuKgMvGWWTvmggqlV704KxIX7kvkw0bSGozf+noCryFCF+YmU0W7tpu8C8PLShjmrbyYhNNGLCAEMpl88Gf4SC9timYN26dSeffDKZpaBh4wYN6pFrRo0a9dxzz3FL58prRilz5szp1KlTq9LSTp26nH/++aZToOP4yThfLKRmkbFZWdLMciAslwekqwA1gZ+gkVpZc66SG0wMiaUK4n9p+aEjQzzrKOEhY/GwvDorb94iCwWgNG3bguvEKQnQmRXUnio/dvUKMhQHtbVtVwpRi6BvR8wiVcL2zJwEywbsHlGEzo1VTzDRyMjAMnoZu3AOSGDHzl2+fDlppVmz5g3q12/YsGG3bt2uu+66X375xd428Bn73nvvZUxpaSl1zfTp001nheGveGUFbxWpO4Jm4DJB9S74NMZEn+pjjVAVEE15C9CIMXnYvjmAY4W59mlDl7FtA72SPufisWBGhqssRV1IlkvgOfluPpCdWYX1rJ9aCuHBNvNAHOeybLC/YvSZlvGBuLVi4ZubLzRebJsL+VGEEo1oWSMt5TIxAsQpUdaVJR544IFu3XsWFDRuWNCoRXHxpEmTPvzwQ7tmREhlfcuLL77IoamkpIQKaOrUqdrPKvnwKT8hyvQH0oofete2o4jTkkzJZVRlRrKwzmeGsKFeXhHotFgp/FDeNHTjx2u4aXWdIHyloLb4HaEO9RuuqP4pr/Y6CNXnb6TJtHLp8nak+p5pOiC+ER8RcRDxk4iKxQOJRp8jeFD76IkOwKW8Bu7aFk0hJNchFkWk8PKbNm3i4NOqVSvzvhLlyfz58+m0t+OxfPmbvXr1Li4uJtFMP+G4nIWxRq9dXfjPmMTFVQZGUnvhhyghdlZ6qBUdnOu6eUDZyUxJz5qaqRLQdeMjyjRkjXTiJNrChSz/mqYdnHj3fRZPAWU+H05UEer2sWGp5CxNZTtAX/3TtoGSMjzDi0czhX7kfq4xeUHp5ae9AFQvtu1DNTqTspGBDMpHGB+Xfkv8+OOPRx99NMmifv36ZJmhQ4fah74pwFGrS5cuTZo04fR0ySWX2N6cSGEqB4T/WAeyiFGo9Bk7he8SGC5OovpHYz4FZiC+6I2Edszq6q9BhMfFcB4LXcxrOugnAlmsJvVYapo5oMMCq2hY2h7lwTRpx5kJERP4ZFYu+1YIft4qCOYbfeen5yqCXdf85IbyadvJiHsYLHZymsrfj5lDq/gdQmj4tL5u3br999+/efPmBQ0LipoW0V6zZo0OUb16I+PWfeyxx9q3b096atO69Z133ml7QxAa/C+mstCTgtfOrhKH+DMFkuqhw60TYdte+CCrufuhk4ej++moAJrFgrLkEEwXta1EqO5yEouBTyi/6f0Qnwlx4pNFPco1MSqvrJWfDkN01QohTsI9MiY0z7iswxNYwd8T5pY59iJPBNaSdkBqiMqPiBfmPOx7yrdt/3aQdR2rxL7rFICIoQrPsm6OUQHxIqrP4ptvvtlr/F5FRUUFBQUtWrQ45ZRTfvrpJ3vPTAwxJwuqjb3uW265pWXLlo0aFXTo2O4f//iH9ql6EyNWWI7nSpYILeszpBbngbl6N9iTeYlHjtv/CzD2TYRqw4Pf3SM6qRj0kO61Y2jKos616Iznn1k5OZQBkTEh1zJRKryFvELu5KAfhU7JCMxCsfwbyLo5hiQhgUOlmgf/yLtu/Q/EL+CMYnvD8EmnyCSapHCNQtUdO0VXyC6zevXqUaNGUcs0bty4pKRkzpw58lBG0qtLczFOdsYZZ+jvJRT26tX7k08+sb1AyOAl9ioRrCeDE5SejMrMrWKoKLYdQRUzKeuk0m8QEhjGSVRv+ipVIeDVjIlCk4IMlthLEEQSXzARWOgCdqIsk8OxlY5t+6E8Z1ZnRDwnMrIC+vmtEavkUKJMBqnk7bfffvDBBy+99NLp06fvtddeo0eP3mmnnYYOHTp27NiJEycefvjhV1555ZIlS+KTjiBdRROFGtO2HTCSIOoWk2WKi4sbNWrE2eeee+7RWxkk7UUGEAET9t6nebPiZs2ajRw50v8ueEoLh7mN4V97jaM7jCHdmX4ajHX6ehC55IuD39HDkPBwuYuGje3XePbYM9ymgMjkBac2vLaEEwR9GlCIwuL5TIaQCs0VavAZ6Y+FDvMlBW1YSYVh06owIvNVD147ejsNROrK8uUDpFLqKglQyfCEjO++++6VV8074MCD+/bt27Fjx3bt2peVtS5pWVpc3Kxp06aEM43iFs1KS0sJ6u7du48YMeLAAw9ctGiRSTdiRo8royVXopE1q4B18Pnnn++884iioqZkmS5dujz22GP2hgAXNW9pqYyJEbt+/XoEbtKkSYvi5scdV9kP0eQFdayqMGRcAa82iUK6TWzbjgpCieRBQ4amyJ5VjmQe1VWqxicFqlzbjsC6pbbENvmum4eyZQU1kL2QnwjUB34ni6xZs+bqq6+mZmnVqhW5hJxC0BXq7zbTKGpaxAU/TYuKOKAADhkGJt3svPPOF110EblG5QjoLZRosjuJyG9aFQW1zJgxY6hB4LJz586PPvqovZE/li5d2qZNG+i0bt36jjvusL3JiDFbKiTONfV/7L6U7c9oUpzJtPVuno7rgslB9iIPxEuVF2R1n5/Ec6K38ljTkpVZPppB+hWV/bcC4uEN9sIPYdJoyW9950ifv/nbDpjtyudRlYG6pmmuWrXqrLPO6tq1KwHbuHHjAkVhExJKi1alLcvKytq1a9epUycG9O3Tu1+/fv379+/Tpw/VA53cIjERm7169aK04ZxlaFqgh/It8vZ2Ttf3F+QOuNTy3XffjRs3pqRlCdmB0uupp56yN0JIVKvkcr07Z84c8iuZFVIff/yxuZsMdUd5dbKXDJ2bnaaXiG81wA29zA2jt+DgVBMzkLnx+olBHuNlqJu+VlKqQXPNPyqLSbIgKpoLMtJJPwUqInsqeP5sfMO3oUpIeE0ND3uRArL9BDwk80/lEa1ofNWxaklswpg0FjHwjfzhP+suvHAWGYSapYGCFEMtQ3Ihm0yZctS8eVeSO/75z38Sel9//fWnn35KDfHvf//7xRdfvObq+TNOPGmnnXaikqAUoLTp3bv39OnTVXtK31uFRJOkTbgJqypuvApsmtRO++23H+c3WEeAJ554wvTr8qbpgDqxQ02bN28eO3YspBB+770nbGGUdsty3oo5UmEKCKEMBR9lv1xyIzsmfrmo0jIQypXj0+ci0ghSy3LtKrb9c/OFaNiZJWXJWHEtROrAmHw4STFSIs2OkUau8bp6PM8R3nR8sEd+xDGcdKLj4+AaGenxcRuzYCroWgSP3UIMIc4ZO+64o3k7uL7+MhC1ye7jxnGAevPNNzdt2uTiMADC84033jjssMPatm1LNUR1Q+zTaW97CBydhGI6BSXgp59+mjp1CrkN7imr7rvvPnsjCBXAtpPx3nvvtW1bhgooai677DLbCwXRloNboZzT9VPDkYjhO8h6nCCqz4pykjhXBMzIHhmZh/giSnAwl+51o5kradvIF7qsJacWVC7Mj+lxc1V1qGLy4pz5sezV7zGQNGGbKZIvlJLHfP/99zNmnFxS0lIPSQWNGjUixZx66qnLlr1uR8TCmIqfLP3nnn22ffv2VAMtWrSYNGlSjkQTD7+QSdiyZcuZZ54Jx+aYs2DBAo0H0UtO1Rjd2LYPF198MbVMg/r1qeU++OAD6UJO10gD8w4/6xp6udetOBw8aJcs7QNXCdpz61Y1lkrnqoocI9PqX31IKTI45er6Av1gvaMiB7RQUQgb6bWRB8SJHByqLFUMXSlAFXHUIrY+zwm1isOCQsdr2n9joLdtFfbWW28NHz68SWFR3XoN2MI5fMyYMeOLL77QgQxN4S0K1ZWMXLJkCeHJsYtEc9ZZZ5m7fthEI1qoCkPOmzevdevW8vndNm2ovrRPqjU4kp/UUG2IAKQMToDoApr77LOPyZRKKExtzVdr7r777qlTp07YW3DOOed89tlnaCGlygCHT055d9xxx6JF91INJn8uwI9Uq6hItm3AlHx0YmHohGl5sO6bGkrKtuOQL5+GQ9vEqXz8eGRUgACfkTySQwodn4MrlsikP2nnpRk/ZK5tehBq+iMXvmj3QdzeW914iFjHdPxO0EXDSy5atKhDhw5UMXXq1CGydt5553/+85/2XnqICbP6vPHGGznB1KtXr2VJ6aOPPmx7fchR0Rht2otcePrppxGA9UpLW5511jlUN/ZGEGHnS8TixYupj1AKx7/IZ3AsSEbz588fMGBAScuWlIIlJSVdunQZPHjwSSedFC3h1CcCnQj4+ONPHnroob179+as169fP06tEyZMuPLKK9evX28HOeAMaadc8jAvTWCAbO0jmpclQnP0UsYIQYwdoulzLB2QMQHUQiPDoZ4vZLqfZtXEkFFUFspkAmWff4pEnuz0m1YGos+8OWRGiJ80MHyo7TJzs0Ry1Hq6pG1HIaTzkMIwYi9Q1ubNl19+OQFSt25dsgyNCy+8UMr/fOBkYLfddoMmiWbgwIE//PCD7fUhNtGIvBI2kLWGVPKxSl+6dGnfvn0pnFq2bHncccel+YVsQchZQygvP2rKVGqZxo0b9+nT69tv19p+Hyg9Ro8e3aK4WUFBY/M1oKQkqioObrvsssvbb7/NGNcK2ldevm7dD6eccgr5RT6B1KwZ/JtvokAWastrr73WjGZkSL/qRs5ARSLb8oO+cFKIRTgV/iZwbsLx0HhL4MoXSOI6mUvfKnG2Ts2H5mv3aHr1JxUtsZ2Es6TyTI+wVylA0kEhSlkliOVTUqRwFSNnDHRWcHWV0LYVZBkONc2aFZMR2LnZjM2XzOWA8J+DFyoAQm+77bZr2rQp27PtFRYUEhFbUlQ0KZz+k08+GTZsmMky++6773/+8x97w1Bw7QnaHzSACBQYydmHfEF1R5V01ll/sb0yUoxHLps7d27btm3r169PKkV31D7du3dvW1ZW2qoVtRW1ycKFC+0cF9577z3OZWQxKDRuVNCiuLi9fgU6r5Ai1+w9YZ93333Xjv7fg9M6X375Jen166+/Mpei5JAL/nZI4ZQVg3qLbRtE/ccPldrhdXFQNcZyLkt7a+m6HmVuVIW8lmaKNOlfXRfPISMDhGp5OcFy+ul/btRIjks4PHvwRx99ZAdFoJSNvGJQyRUKWT3C45o1a3r06LH99tvXqlWLM4GznAEpHwb7EFEGaWW//fZrTjlQXDxixIjsI6U8oVoLuA55hCqjoGHDsrZtQgG/fPlyzpaorEGDBqQJhh144IEvv/zyhg0bpk2b1q5dO1PUzJ49206wyNJ/4YUXunXrRiYmSUFnwIB+c+deevPNNx955JE9e/Yk15CqyDXnnntu9PyVhXF3nzFccB6yVN6cnpUPyMtnnnnmrrvuOnbsWCzCSdbeqHKIuPE6cR9bEsbnB484Gk8IsyR7pIJGm20HgDW5I7WVNEKJ3jqDIyCB9qfSg4zUwbpQto7T/kybRVJRw4FnzpxZVFRYp3YtgmXvvff+7rvv7L0QoO1bKySE4cpeeJg8eTLJi3KGOuOBBx6wvRHo39421L0F1C2CK0SgSUGwZcuWGTNmtGnTprCwiArCHFXE1TyGLHNQzJJMpZ0ff/xxwIAB5o23P/zhD7ZXtUZ5RirhlskRpAP/LzfcftstFDVkvU6dulx11VW2N4i///3vGQqlpaWzZs3KnFQpc/bZZx/ztaGdO3ceM2aMfasrA9WVyGWvPQSuGeMMAzoTwsMNa6NELFu2jMzbtm0ZRSWiDRky5MQTT7T3glDOjYF8hshwK6LZxcTF440Vd5BRblOZOA1U16k0pnnHrit8VQkPPm2YJGLbFugHJUT7w9D78WO4nYtCnghQY8Nu3rw5JyZCiR0oruhIQjaKM5Rpbr711lvZ6WvWrEkcTZ9+nJhe1g6sLp2hb9hLhq4SNt51112HW3M2IyaJXtsbA5keoRAHZCgulvMkr88//7zKsJkTwSGHHFJYWEgS5RbqO+aYY7799ls7R7FgwV3FxfIxakqSxx9/3Pb6cOedd3Lgqle3Adqh6rFJSmxteSMx77jjjiUlJRyg+vfrd9+9i0x/LNQGpqWvVrmmHYXqwRE8XvznB1Z+//33hw4dSlnHfoXhSZEk/SOP+MMvP8c/KUv27YCt1Xl8UOkSJitkH7bNKkHuFWOg8xxa1RQW6Fe5XCMTrSlBmKHPsMqJLYq3zRxwcaVO5fNkcO+997L31K5du2HDhnvuuWf6LKP0bdsiKB2BQ+BzaKKcGTx4YPZPyHrQoaJkfryKxiJCOhEU5927d6dkIqT9D4GSISvKPqBbQQyoL0aOHGmeWu2xxx7m8PLKK68MGjSInh1q1a5Xtz5Lh3+rQnHCCScgP4mGAatXr7a9HhYuXMipihSD3qmY3nrrLXvDB4opihrCFdG6du168cUX2xuVgPpPUF56jFvF79g6Isd+jq7Gjx9fVFSERCRlMj7m4LR8xBFHxL3xVyWINx8y2XXVu2Kt/BsiGGx5QRUuzhmiIJfyYy/UcmEYc9oLhVxXQgOONUDM6lG8+tprHTt0YPsBQ4fu9P1amwuUpVQUGOr0z1dffZVtmBRDoikrK/OOMrGowDMam9XYRQcPHsxiLHPKKads2QLrLrcWRk1EKcdZpctgI6vetGKrgbeQDkjD5lxjfhvzhhtuIEGQmAEV4F577fXZZ5+ZKVmUl/+66WdijAFNmjQ9+OCDbLeSpfHQ3/8Ot5AlW3G48H5tSuo9A3Umubrggguo1IhbFj311FPN3XxBnL/++us33ngjtV7gQY+I67v0kHdFo8Fw7rnnUtk1lD+J1fbhhx/mmNmlS5c+ffpU/m9FGPq2/f8ojICemGG7eJ4rW6PtioHaLuNHVQ/hwRXw2m951gE4sB22bt066lxcHfTs2dPGi8qj912Iu6OKsO2tW1977TXiyGQZYiTNu1fVQiQSoDq3bcokdlFyQZs2bTj1bdy4Ue646WgYo4ugCRPwyy+/jB49Gu00qF939Khd2bGJGYqL2rVrAaqV888/3/n2Od5AYBN15G94u+WWW2y/qv6ZZ54xb1FBmVomk6dU82HeHnroIUoDDiOlpS2nTfujDEilpewYpLj55puPOGLysccee8kll9jznWobfqIr5oJ7dcpXTI5EVDSnnXbapk0/jx+/J5sYicb/6xo+BJxV3ZTXJH6k/AyurrNC420PspnrNJAp9sdRQVQVlLIjRM3ScteMcWiGTr9vZJ9Y2X4xpZVXVZSDf52SWUUFryooq7atYGPD8fAKHJ7dWr6cW5Zz6SEO6hm27QNphfKiRo0aJBrom7/mmIXozTHLq2hUrbYtSGKIjZrjCUFL8I8YMWLVqpWqQdG7GSD/plMiE7PnW4vNf7vn7pKSEuoOksX8+fP33XdfDgU77LADPd26dXv00UfsQBemTJli3orq0aPH2rXe527KN1NDtm/fHqVT7AwcOHDVqlX2FrDM2yuDZ599lkSDHklbRx11lO31yQhC7itC26bcW7FixfHHH3/kkUeeeOKJ119/faCiSYbPVLJPxrvv2rXfDxu2kynQhg0bxvH7k08+6du3L7XY8OFD/R/3FD27zP/fhYRpvJ8gzjfffPPVV/Z9eic0RQZ91WcjlTpCn/FBO4bwW6hJ6x0/J/kvosqy7QhE0qCfUERTBBAIbJbz5l2ZoOc4yGKRFSHLTl9Ts0xhYSFbqb2RC+YZjSOtaL+Tuc033HhD505dKJnYNl988UXb7UNwbpaIqkrWCrGv4nBPZlEI7LbbbmQE0K9fv+HDh5NlKGQIp5EjR362aqUZHQFkNxPbpD+U26RJk7/8Jfu5mw9WrOjdqw/RWL9BPXhO80UTlD8kO5Ym0fzpT3+yvXGQ3QSPF8Ftz9atH3744YwZM9hVrrnmmtDj6srAr9uzzjqLvMlZEibN9yhTOnXsSEHTYfLkydEHNCEOBWETOzwhX4g7hcnmgZUrV95xxx2HHnrorrvuttPwoZyRL7744ugjTPEl1ypR59BhOZJLMqJ605CpuIwZCOWQznUx27agksoPHJoGDx5MIBQ0LNh/0v7pNznEzErq40T+LS+/4YYb2MVrKgix2267zdwVVbhyiB85P7AHAiSef/55YpUgpLgI5LOAguKSlCIw0gd1BfOQnLRCCJlDEIGEVJQqmV8+UnWYJhdKUEHtYMoZtvTM9wp/8cUXZCio0U+Rsnz5ctOfjJtuuolMChtsCNQjtjc1RMLyLZRUHND8pzwV3aWZOJ0oVN7w3XfeeQcx69Spg4rMO9mIPGTwkLZt5WPNVGRmmJ2mujXNykA5ibWsCuEtmOwDClTk5+m7776bOXMm3kVlbt7y45U6lFyTZm/48ssvH3zwwfvvv7/Cn+RSvwXZ6kBFyLajVqhyyPo5UpiPtxgNn3766U2bFjUsaIj23nvvPdubHmpI21b8tHHj4YcdVq9u/Zo1tqtZc3uKmti/RKIQ60t+1MOm8Fkuz2ic6nN6Cbs0JQYlGS5+9tlnkyllZgyFCoByZtSoUXXr1qUwq169OimGWoZQnzt3rs3KvhQTMjxhZg5HZCXOLKaTUB87dmyDBvUbNmzM3eB3icajvHzq1Kkmx+Huy5Yts/0BsHq6/T8uuRioGWw7H7Dn161XFw116NDxs1WfmQ80lZWVUdNRRv3666+6aDoO/YAZjx/VcI7tVMdih7CAOte24+BPRhz1KWCbFhU2aiSfnCoqkt87IY2S7kePHh37ATMFpdu1115D+cNGwlmeCujXTT8LZwme6bSdTElpU7fVrEvo0tphoR2Wsoocugu14LoRCrmg8azAXalqGzSoW9S0aO6ll7m9NEEzQcAbNebIkbvUqVO7Ro0a5j2mCnwWNPOMxv4viBFy/fr1EydOJMWA/ffff+PGjfZGBDo/7Hlu4I7euuS/hQvvIa2QZapVq4ZUxDl+5qvQHFCHlrVILjgoNQgJhYQIB79u+vWggw4i7+CvpaWl4adWOlc9xpcyVHYct0+fvuajOkOHDt24Me2vcQMRJ5UFU0Gks80AXnjxeeo+9MPhznyw4JFHHunatStiDho06M03/6UT8aV0VjDw6+F3BIXqSSed1KZ1WUGBVJ1IhCDki3p169WqVQd/4K4d6odwC7b8/POv06dPR3DstcMOO+CcZ5xxRvpfFAyfXIzOK6MHT+cSQwl0xK72bpyljOmFjPxLxjcdcbDUqP3RYUFBAZ5gjpzqDPl4ggd29zvuWEBlyX5fo0ZNApN6M+6XckQEt7wwHvrAngx1C0PQnnrqqdQybdqU7bTTTp9++qm9kRLqFLYdgVH0999/379/f1LmNttUJ9HgNGVlrR9/POY7QIEmBdNcunRp69atyQuomLqRHnR02mmnUeOReshWMW/BuPHkk08WFRWh3MLCwssvv9z2elCFSnaLFygPKJ3NHA3+9re/LX7pZSGeCA2tn/fcc0+yDMDwOBPm2HHHHUk9bOnJkjL47bff/fjjTwLndpGoEqEVglDLoRpum2BetWrV7rvvjp4JDPYJ6sfZs2d/8MEHs2bNwpQUlWzOCV9iQEKZPHlyk8IiYmCbbbapWbMmiebxJ560tyNe51ktR5kWhtIxlrI9DiTfFSe3LQXi6/kCmFk57M4E+bFNy0w0SxIIHTp0IF83b9789ttvN50yPIk+ty0dP8Fvv/32yCOPhBS6RbHE0YQJE7JvsFhANoXn5Pylygyuv/76rl06tSwp7d69+wsvvGB7/UAJFXVW1Vr5FVdcQabYphpZpjrlDCnt1VeXJhvPQJ4f77pr3br1mc5muPb772GG+plkQQ+55uSTT87ElZwbc9GcNGkSMbzddjXIdJ9//rnpzG+XE9uGnTnSYfHRRx9xDiUtXnvttSQR2xsP8yEjOORwgTPhEOPGjSNEWxS3OPjgg/2/0WqwZs2aW2655ZRTTmPYgAEDyE1sFXvsscfNN9+cfuePg7q7QzDt93QuqSeoc7H4lldeeYXjknmshrH22muvTz75mMEU/0ZAUo8pZ1T5SsGnRJg/7LDDyEdsCRy0AdE1fvx4/EFWT+E5aSHvbWmcx5kwJ1z+IFCaEt45uU23+rRp08ja6IRyJuHM4YfTfA899FCXLl3Y7IlEskzjRo3PPvucTZt+dkuRAvGJBoIe0X+9+Wafvn3Nhjl//ny5KXfi3SgVsq5Ag0zJXkQhA9ia2rdrR5Yxd6MIuREBg5uiFFR800030fPXv/61tFVL9kicmB3vV/nqU6eCIKLvFikzZsRzzz1njm9sp3/+85+1Lwl+TvwI9aubqKKCnJABjzjiCCJ/7NixyW8WatwyfPOuklXr1q69A1UMFQrBVtKylBgbOHDgv//9gUpkLfLWW29NnToVxVLTIRT6AZwlS0pK6Bw8ZODll1GveQlUWMyRTFVXDphu/d/el39jNGNgXJmQIMuQJTOfjaLG6d27NwIC0tDq1Z87VyTLsN9i31q1dtBdQb6jgFNz5il4CGJfFz9x/TkgihCfysxVOg5OdVRGw9ExWYULBbd202LFive7detR0FCecOVVwvvx/vvvk6xJ8SbLcCBl8zYfyRP3qICuFLk/sMeGOX78XhxMSktLjjv+BOcn5dICLmPW4rxDLaPlTDVCYunS13Kq3ATeF1980alTJ5SCt1GEs5vddtstrVvLB/PwvAMOOGDDhg12QgowfeTIkaRwHJdQpJwRT3KGX9RBE9UYBP4m0xFh3rx5ZWVlLVq0GDZsmPdOmbkVhskCTzz+JGkFYckXZFXyCEmEPNutW7dnnnnGjASkGBIQZPEYVEHdSzw3btSwSWETvBANl7Vt07VLl9GjR+NYdo6HSrp7Gtx6661ITSqBMUp9eXyma65cuZKCq04d5KuNy2Ue3stOoOY2SiDbsnVrlqmFgC1aSBplI9x/0v5YUMfr+x2/DXxlYO4jmOU83vMrC6FqKV92+WXFxWLxHj16OD43nwtE+jnnnMMmhPJNQKHho446Kq8PZxiv9tq82NiJrWh0ggxiVyeSW7cuGzN29/Xrnb+RFdGgRBFz6Y8YOxi0Jt7IxBRo22g5s/3226d9b0hBOYC/ohf87M0337z33ntxUJNlxowd9/XXXzPGGbdAd6UsP7QphaAGDwUFBfPmXcVEey8A5nmzEh3ISGcvLGR0Zot75JFH2MzxDM6JF1xwgelMBqkT6WCyV69e++67L4UM3sD0G264wXDy6aefHn/88WQfhtXaoRYO07BhYzIRgc2xl4qaiez8+BNziWo2KwT3yRDZdBUuWRIBmRjNcI4radmybj35RTbyo3xoVfHGG29Qy0iOqV2ruLi5fLA75C0iodR0nKcozbbbvqahgOkRkProtddes0M95MezAFdRE7GUx7/Izotcli9Z8tKZZ56OFU444YSnnnzSFMvuVWJ9A6G88SJgQMY4yBKJsqCWoUOH4gx4PlnY9qYDmzHHdioXdiOcH9CgXs58Sk5Fz6ye9QTRTCJXGTgTDVSzkdCzZ0/8mCJ26VL3WUYWq9zuga9okhFEv9k4Koxcag87YVFR0+22q4HDzZw584EHHiBuCTB2ew4jmccrxuRROiF8/PHHTKeW2W777QcNHBj3/EJ0Hi+vup3TvXxQTihACHhSBtzutttuye/gGrz++utlZa3r1JaPL5JPiS6SFI05c+bgZz/++OOVV17JroA2amtRgLu0btP2wAMOQDPvvvsu/sS6FDs7DhhACYBHMpjgVM3k4jkOMtdpoww0dL2UceONN8KwqbBwKv2AjIy577772rZtS4VDkdK8WbOrrrzCjA8BMc8880xTy6C6/v37U3gWFha1Km3J4YsBmCbEiUR1MGFVGAsWLBg8eDBWa9e+46CBg8eMGXPVVVelf86lu1qSB1YYUH7m6edgjKMo0ep8+1kNwbFanzd5gPnbbrsNNeJIkuD1k7EYaNasWXkdBWKgK5JMIu86CWxbf6Fp1113he/OnbvOm+c2vCLspiKSy7TGI+2FBw6TNsdUqzZgwAA8yd5wwdYCSohqRZ5XoZtaOwwfPvz2228vLS1FTYQZqd1fOqqj5wgk1uXkRWVEnmnWrMXixUvsDV3Ltn1QGW1bNZCfAz344IOUGCbe2Maj5xcnzFv4nJyrV69OsHEOat1GsgznWfIFh69GjQtEH7VqQbZ9uw5nnHFGNttmUF6+2667Mh2npMYJ/DYGiLFdItKO58TEaQ6pAcXUyk/FRhx2cGsSn6RG/UADx0kzXiDGy9JHWGoZI+DAgQM7d+6MIFRnnBMzn+dMC59VdefAi8WOYlaXNZ/VvyhCckdvrNixY8e++n2vphSVADbj/kvAN9Ah2kAtIVWIULaZxQ8//HD99dcTcYiD2nF7XtHtgQce+O9//9sO8iAqcelEgsPTozZjo8BV0TBaY+iiiy7q2LEDW+g+++yT8gm2cpRZLCpdFsJi+eaPPvoICU2WIX7SHyzJC3vssQd7Gj6H1fE/ipG69eo30F8yCH9VVSKMe11++eWUQjVr1uT1jDPlDXLTb8ZEsWXz5jffXM6G5nz6qAk7VvwrrriCeKtTpw7xRqjHfCAwjK/WfFPcotk228gRs3r1amz75Fm2ox9+WH/aaafo2zQ7UPRCE1VQ2PsKOvuvAaoz37bRqHFjMvLP+h5NgotUDOpBgYUpP7GUOTFRlmstI+4+ZcoUohcvx5oUNYsWOb/9R2zBYaqgoCEOg4xSVrRrx0SiC0/45ptv7ECF7tvZ9PTzz/J2SYI145DRzMqVK823Akg0Nink+Nm3Ty/0T+fo0aOdf4iVueIFfigTjnZqCE1Pq+JhGkRcb9jwo3n/jir11FNOS6S85euv11x22aXdu/WklEbn6JNXNElVYX6RBYS9V/TgopkYIzLDs0LsMxpSwIgRI7Bl7PvZ8VA5LVuuUlZRvnnLlq3sCSbLgIsvma1VFoiMj8jIGQF/JcuQjw899NC2ZWV4QMOCRj179HjnnXfsoBDULLYdxEsvvYS/onEIcuaintyyZQsxYG97kMkegccff/zggw8m/Tu/61PMH5JCTUXp8ec//xlvoHRiT8Zf33zzTXs/vo6A1IoVH3C8MlkGIDvW4TC7ZMkS81stcA6aN28+YcKEzFMPJ1au/Ky01L55TD6yvR6UbYeW0Nx336399ttv5Q14I52MclnWQOyYpUMoUpCTW2G1f/8dzY7CfjBu3DjCg8SBHSngbc6NOoB+uIk8ZcSEc6rXJk2KSlq2RC2ff/5FHCe//vrr4sWLr7nmGv+T8jTw+y2lPdmkfv16jRpJDcjWMvPc8wcPGcLBk1M/G5vzI4UI79fAbwSYxHOee+451IsOydRxH9tl5JerV3PA7Nq1Kx6IzskvbKt4/s477+w9GCVG4m1qYCwrL2krWRCbaDjR9OjRo0OHDkceeaTt8kHFy8WQD2q2sNKvu+66TORgsEC4ihiB8XphB+COHOjYvYkWNEsyRmXEHgzHZpl44EZU4GQZyhlqgffee2/58uXwdt+996kHO/DFF1+Qj+CZMhUnVmYD2lD92LYBlvn22+/2228/+CTLwDBxlfk9FCnd452SmmX+/PkEJIraZpttt922+rRp0yhYWFpjr/YOO9RCFfBz98J7QnqLgoMJgVqndp2SklaLFt2b044UC9RNhxxy+LhxY6htTzzxRM59aT7vk8G//vUvHAnPNu+Vkl/QxhvLlnHWw3YwwytZO+HdjZeXvNymTVtSDGXvtttWa9JEfkEB2cmqmV9qc4II5EwxceLEI444IrofZIHS1IgRq23+aeNGpGa5unWlVDTftcZWNGPGDPYJPAfR9thzD7xIJ+QXF3FQI4bsGHi2EgJnZPIFmqRUXPv9t9GBJNz7778fpyUfkevJL/ghyZpEz5aZoBnVSdS3tdALK0t0aNsRBBKNFpzy/OannzZieMpCgoF6NZFCPjDMiUXlCQuimixD6Lz88st2TAShlZmo74DK9yHXqFmDiK1dR75ymc5MdRCCqsa2Q0DFBxxwADmLLIOdLr300nPOOWffffc96qijrr/+r1+ujjzgUJx11lmcZjFYly5dV62yH5K2BvBB1tSjOzJ/8fnnw4cPZc8hWgg5ytT0v/u3evXqmTNnIi+6ql69OtkKR58+fTqlL9ToJ1CPO+446+sgYjB9zCH7DxMHDRxcTz/cSCm06Vf548pmjIGahx5k2cK6f/nLX/ABsjnhxEmB0KKImzt3ruPRD1DL2rYHEgF1KwbCZJx3zFsKLy1ePGTwYI57bK1UzeS+OF+H3uefr+7ZsyeSIjs7EzokqGCJUF+3bp2OMZrPLi6XlMyby08++WSyDDjllFOyTy5kK0ZQHRaFhIAF6qJeRs/wz2mXM6+9IR9aWYECUQt1DVVVyl/WTYBIkVAh+hEsJVAdBRc6gcOpU6dKFEfooHYEQY3UvEVFhRhi7733jqvyTB6wFwrhTclm+122zkDHByh4iUYMY6cxf82ar0h1nPpGjRqVfQbBAPnRwREo6fDCOpz/7Hj/8gcddJAmGVynOknNdIYQYFdobVm/fj1ZgLxgfk2BGMN9zXtMoecyhBaqsRcestQ8XHTRRQ3q161ZQ+j06Nljl112Ia6GDx9+zDHHmJBQEQJ0cCl8iyxDeM+aNUu6jNLNjwUdolLp37r13XffJWuTX0zZz+6a9smlUqB8OPPMM0kNTGcXwj/YyWGATEtx1Kq0VL59PsYuITz00EMwgN5QWtw3twOOjZdccgmZRfbJxo0bNZb3tqiY8Ic//vGP99xzDzukHZoIAhVWTZahHDBVPUmKtEg5Q4rp12/HJ554wgzOQOzuhcratWtZ1CRZgA4pZNi37RfuRxzaD5QMt4cffihZxgsqvEL/TYENGzYcfvjh5mSHHs4997zNPkcgvBENEXCGAQMGPPyw488zAg3a1Eumg18/4P333+/YsSM7H2V+3B9ZvOuuuw477JA+fXqhdjaP6JYsSUR8yA9Nx2mgXmrbMXAfnT766KO99toLnvbff3/iTQQLEtKrWAOHFJFJwNoveP3112vW3L7aNtsa18luxTJmS4J0HBbQJhUQE3llLpfHHnus+bxMFjmktuBcihuZN3FwZdJ8t27d2WnZBkNvA2kut212BmKVowrW/fLLL22v4j//+c/ixYtfe+21zeKSVgMYtXv3nnVq195+u+0aNyr48+lnmt1bTSvPpIw2I9Axkq2kQd5nUWrAfv13HDNmTO3adWrUrEn0cnYzT1UZL4N90Llaonrkf/nlF8abgxuJT5KdjPFue+6CCCNGjCC0SBCkM/ZAzqSE3Kmnnkq+W7hwYeCM49/9/NQU+DQZDV3xmvnc85IlS844488cNziSOL+z2Y+pRx/NUVGTTDXyLIF9/HHHf/mloxjUlQNbArjppptmz56NRIEv64joKgpqpUmTJlFwoStecYlfoRCUDm1Q0eCB3bt3z/6tQQ/+VWRaYGpVgnqwtLRlYWET2Ih7G4StbtGiRZwb0nyKQn1GmdeAVcZVAtvvqJhywpVoyss/+vDjKVOmTJ48eea55635KhjDCsuHbcuLaXuwLpuB4c9ebN3KjmRch0rY/E6DE0o4O4tKHl83TwSJsZYlJbuPG/uk64F/Gnz22WfssaQYw0nTpoUdOsgX091+++3sw3aQB+Ff8kL5e++9g2/hfARh6LuEcc2LL76YfW/hwrszjzAwMPUq46nC2HOuvPJKsoxsHZFqKwGcPliUmMfjy/SLO0mLMMChT5NFWNtBcE9zWXn5pXPncjqvtUMtnPLWW2518kBkshbESeK8du7cmUDNnPLyejSDW5uP/8I5FWLGTaho7rzzrnvvvde/wThQXj537mXVZVMRG7EfDBo05P77F6m8bkdftWrVc889zVHLXlcEQpn9g42WitXUMieccILzZLdgwYKuXbtyAERL5513nu31oEzmYeUKg2qguLiY/WDs2LFhPiVZoHT+V2bEC9T9ogh4UTa642DSqFLLMdJAEk2UKGnv//7v/2644Ya4X5zVNRxK1EIxx8LPPvu0F93VunTp/MsvqYpwQBV9waxZHEeHDBmy++67ExJkBI0gl+IUWh857jKRGgHfNWwQCe3atzv88MNyvi9+6aWXmif25Dv2Sdurb3+Smqk1jppy1EuL7fMmag2KaoiTGZkV+rOZUR2qrR3a44zDdJNfzCd9oHnYYYdFE2Isyjcveflljj/m/W+iyHxU30KVyL8zZ87kaEZ+ITtw4D/5pBNXrXJ94MC6rx9cZjinvQWP33+SfAcrpCiIOIupaA5bWKjX2raCUwBFq3m3gP3gyCOPjP/OgM0//LCOYyy+MX78+Cvjj4Sx8PH13nvvDR48GG2jKAL4T3/6U9yv3VARc5xkDPn0nHPOsb0hOHSVhNA5PSfYfXv16kU2LG3V8txzz7W9GXiWrUJIjOs/zoSlXs0PzYAgjoqGcVT+X3+95rvvHH/rOgeiweMXlFb5Fk62mdPKG2/8MyFNRAFnH374IWVCpX7lSv/YjXmniZKqXt26ffr0YXeKfvdlCKw+ceJETlvEee/efU01wQ9nJRJf//4DRo0add111xk6ZIHdx40rKGhElmG3WbDgrpDqdaoXWonuCHHOTebAWLNmTUL3j9OmSSXvg1ILad6UuEIWZkaOHEmWQWRSSTSfos8ZM2bAZ726DRoWNMZ3OeDYe1nk0I8fy5YtgwjhirrkgwvBJALEF4TpcL8B5iDOJcdo2cshJbxX+/DGG2+goqKiJnXrNaC+IAX/uunXDGVdyDRjIbGh0j3zzDOkRXNKZS/xP6WGV9VlFs//44V27TqyB1AaRz/R7gGyOfSmq+cP9RkYJs3BAwf5p59+WlUKNlMraIwQjw7aZkV5zWdhHa8Ew56GimAm68NKP0A6mGiExezQOCdIgGHFXvgg0uvCJGB8Am9gw2T/NHcrBhWmgrj++uuHDh1aXNysfbuOFMahDwpCNiyFykVm6du3L5HDRr3LLrvgguahae/evUlbFC/nn3++eUqK6udeelkTfVcIl0147Oo3jywb0d5bb72FukwNKGmxXr399tsvUI9EIPSCdDjlcdgky8C5/60Tg02/bpp69BTzMIUcmvCOmBbMtp2MW2+9tZ38ckAheS36oFQrzVjvevDBBwcNGrTNNpQzUs9Qe9obEZBAOdm1129WZOsCnHemTp2akJXigHEvvHBWy5Yl2BdA87777rP31Ebib9LI2ouaq23btgwmJc2ZM8d0KhgZTS7pFJcCqj35h9cLLrgADZNocD/z7AydLFq06PLLL7/66qvj9mMrS4WQ2b0yUGq2HQebaGSoUxGRXoRMy6LYJkyT4w9F5rHHHsvRLH3lr7uNj5pfMJ/ho9CnrTZ52y7FP19f9tf/u55goDiyXSJpLB2Djz/+sFfvPrgyYBP7wx/+MGjgwFalpRxJ2AbZ0zKPMFatWtmlSyeSAqAIMp1RoIGAEiIag+3p048jQUia0aehFE1SSeUDAoZgoBRiOuWkCUJJGSovDBx//PEmy5CG4DZDP5WhYdilf9IZOy0x0KFDB/93JKr/JOn5q6++Ovnkk0noJnFQXIS+8UArNcGLL744YsQIRCM5muKUkg1B2EUwK9kNwZP+sJmPcxLrPvvsY55/o4R+/fq98MKL4lqJ4PCOG8Ahrzn+TKt4KauBAE1lwUtJetu2xeHtSJ3i1himJAuzZwOOllwC1LXnnntiR7bADRt+zKyoFndIBGk39SDSjMkiMtqraISbaA4GWdWoHhyM5gUUsWbNmsivGgTzq2sVnw08MCzUGZMENaLy5hxSJk9lVlm5cuWwYcNIK2zUOCXbCBlH3pTp2XPOnIsRzZTfgJIb2xMADAh9TpeDFTvP4sWLcVNC4uWXXw6JJleeFKtXf0k5Y7IMIPzsuwZqDB0SgDqzbRuganZdsgyhyC5NRWlveOBU0rSILCPvu0+aNGnDj/onulwIfaUWtRtJ6vPPP8eg/kOnVj1brrnmmi5duph3f4855hiUY28rJFm4LAVWrFgxd+5cCkb4QXukqoMOOii0M7/++uuHHnoomm/YsMAomfxC5cihknRJaqPGHD58+B//+Me7774754mYMYxnOUhh1j322OPjjz9Gjc6w9CCJA9UVFTXldNyxY4dVnwV/ZcyayGWjyP5vr2RJaWa8KCc+/fTTnj174mlt2rQxhepdd91Fcd21a9fddtstk/syqTkD9RO7ivp53tGRLxzPaKoaTm0HoD5XOVHFeJWioOaPpWBcgARxxBFHULywg5W2KmnRojk+jUNTqeLNGQoEFcUOEUI+YiRHM7bWJ598EieYNWvWtGnTDlRMmTKFzWfZsmXqkGFja88WqiSbY+R9sabsz7qKHZMTcELuMMeKGjVqcOZasGCB/9sYSYiEK8FpskygvPLhm2++mX/t/KOnHrX33nsffNDBJ510EjXp4YrTTz+dk07w/SOy8xa8HM3g8UQCZ7FXXnnF3swFcgpiUvn36tWLIwlnmf79+9180w1frl4N55xW9t13X7SKbvUBUKPWbdqeccYZ48ePJ6khBRmH1ExuHThwIHz6fsPDEU6kXZIRUQopsgzLnXbaaRs2bFi3bp3j/TWhkAW63XnnndEtJdVOO+3kz6SSo+THXjjf3csBHCliZuNdfqBk8jjJET9E0meffbZbt25IgfgclkPZ2XiUvVCoLwVpqi/ath+JPqeTkgYAk2jCAlQlfJIEeUGVjnWj6jDQzsrxGVWrHxFFSZEfWfH+++9ng8Wx+vTpg5/NnDkzWiPgc1OnTmWTxOQcH0yw9VcMGjRo6NCh7DYkmhkzZjzxxBM/bdwYZ8Wvv/6aw44mmW2qb1v9b3/7m73hAqxGpaNu2nHHHTm+kWVaFDc78IADrrxq3kcffWTuPvroo3BIFVCnTh1yQeBE5umKTg6Y1BekVyoUPBifxrm5RJYxY8bg0I899lj0WQDMcxjp328AYDrD0v5eruKNN95gVseOHckavKJDQghlsnsT2GSTRo0KmjVrvuuuo958Uz6Se+6557IQjJFu2NKHDBlCBlmyZInzg4XoCrmuvfZacpmSakQSx17sBwjy8suLH3jw79GvtgnhX//6F7UtBoKfnH+dXSuIynlvFtnoIC1iEVSEvC+88AInvpKSVlxS7uV7vgbZuFPrC8PimH6/YkCOhBKHSlY0JpHBR0CJwqVtBqDBYNsROJKLE9kzbRok51q5GWd+uRWdSxL55JNPnn76aTaQ0KcEVWrLG2eiUaNG4ccEJ95vQoVLHILK/Pjjj6cKWLv22/jVBUSaZhnB5MmTbW8+ePzxx3faaTj7P+E3dNgw82tK5kHy+++/T8ogxZCGYCz0ByFR8oYff2TwhAkT4J8IL2lJFdcyE8kkzdGjR1OU3X777ZlyRk2Tlei6664bN24ceiCxHn300eZvqKtWk6Q2oLYyxSP5hVgq1m8RbNKkaeNGkmVIN0MGD77xhpvMd6aw7gcr3qf6YwrbwEUXXbR06dK4zy5TrVCBjh07FiKkGEBkHnzwwea9cw5uFFNnn3323QsXQtdMcaC8fMaJJ6E9ikHYc/7tpITZbkhg2znqSzm0hCuiWKRgt4B/XIvilOqG7J/mU3kpYW2a+sms374SXl47mGgQ09zLV0cZpFBQesTlFBXGcStQColq3NMzYIBWubmhQuUh15o1a/BXinyqHjyACmjEiBHEwNy5c9mr494zUqvYVR55+LFq2/Bf9WrVqlPVOzcokTfRnb/44ourrrrquOOO4/h2ySWXPP/88+ZEwBkQxqhl2JBJHP4PpHMG5KB0yy23cBjp2bN7585d2rdv3717d04iu+++O4UPoFQ555xznnrqqeyXM8BGhhPxH/GiH/6z7qyz/0IMcJC88MIL7VcQyK1UOl++fDkKZF2yG8HMUZSMSYMcsXDhQvNbTiFkjn7iIajHz5Ueyh599OF9Ju5NhiW5EJYUMuSy2267LXPwITWbbEWW5FI9TXZNNU0WbyxbBjPbb789OiTb2l4ZluxyacM1DT744AN2CDILnKCiJk2KOE4iTiDrqSG8pjvFq0Hy4ErLhVQW9EMTTa6ATA+1bL7UcjAt6SCoCBEzb0lTQp4vKP08pFCRiS7dkUQDwi2+S9Xw7LNPc7IgxlauXOn8WK2YP5PCPFdgLgeB6vo7hLw6v+7EDcNDEARYJpAAXnLt/KsJNoKEUDGnv7Vr15IBb7rpJsKM0xb1F1UY7suhj6LmoYce+uXnTR9++PHHH3+4evXnJp5lmVxWIKP99a9/vfrqqx944AH/syFxVm+y8usm9OGHH15xxRUHHHDA3nvvPXHiRFjlNGSPaRofOioWao2s4C+99JL5HSsikxoN6Tjhhj4EuGDBAhYiyYZOQ6GV4Gc7+SLG7du0aWN+nZKkn5EoDTRcM3YHWT5TAlYxIvVdfflNkboNGsh39Dz77LPiUR41Va31ZO2M9Wq5mwf7ecNxdGI5pwmNakweyT+bZJHTPxKgvGXNYxs5IR6XanBGQCe0gnA4hJJ39zvH58Q777xDhBcUFOBDoU8bJXOYBhs2/HTUlKkEG4UShTcZbfDgwSSXvn37sii+i79mUsw999yT/rQvvNlmFj/88AN7b+wHf9LpJ+4ptfpkQvDonqEg1ZLvqK2oyAYPHnjSySc6n8LMmzeP88jIkSPNXwdzgnNx3boNtttevi8q/nN6ISBmDqtJXAS1ofzH6ueYY47BfNSkbEXGlDBm71UQAev5c3Qs1PVlWtTwQVTyGc1vBWUfw0hqs13pIcLbZtUCnoxWKwQm5nQ15JUGO/mf/vSnSZMm4TrZYkQWt20dWcF0A5Wjp07t06dP586dO3Ts0K59x7Ky1mVtW5NiQJcuXfr378/SeaaYLG9+qB96tV5qyCTbtOAyJK9qIKON8F0n2O0vuuiiu+66K/BASujIfPN63nnnDh8+nOR7+OGH6zuJYbJLX1narFnzGjXIMzVI0NFvR8sLIoUXzypRrJb0rm0D1uVQyT5EzbvtttsWFRWeeOKJ/rrVASNjJeB/NKHE8vDGaoESLj2UYZlYUXf/raG8+RWhvl4BRVsBmavazI9CyBhBPautbDsCgsH58VwHnfzBWezggw8mokg3VC4c9WkMGjRw/Pg9zzvvvBdeeOEXTnlO3nyrow0n/3KIcHJIp0gMBduRQYJSdZXKypseVCgUdyhkzJgx0e/ceffdd8vK2my3XQ3OTaWlpenfs49C9RCQK8kbIli6dGnz5s3NJ6cpajjK/Vi57xL3zitZFuTSxLkLLv6lntVXh73iK5oY62pWs7d0MdMEuTNOHBM5wBrpLKD8hISXTq/N3Xgm5a5Zxslh3MTsW+B6So+XLsJbFOJqmTHKuna5ZtFpuc0JWVcJSeblH9NL0XT77bdzLqN0uuCCC9jn33777Z9//lkczggbpK+8GFJOVdCfA0YYe+FAljfl0zZTQRmz7XQIWUrSmTbOPvvsfv36de3albRr3ibL4B//+Efr1q3l7zbW3K6wsND/cecYiBSqNCuM6DZs3/R29KF889ln/cV8Xpxcwzax6rNVCRpQq4Xk9Wss21ZeYulEEaXsh5D1Ii6QaHxrVwGiChS2KrCEsOswhlLLtPPb9wwnzHbQDcGoUmIkdqyhZi8iSL6bBhqiUQr50BQdWpNrxRGXN+W2vCSrRqjl1lwKIJkxHAJSLdpePzIpIAyNYdvUEXnoOd6al1122aBBgzt37tqjR4+JEyd+v3YtDKxcuZKDSb169cwHrMkyod+KyECpWsp+zoW3sL3cDASgfKpmMpKK0/7000/Dhg2DGfN05skn5W+NB7SRUg8RoNR169Y9+OCDCHjjjTe+9tpr3iekYnQr/Hh+5bNI1EO8RKMCeU2IxjuiQmQJ0AnABoaQZGFRjR8yN68gsTDUIoiI5IeykUsWhxMIVHHBucJ6DmpVANGb5AK3vIkQWTwORSlubmM0GYMEQwuEW5f2Uqyi3OYtYwJysJoC991335DBQzp2lK+z6qRfnTd48GAOKRxPauhfoS4qKpo9e7Yd7ZNddyNPlni5mODw2EhPgFoEHKv79+9fXFzcsmXLuL/arLq1NKUdH3HcgifTXrFiBSkVkaE8eMjA6dOPy/41nqx0GcJ5oIIPg/WYYCGeLeoDIo+qmJtOwbJJx1pC1KHXuSGU9ccLnoh5ckBWdHClJKwImesKQ5VgofQCK/rvVgaivbxk90PnRhOZ6tb2KJ9xuhKE5hqIClOoL2vB1FDe8pBXx+e/ytbyFSve32effXr16lXaqlVxcbMmhU3q1WuwQ63a2+s34ZeVld155512NBA1elxFLCK3XFpKD5XCQeHrr78++eSTDznkkDlz5rjfj8upKteAjRs3Xn755ePGjSsra4vsQ4YMIYuF/+xXfkAH1go20ajC0ilF1Bdh063QiuzJflTMXQIQwUA2bLjgxbbplCVkIdPjR/zqkmSVZlAPMXQsfNQccysGlc02fdpmoSAngbVUFfF85o+0nqMQxpxaEv3k0omayrYj0M3PZS+fluKgE2FgM7jwwgs5mHTp0oVCprBJYaNGBY3l08OlkyZNyvyNDbWgJ4VIlIt+wPruQ2J6wOQHH3zw/vvv53ibKYKwfoQrSwFxSLKnn346+YVyhlQ7efLkRx55xNz1wy9LelSwojHQJQOiuntsMx4pTGXCOxfwKJfqk+n7E4Rwm8RwNEFElB7DQwDhRKNayikfQ3JSToIuYLwkwLPqJsZ1gkypaGSxJBmhJnflNW93jEJJBdYSXcVTzu1HGagYti0XdhUOJpdccsnYsWM5nnTv3p2Mc9BBB8X8kVlRhb0AXjOqHOHZNrkIx8jvA1k0yyHR5ONc8csvvzz88MMnnXTS6aefMX/+NfYbNmSWHSnCKvN5KJlZ8v+W+ESTaE4/VNdWccpEKiX62Q3PClKQyM/2YFrbsqjQs4xk6IqhUPSvy60AE2GHA1xVOVfGIroSL2EOk/OjMJNwPzV0YTF3vHTKp7+tyslfGzo3M0sFV5jr4F0BNyLBg4pcPuyj48SWzeWfffbZ0qVLly9fvn79ettrwKLxc5WwiB/iLQg9p/+X4JlDEk3IhaLIyaaWSJlBSR7oSjTJqpT/g3e58jqUe5eKE2mmR8C9RF9GNul0riudRpvyGqOIKuItDiZtCbNOp/dD3dS2f0coh/lrQJUvzurxrHRMs6IQDVSBLdTuXluIVk6rOTykChh2Q7w6Zy7wDRCLZMWWFz+F1GwqkUyUZWiqErJ6gLIr4hjhDdHhdvW8j07CenqWPaj/BNkSOpUzvySOPCioCgLj1QzBnjj1ic6c/WSQnDxkjZMeUd7ygH9BiFRkfR/EdrZpoLw5AkAYrvhaWBMSekCuBMOxehMpPLIyIMQ/s2wr6icVg3AikRJd678EJKyEYiuJSj2jSQ+VMdZ4Kn3WCXKaOTggyZBqbM0FVeE6OZExoxi04jbNOrrf6VUKucz0VBWEZiZlG3cU5s1apreSyPKcu6wDhocY+DcDYdsbqVLEzxJZzNJ5a0+0HuRHO2LpKIepFKdcZUaKXObHLGC7FcGRYeitVCv+nlCepZYnQqsg0ah1kTSnmeMNI/tYOvOL/oOrRHuiiI7JOYUhGD4rUSJ7idL54Q+SZMSNVF3lDcSNmeVLMTEQVXn1i8Sqk/+ohgMQh7PNKIS5wFz1luyKWQ6t48bp0NcvY3LoSQYH6fjXjSJ+3RSQtXLw878Dh2Z8z0bT+7Df56pJsZowLYWCxABBN9ae/18Db6uoS1UMKFn1nDM8YmGn838c5yzBLUcgib0SEkEEOv43t3CyF/ldP4A0Hstctx4E9iIODEiIlyxy6jP1I2HlyUaZSCdxLu2qggidQyK1uGOMMBYfKTCpP1vLy7f+f+h8JjcHfTgSAAAAAElFTkSuQmCCexport interface AbstractWacom {
signData: (body: WacomSignDataRequest, callback?: () => void) => Promise<WacomSignDataResponse>
getDevices: (callback?: () => void) => Promise<WacomGetDevicesResponse>
systemInfo: (callback?: () => void) => Promise<WacomSystemInfoResponse>
}export class WacomDevice {
constructor(public name: string,
public type: string,
public model: string,
public width: number,
public height: number,
public certificate?: string) {
}
}
export class WacomGetDevicesResponse {
constructor(public data: Array<WacomDevice>, public success: boolean) {
}
}
export class WacomSignDataRequest {
constructor(public name: string, public reason: string, signer: string, hash: string, image: WacomImage) {
}
}
export class WacomImage {
constructor(
public data: string,
public rectX: number,
public rectY: number,
public rectW: number,
public rectH: number
) {
}
}
export class WacomPackage {
constructor(
public component: string,
public version: string
) {
}
}
export class WacomSignDataResponse {
constructor(public data: WacomSignDataResponseData, public success: boolean) {
}
}
export class WacomSignDataResponseData {
constructor(public image: string, public metadata: Array<{ string: string }>) {
}
}
export class WacomSystemInfoResponse {
constructor(public data: WacomSystemInfoResponseData, public success: boolean) {
}
}
export class WacomSystemInfoResponseData {
constructor(public device_list: Array<string>, public package_list: Array<WacomPackage>) {
}
}T1CSdk.T1CClient.initialize(config).then(res => {
client = res;
}, err => {
console.error(error)
});var wacom = client.wacom();function callback(err,data) {
if(err){console.log("Error:",JSON.stringify(err, null, ' '));}
else {console.log(JSON.stringify(data, null, ' '));}
}
wacom.getDevices(callback);client.wacom().getDevices(callback);function callback(err,data) {
if(err){
console.log("Error:",JSON.stringify(err, null, ' '));
}
else {
console.log(JSON.stringify(data, null, ' '));
}
}export class WacomDevice {
constructor(public name: string,
public type: string,
public model: string,
public width: number,
public height: number,
public certificate?: string) {
}
}
export class WacomGetDevicesResponse {
constructor(public data: Array<WacomDevice>, public success: boolean) {
}
}client.wacom().systemInfo(callback);function callback(err,data) {
if(err){
console.log("Error:",JSON.stringify(err, null, ' '));
}
else {
console.log(JSON.stringify(data, null, ' '));
}
}export class WacomSystemInfoResponse {
constructor(public data: WacomSystemInfoResponseData, public success: boolean) {
}
}
export class WacomSystemInfoResponseData {
constructor(public device_list: Array<string>, public package_list: Array<WacomPackage>) {
}
}
export class WacomPackage {
constructor(
public component: string,
public version: string
) {
}
}let body = {
name: "wacom1",
reason: "signing some document",
signer: "test user",
hash: "...hash to sign..."
}
client.wacom().signData(body, callback)function callback(err,data) {
if(err){
console.log("Error:",JSON.stringify(err, null, ' '));
}
else {
console.log(JSON.stringify(data, null, ' '));
}
}export class WacomSignDataResponse {
constructor(public data: WacomSignDataResponseData, public success: boolean) {
}
}
export class WacomSignDataResponseData {
constructor(public image: string, public metadata: Array<{ string: string }>) {
}
}interface AbstractRemoteLoading {
atr(sessionId?: string, callback?: (error: T1CLibException, data: DataResponse) => void): Promise<DataResponse>;
apdu(apdu: APDU, sessionId?: string, callback?: (error: T1CLibException, data: CommandResponse) => void): Promise<CommandResponse>;
apdus(apdu: APDU[], sessionId?: string, callback?: (error: T1CLibException, data: CommandsResponse) => void): Promise<CommandsResponse>;
ccid(feature: CCIDFeature, command: string, sessionId?: string, callback?: (error: T1CLibException, data: CommandResponse) => void): Promise<CommandResponse>;
ccidFeatures(sessionId?: string, callback?: (error: T1CLibException, data: DataResponse) => void): Promise<DataResponse>;
command(tx: string, sessionId?: string, callback?: (error: T1CLibException, data: CommandResponse) => void): Promise<CommandResponse>;
commands(tx: string[], sessionId?: string, callback?: (error: T1CLibException, data: CommandsResponse) => void): Promise<CommandsResponse>;
closeSession(sessionId?: string, callback?: (error: T1CLibException, data: DataResponse) => void): Promise<DataResponse>;
isPresent(sessionId?: string, callback?: (error: T1CLibException, data: BoolDataResponse) => void): Promise<BoolDataResponse>;
openSession(timeout?: number, callback?: (error: T1CLibException, data: DataResponse) => void): Promise<DataResponse>;
}export enum CCIDFeature {
VERIFY_PIN_DIRECT = 'VERIFY_PIN_DIRECT',
MODIFY_PIN_DIRECT = 'MODIFY_PIN_DIRECT',
GET_TLV_PROPERTIES = 'GET_TLV_PROPERTIES'
}openSession(timeout?: number, callback?: (error, data)){
data: string // sessionId string
success: boolean
}{
data: {
tx: string, // input
rx?: string, // output
sw: string // status word
}
success: boolean
}{
data: string // ccid response
success: boolean
}{
success: true
}{
data: boolean // true if present, false if not
success: boolean
}{
data: string // ATR string
success: boolean
}{
data: Ccid[]
success: boolean
}{
cla: string
ins: string
p1: string
p2: string
data?: string
le?: string
}{
data: {
tx: string, // input
rx?: string, // output
sw: string // status word
}
success: boolean
}{
cla: string
ins: string
p1: string
p2: string
data?: string
le?: string
}{
data: {
tx: string, // input
rx?: string, // output
sw: string // status word
}[] // Array of response objects
success: boolean
}{
data: {
tx: string, // input
rx?: string, // output
sw: string // status word
}[] // Array of response objects
success: boolean
}<?xml version="1.0" encoding="UTF-8"?>
<!DOCTYPE plist PUBLIC "-//Apple//DTD PLIST 1.0//EN" "http://www.apple.com/DTDs/PropertyList-1.0.dtd">
<plist version="1.0">
<dict>
<key>Label</key>
<string>com.t1t.t1c.acc.api</string>
<key>Program</key>
<string>/Users/michallispashidis/Library/Application Support/Trust1Team/Trust1Connector-Acceptance/t1c-acc-api</string>
<key>ProgramArguments</key>
<array>
<string>/Users/michallispashidis/Library/Application Support/Trust1Team/Trust1Connector-Acceptance</string>
<string>-f</string>
...
<string>-x</string>
<string>51883</string>
<string>--log</string>
<string>none,t1c_rust_api=info</string>
<string>--env</string>
<string>prod</string>
</array>
<key>RunAtLoad</key>
<true/>
</dict>
</plist>
<string>none,t1c_rust_api=info</string><string>none,t1c_rust_api=debug</string>


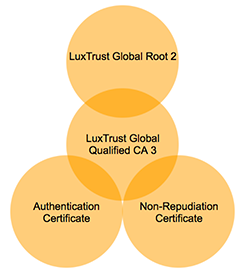


msiexec.exe /x "trust1connector_x64.msi"cd ~/Library/Application\ Support/Trust1Team/Trust1Connector/./uninstall.shUninstalling Trust1Connector
version: 3.6.0
module: trust1team_launch
May 24 13:16:04.627 INFO Operating system: macos
May 24 13:16:04.627 INFO Installation folder: "/Users/gilles/Library/Application Support/Trust1Team/Trust1Connector"
May 24 13:16:04.627 INFO Starting migration
module: trust1team_launch::commons
May 24 13:16:04.627 INFO Migrate Trust1Connector Common
May 24 13:16:04.627 INFO Stop service Common
May 24 13:16:04.627 INFO Stop service Common
May 24 13:16:04.631 INFO No file exchange configuration found; No such file or directory (os error 2)
module: trust1team_launch
May 24 13:16:04.631 INFO Launcher ended successfully
The application is not part of the firewall
The application is not part of the firewall
The application is not part of the firewall
Uninstall Trust1Connector Completed with status OKcd ~/Library/Application\ Support/Trust1Team/Trust1Connector/
open .


// open the host file (write enabled)
// use your own editor of choice
sudo nano /etc/hosts##
# Host Database
#
# localhost is used to configure the loopback interface
# when the system is booting. Do not change this entry.
##
127.0.0.1 localhost
255.255.255.255 broadcasthost
::1 localhost// add this line
127.0.0.1 t1c.t1t.ioc:\Windows\System32\Drivers\etc\hosts// add this line
127.0.0.1 t1c.t1t.io%localappdata%\Trust1Connector\file-exchange.json[Windows]
"C:\Users\userA\t1t\coda"
[OSX]
"/Users/userA/t1t/coda"application_id: mywebapp.com //domain
entity: Trust1Team //root context
type: Codainterface AbstractFileExchange {
download(entity: string, type: string, file: Blob, fileName: string, relPath?: [string], implicitCreationType?: boolean, notifyOnCompletion?: boolean, callback?: (error: T1CLibException, data: FileListResponse) => void): Promise<DataResponse>;
upload(entity: string, type: string, fileName: string, rel_path?: [string], notifyOnCompletion?: boolean, callback?: (error: T1CLibException, data: FileListResponse) => void): Promise<Blob>;
listTypes(entity?: string, page?: Page, callback?: (error: T1CLibException, data: TypeListResponse) => void): Promise<TypeListResponse>;
listType(entity: string, type: string, callback?: (error: T1CLibException, data: TypeResponse) => void): Promise<TypeResponse>;
listTypeContent(entity: string, type: string, relPath?: [string], page?: Page, callback?: (error: T1CLibException, data: FileListResponse) => void): Promise<FileListResponse>;
listContent(entity: string, page?: Page, callback?: (error: T1CLibException, data: FileListResponse) => void): Promise<FileListResponse>;
existsType(entity: string, type: string, callback?: (error: T1CLibException, data: BoolDataResponse) => void): Promise<BoolDataResponse>;
existsFile(entity: string, type: string, relPath: [string], callback?: (error: T1CLibException, data: BoolDataResponse) => void): Promise<BoolDataResponse>;
getAccessMode(entity: string, type: string, relPath?: [string], callback?: (error: T1CLibException, data: DataResponse) => void): Promise<DataResponse>;
createDir(entity: string, type: string, relPath: [string], recursive?: boolean, callback?: (error: T1CLibException, data: FileResponse) => void): Promise<FileResponse>;
copyFile(entity: string, fromType: string, toType: string, fileName: string, newfileName: string, fromrelPath?: [string], toRelPath?: [string], callback?: (error: T1CLibException, data: FileResponse) => void): Promise<FileResponse>;
moveFile(entity: string, fromType: string, toType: string, fileName: string, fromrelPath?: [string], toRelPath?: [string], callback?: (error: T1CLibException, data: FileResponse) => void): Promise<FileResponse>;
renameFile(entity: string, type: string, fileName: string, newfileName: string, relPath?: [string], callback?: (error: T1CLibException, data: FileResponse) => void): Promise<FileResponse>;
getFileInfo(entity: string, type: string, fileName: string, relPath?: [string], callback?: (error: T1CLibException, data: FileResponse) => void): Promise<FileResponse>;
createType(entity: string, type: string, initPath?: [string], modal?: boolean, timeout?: number, callback?: (error: T1CLibException, data: TypeResponse) => void): Promise<TypeResponse>;
createTypeDirs(entity: string, type: string, rel_path: [string], modal?: boolean, timeout?: number, callback?: (error: T1CLibException, data: FileListResponse) => void): Promise<FileListResponse>;
updateType(entity: string, type: string, timeout?: number, callback?: (error: T1CLibException, data: TypeResponse) => void): Promise<TypeResponse>;
deleteType(entity: string, type: string, callback?: (error: T1CLibException, data: boolean) => void): Promise<boolean>;
}enum FileSort {ASC, DESC}
enum TypeStatus {MAPPED,UNMAPPED}class T1CResponse {
constructor(public success: boolean, public data?: any) {}
}
class ListFilesRequest {
constructor(public path: string, public extensions: string[]) {}
}
export class File {
constructor(public extension: string,
public name: string,
public path: string,
public relPath: string[],
public type: string,
public entity: string,
public size: number,
public lastModificationTime: string,
public isDir: boolean,
public access: string) {}
}
class FileListResponse extends T1CResponse {
constructor(public data: FileList, public success: boolean) {
super(success, data);
}
}
class FileList {
constructor(public files: File[], public total: number) {}
}
class FileResponse extends T1CResponse {
constructor(public data: File, public success: boolean) {
super(success, data);
}
}
class TypeListResponse extends T1CResponse {
constructor(public data: TypeList, public success: boolean) {
super(success, data);
}
}
class TypeResponse extends T1CResponse {
constructor(public data: Type, public success: boolean){
super(success, data);
}
}
class Type {
constructor(public entity: string, public type: string, public path: string, access: string, status: TypeStatus, public files: number, public appid?: string) {}
}
class TypeList{
constructor(public types: Type[], public total: number) {}
}
class Page {
constructor (public start: number, public size: number, public sort: FileSort) {}
}
class DataArrayResponse extends T1CResponse {
constructor(public data: string[], public success: boolean) {
super(success, data);
}
}
class DataResponse extends T1CResponse {
constructor(public data: string, public success: boolean) {
super(success, data);
}
}
class RestException {
constructor(public status: number, public code: string, public description: string, public client?: GCLClient) {
ObjectUtil.removeNullAndUndefinedFields(this);
}
}
�download(entity: string, type: string, file: Blob, fileName: string, relPath?: [string], implicitCreationType?: boolean, notifyOnCompletion?: boolean, callback?: (error: T1CLibException, data: FileListResponse) => void): Promise<DataResponse>;{
data: string
success: boolean
}upload(entity: string, type: string, fileName: string, relPath?: [string], notifyOnCompletion?: boolean, callback?: (error: T1CLibException, data: Blob) => void): Promise<Blob>;listTypes(entity?: string, page?: Page, callback?: (error: T1CLibException, data: TypeListResponse) => void): Promise<TypeListResponse>;{
data: TypeList
success: boolean
}listType(entity: string, type: string, callback?: (error: T1CLibException, data: TypeResponse) => void): Promise<TypeResponse>;{
data: Type
success: boolean
}listTypeContent(entity: string, type: string, relPath?: [string], page?: Page, callback?: (error: T1CLibException, data: FileListResponse) => void): Promise<FileListResponse>;{
data: FileList
success: boolean
}listContent(entity: string, page?: Page, callback?: (error: T1CLibException, data: FileListResponse) => void): Promise<FileListResponse>;{
data: FileList
success: boolean
}existsType(entity: string, type: string, callback?: (error: T1CLibException, data: BoolDataResponse) => void): Promise<BoolDataResponse>;{
data: boolean
success: boolean
}existsFile(entity: string, type: string, relPath: [string], callback?: (error: T1CLibException, data: BoolDataResponse) => void): Promise<BoolDataResponse>;{
data: boolean
success: boolean
}getAccessMode(entity: string, type: string, fileName: string, relPath?: [string], callback?: (error: T1CLibException, data: DataResponse) => void): Promise<DataResponse>;{
data: string ("rwx")
success: boolean
}createDir(entity: string, type: string, relPath: [string], recursive?: boolean, callback?: (error: T1CLibException, data: FileResponse) => void): Promise<FileResponse>;{
data: File
success: boolean
}copyFile(entity: string, fromType: string, toType: string, fileName: string, newfileName: string, fromrelPath?: [string], toRelPath?: [string], callback?: (error: T1CLibException, data: FileResponse) => void): Promise<FileResponse>;{
data: File
success: boolean
}moveFile(entity: string, fromType: string, toType: string, fileName: string, fromrelPath?: [string], toRelPath?: [string], callback?: (error: T1CLibException, data: FileResponse) => void): Promise<FileResponse>;{
data: File
success: boolean
}renameFile(entity: string, type: string, fileName: string, newfileName: string, relPath?: [string], callback?: (error: T1CLibException, data: FileResponse) => void): Promise<FileResponse>;{
data: File
success: boolean
}getFileInfo(entity: string, type: string, fileName: string, relPath?: [string], callback?: (error: T1CLibException, data: FileResponse) => void): Promise<FileResponse>;{
data: File
success: boolean
}inittabspath = [ "C:\", "Users", "user1", "Desktop", "folder1" ];
inittabspath = [ "C:\Users", "user1", "Desktop", "folder1" ];
inittabspath = [ "C:\Users\user1\Desktop\folder1" ];initPath = [ "Users", "user1", "Desktop", "folder1" ];
initPath = [ "/Users/user1/Desktop/folder1" ];initPath = [ "home", "user1", "Desktop", "folder1" ];
initPath = [ "/home/user1/Desktop/folder1" ];createType(entity: string, type: string, initPath: [string], modal?: boolean, timeout?: number, callback?: (error: T1CLibException, data: TypeResponse) => void): Promise<TypeResponse>;{
data: Type
success: boolean
}createTypeDirs(entity: string, type: string, relPath: [string], modal?: boolean, timeout?: number, callback?: (error: T1CLibException, data: FileListResponse) => void): Promise<FileListResponse>;{
data: FileList
success: boolean
}updateType(entity: string, type: string, timeout?: number, callback?: (error: T1CLibException, data: TypeResponse) => void): Promise<TypeResponse>;{
data: Type
success: boolean
}deleteType(entity: string, type: string, callback?: (error: T1CLibException, data: boolean) => void): Promise<boolean>;{
data: boolean
success: boolean
}$ sudo defaults write /Library/Preferences/com.apple.security.smartcard useIFDCCID -bool yesdefaults read /Library/Preferences/com.apple.security.smartcard.plist useIFDCCIDhe domain/default pair of (/Library/Preferences/com.apple.security.smartcard.plist, useIFDCCID) does not existsudo defaults write /Library/Preferences/com.apple.security.smartcard useIFDCCID -bool no


