Troubleshooting
Generating a HAR file for support
In some cases the Support Desk will ask for a HAR file. This means an export of the functions that a web-page is executing. This is to see that all the functions that call the Trust1Connector are executed correctly.
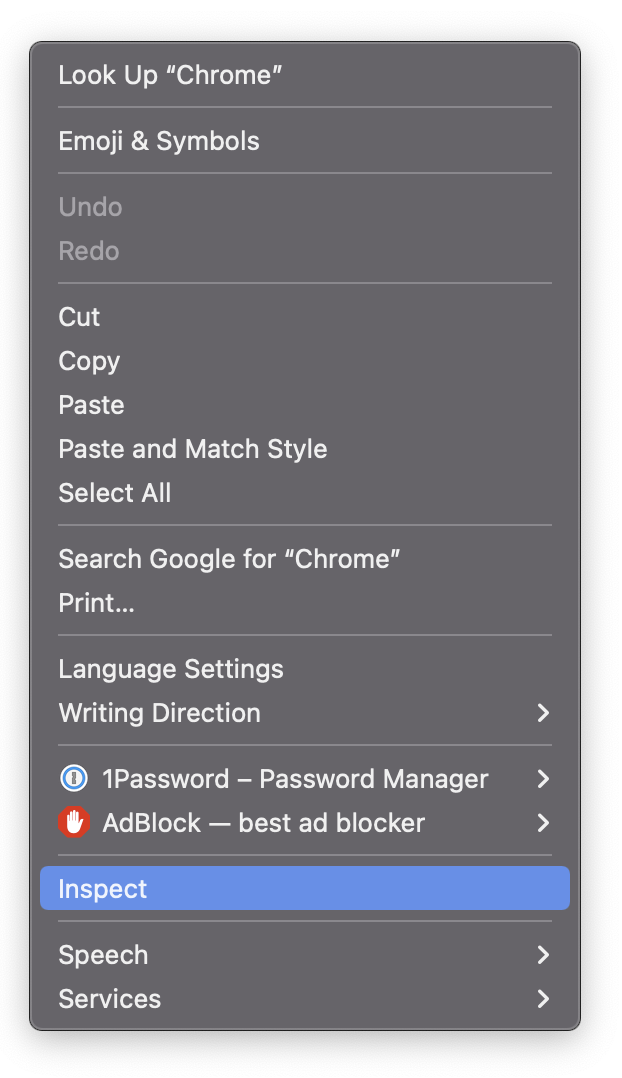
Before you use the web application open the developer tools. This can be done by right clicking and click on inspect

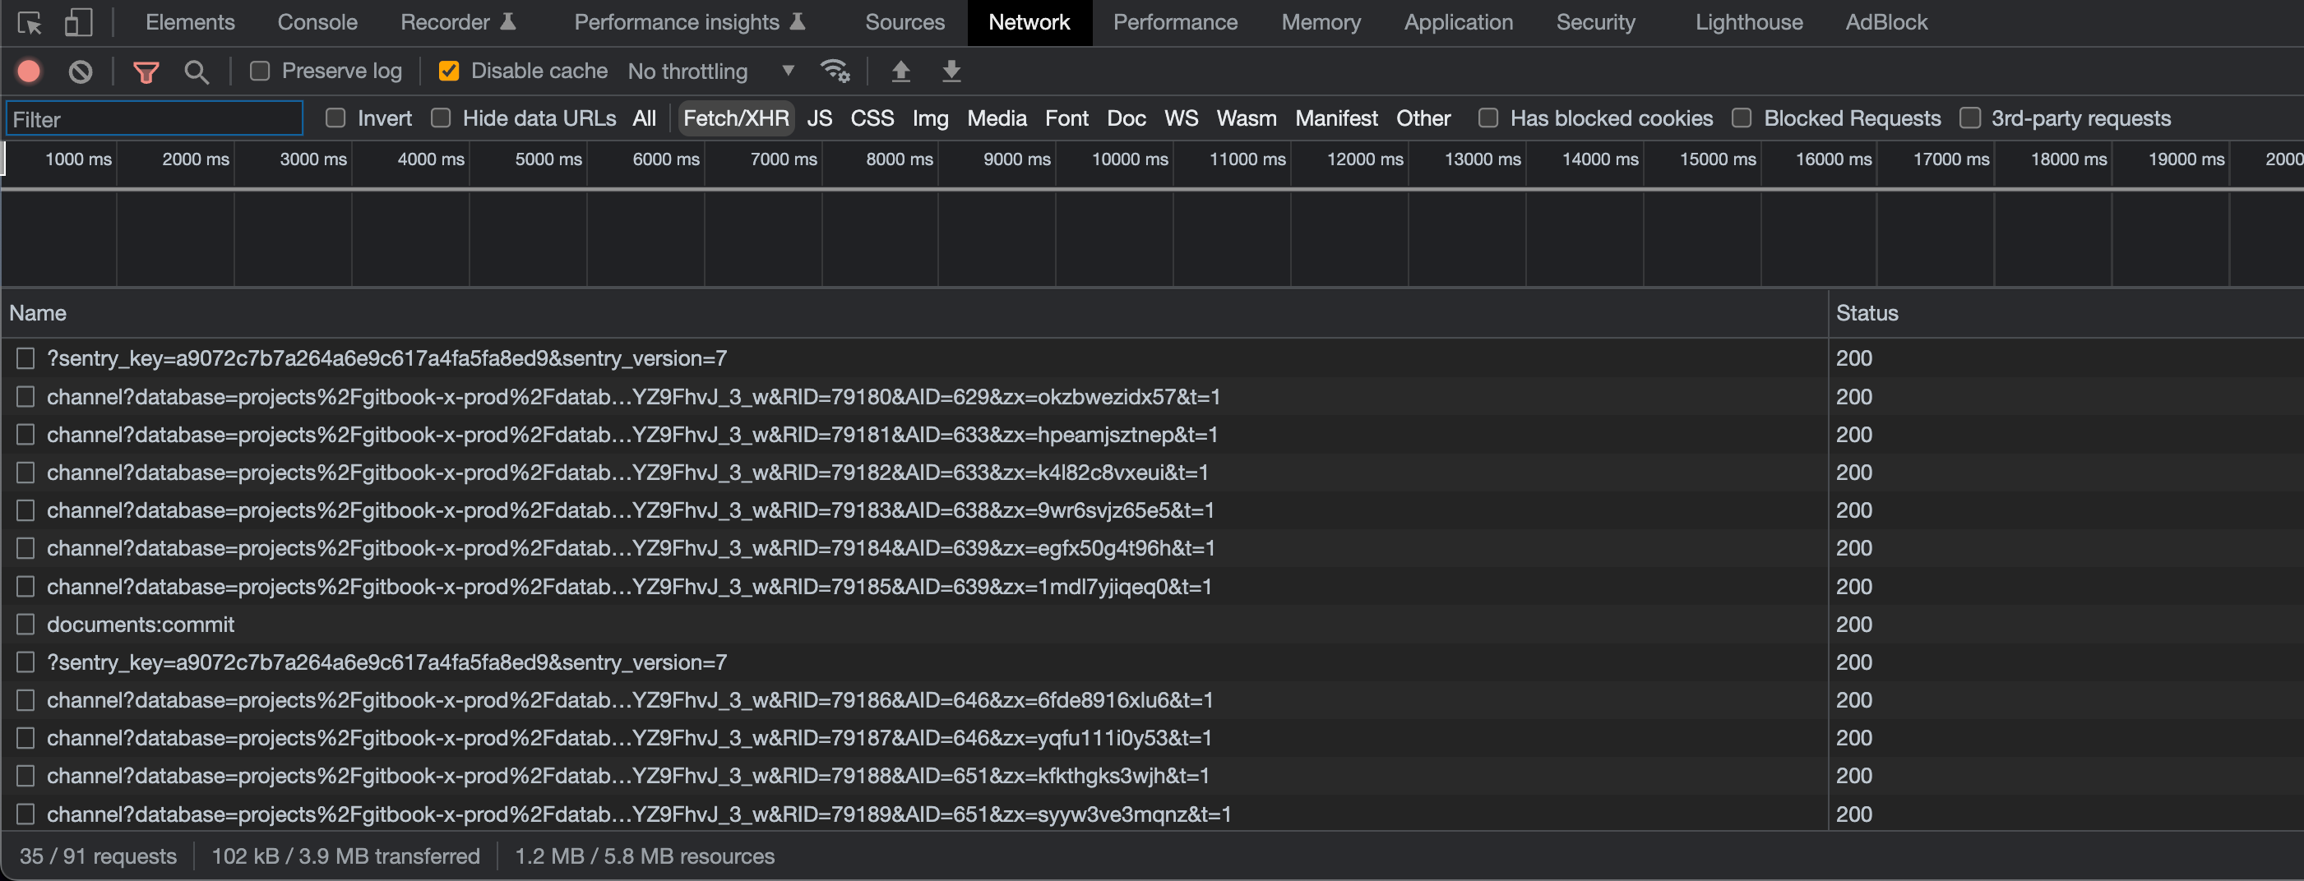
This will open a window like this

Next navigate to the network tab in the inspect window

When this is done, use the web application's functionality and when you are finished or come to an issue you can use the download button to get a HAR file, save the file to your system and send this to the Support Desk

Windows
Error while retrieving readers
Is the smartcard service running?
The Smartcard service is a Windows service that manages the connection to the eID and card reader. Therefore, this service must be running for you to be able to access the eID. You can check this as follows:
Open "Windows Services".
Search for "Smartcard service" as shown in the following screenshot:

Check the following Smartcard service settings (based on the screenshot above):
The status column for the Smartcard service shows 'Running'.
The 'Log On As' column shows 'Local Service'.
Are the Smartcard service settings NOT as they should be? Then do whichever of the following two options applies:
1. The Smartcard service is not running.
Start the Smartcard service, as follows:
Double-click the Smartcard service.
Click 'Start' and then 'OK'.

2. The Smartcard service is not logged on as a 'Local Service'.
Double-click the Smartcard service.
Select the second tab, 'Log On'.
Select 'This account'.
Click 'Browse'.

In the white text box, type: loc.
Then click 'Check names'.

The name 'Local service' now appears in the text box.
Then click 'OK'.
Leave the password boxes empty.
Click 'Apply'.
Click 'OK'.
Go back to the first tab, 'General', and restart the service.
Click 'Start'.
Click 'Stop'.

DNS probe finished nxdomain error
In some cases there is a possibility that the system is not able to retrieve the domain information, in this case the T1C is not usable. To solve this problem you can follow these steps described here; https://www.hostinger.com/tutorials/fix-dns_probe_finished_nxdomain
Error during installation MSI error 2502 or 2503
When installing the T1C the possibility of the errors 2502 or 2503 originate from the fact that permissions in the temp folder (C:\Windows\Temp) are not correct, and since the MSI installer relies on this they need to be correct. You need to have permissions next to the administrator rights.
You need to have permissions as <My User> next to the administrator rights.
More information can be found here; https://answers.microsoft.com/en-us/windows/forum/windows_8-windows_install/windows-8-install-some-software-using-msi/48881523-1a5d-4c43-abc4-01b1ce3ebf3a
Antivirus
The Trust1Connector and some installation files are digitally signed. On some machines however the Trust1Connector is flagged/blocked by an antivirus. Disabling the antivirus temporary can allow the user to install the Trust1Connector for some antivirus tools. Below we provide procedures for some antivirus softwares to be able to install the Trust1Connector.
ESET
If the user receives an notification that a script from the Trust1Connector is blocked as shown below:
The procedure at https://support.eset.com/kb2908/?locale=en_US&viewlocale=en_US can be used to solved the issue.
Kaspersky
When using the Kaspersky and kaspersky web protection you can add an exclusion rule to the belfiusweb page. After you added this rule, restart the computer to make sure all settings are applied.
A9. T1C List Type Conent Issue
If the connector is not starting with the error message: "Can not contact the DS service"
Go to the user folder in %LocalAppData%
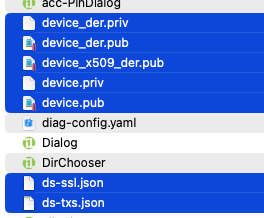
Go to BelfiusConnector folder and remove the selected files below:

Restart your pc or mac, and the restart will re-initialise the device keys.
The problem should be solved after executing this step.
Last updated
Was this helpful?
